-
Pembersihan Cakera
Simpanan Maksimum. Prestasi Maksimum.
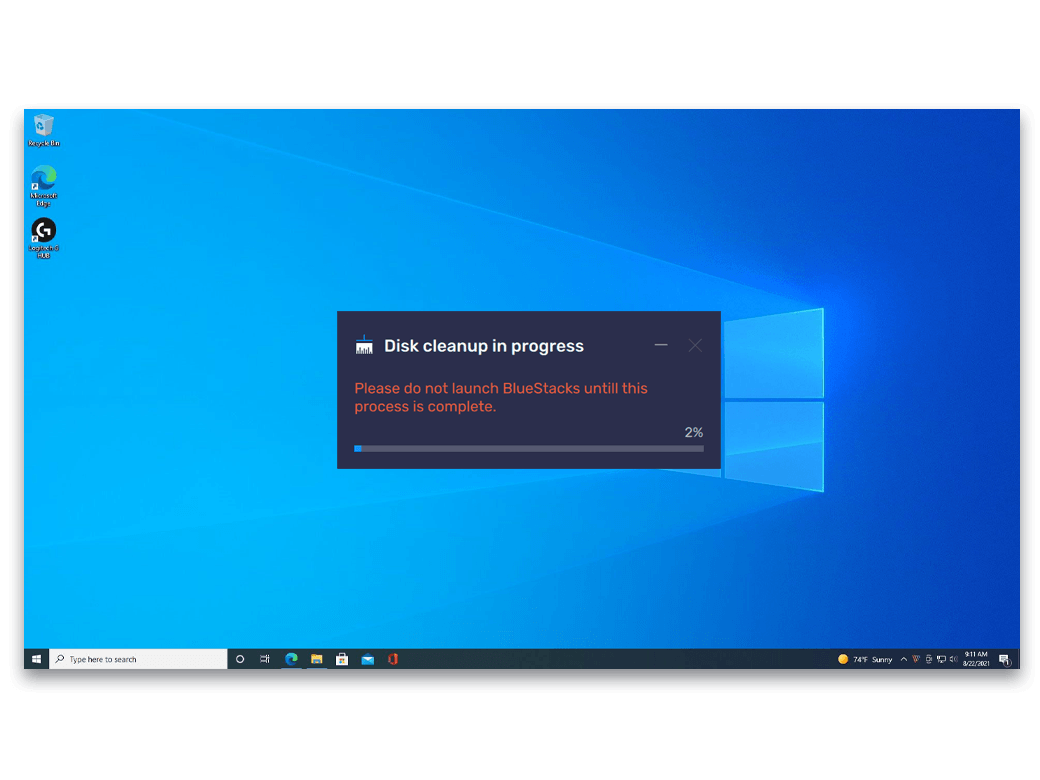
When you uninstall a game or remove apps from BlueStacks on your PC, the disk space may still be unavailable to be reused by Windows. High consumption of disk space or having your hard drive full can lead to your PC’s slow performance. With the ‘Disk Cleanup Utility’ feature, it is easy to free up disk space earlier consumed by BlueStacks. This helps you maximize your PC’s storage space and improve its performance.
There are two ways to Run Disk Cleanup Utility.
-
Cara 1: Daripada Seting BlueStacks
-
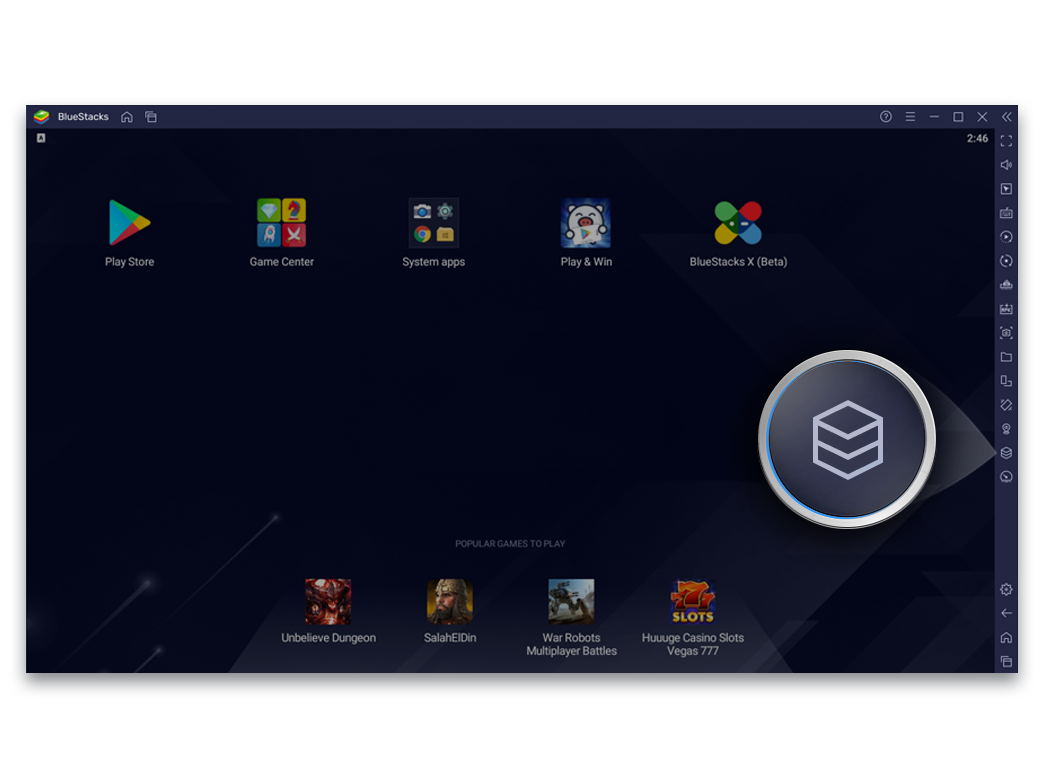
Open settings (click on the icon on the bottom right of the sidebar or CTRL+Shift+I)
![Utility Step Image]()
-
Pergi ke ‘User Data’
![Utility Step Image]()
-
Klik pada ‘Free up Space’ dan ‘Continue’
![Utility Step Image]()
-
Tunggu selama beberapa minit, BlueStacks akan dilancarkan secara automatik
![Utility Step Image]()
![Utility First Asset]()
-
-
Method 2: Clean up instances from the Multi-instance Manager
-
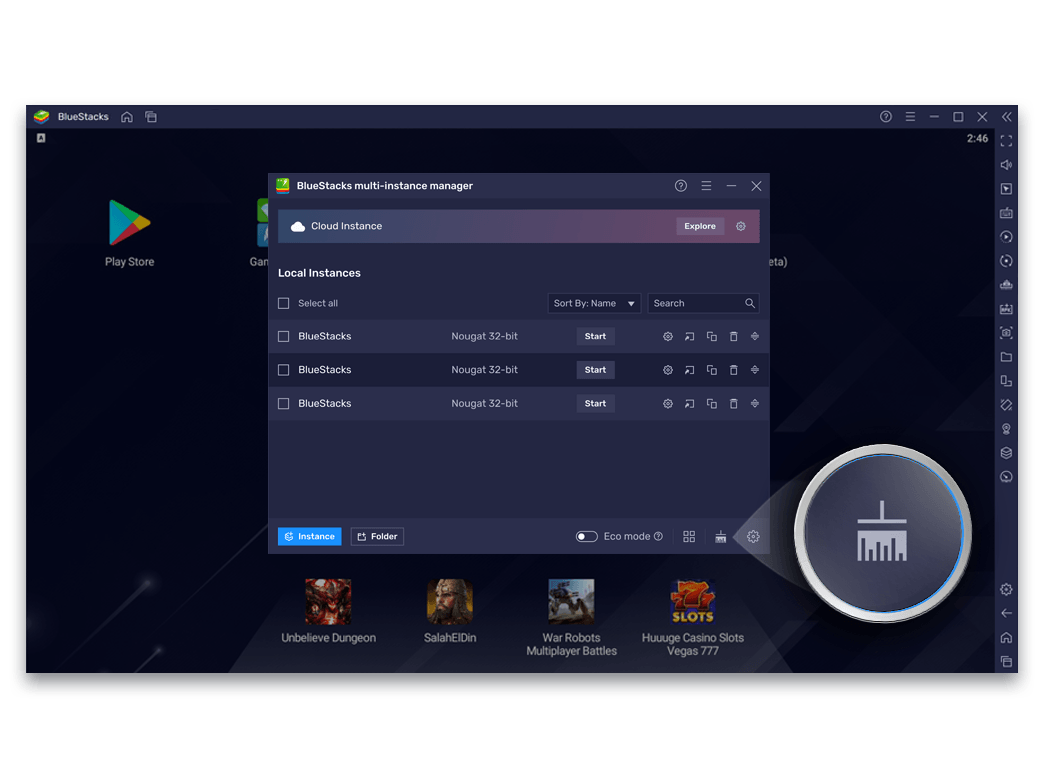
Buka Multi-Instance Manager
![Utility Step Image]()
-
Click on the disk cleanup icon from the bottom right of the screen
![Utility Step Image]()
-
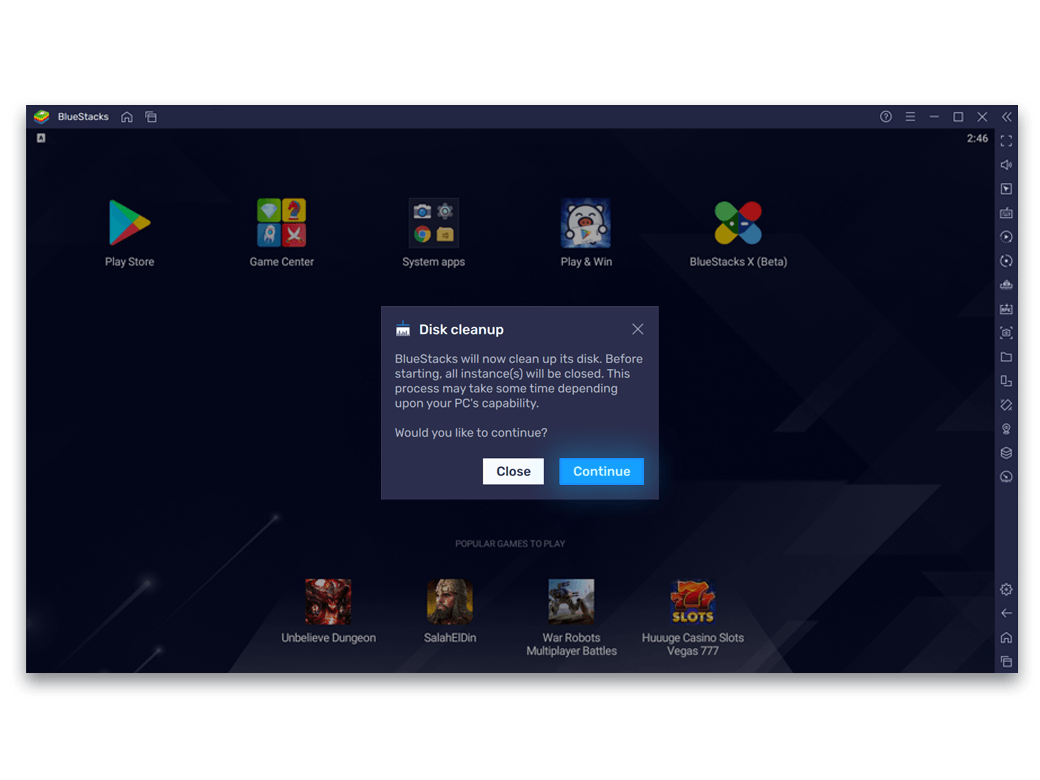
Klik pada ‘Continue’ pada popup Disk Clean
![Utility Step Image]()
-
Once the process completion message appears, re-launch BlueStacks
![Utility Step Image]()
![Utility First Asset]()
-
-
-
Tukar Profil Peranti
Bersedia untuk Mana-mana Mainan, Apa sahaja Peranti Android.
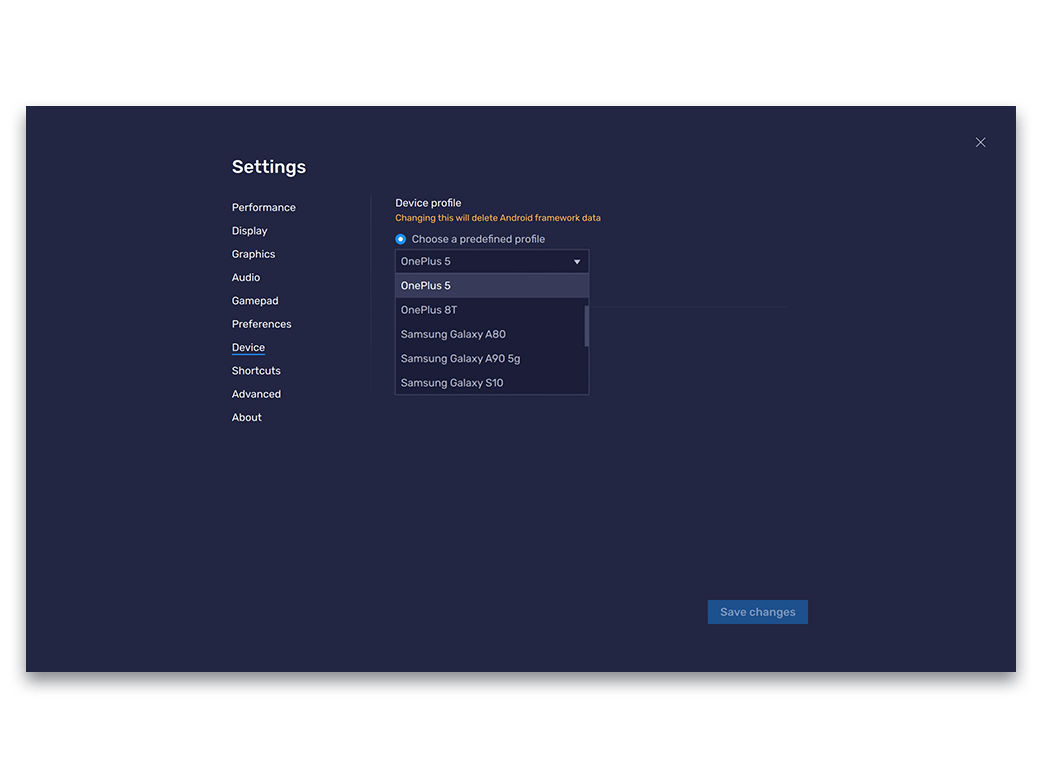
Some Android games run only on exclusive phones because of which you may not be able to download them from Google Play Store. Certain games perform better on particular devices due to certain technical requirements. With BlueStacks, you experience the thrill of playing such ‘device exclusive games or games that perform better on a device, by manually or automatically switching the current device profile on our platform.
-
How to change device profile
-
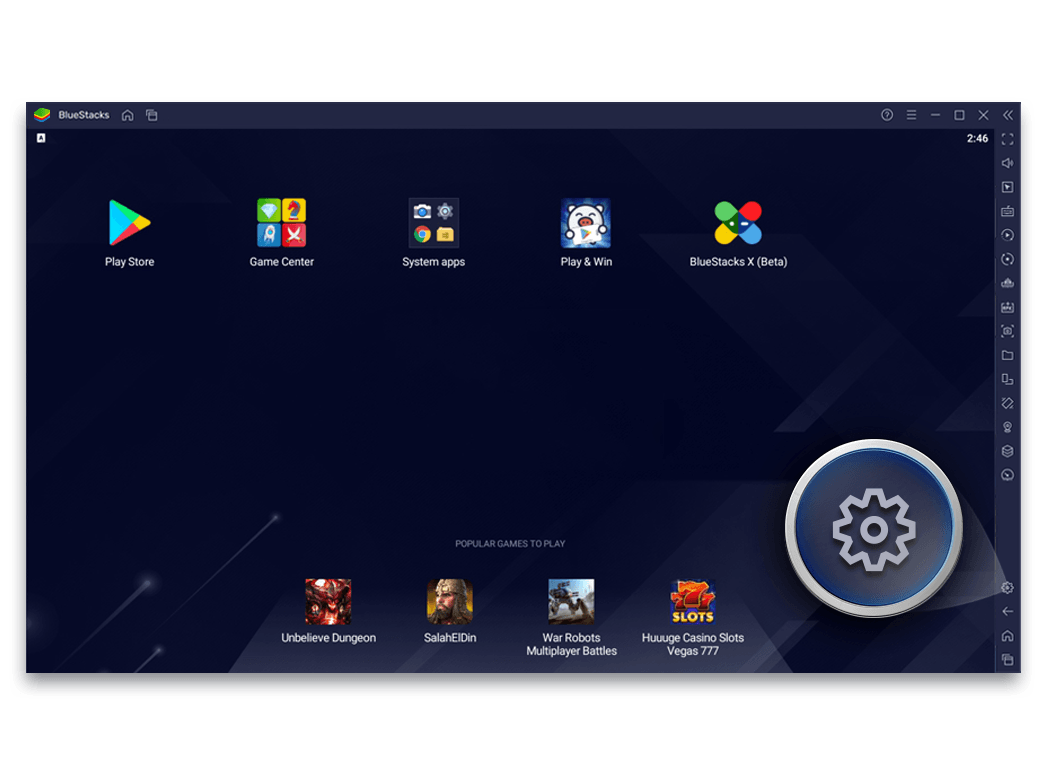
Open settings (click on the icon on the bottom of the sidebar or CTRL+Shift+I)
![Utility Step Image]()
-
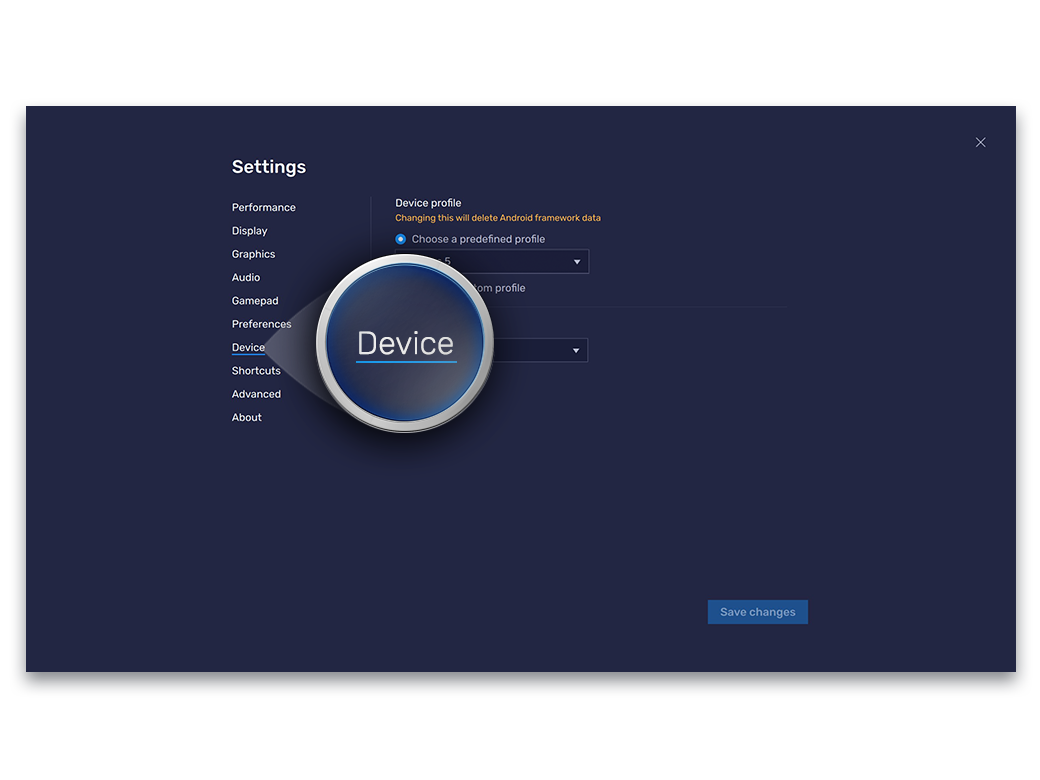
Click on Device
![Utility Step Image]()
-
Tukar Profil Peranti
![Utility Step Image]()
![Utility First Asset]()
-
-
-
Tangkapan skrin
Satu Tangkapan Skrin Menangkap Jutaan Perkataan
An unexpected moment in a game just adds to the overall gameplay experience. And whenever such a funny or fantastic moment arrives, it is worth taking a screenshot and sharing it with your friends. With BlueStacks’ in-built screenshot utility, it is easier to do so. All you need to do is press CTRL+Shift+S or click on the camera icon on the toolbar.
-
How to take a screenshot
-
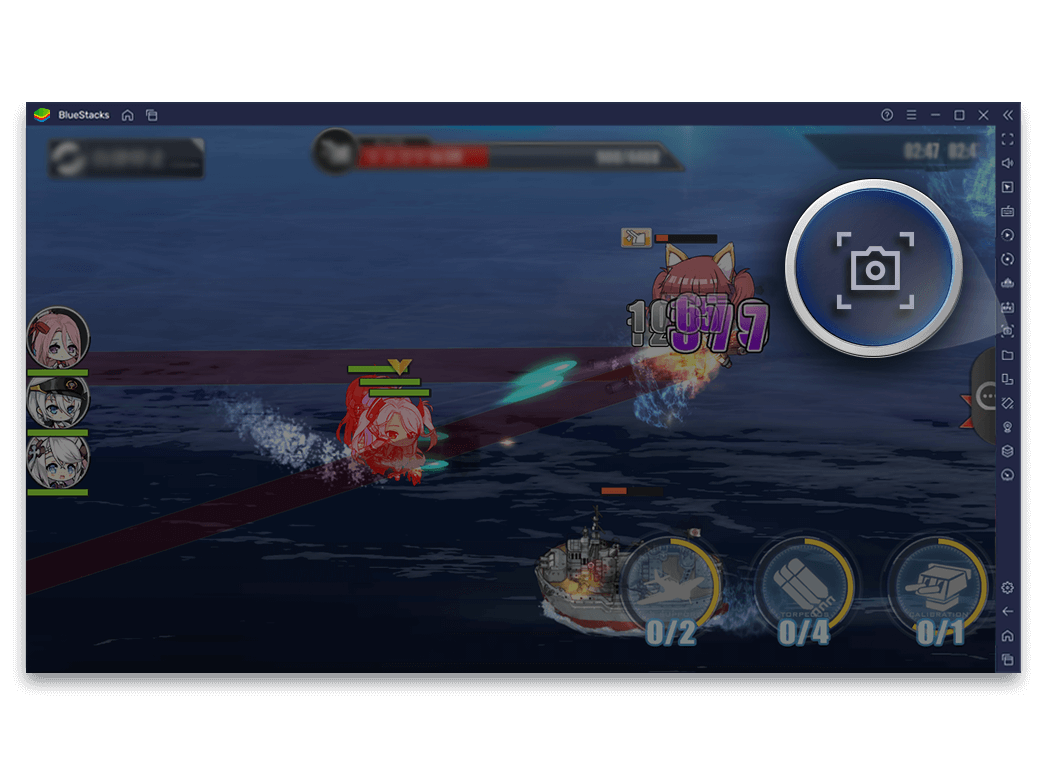
Tekan CTRL+Shift+S atau klik pada ikon kamera di sebelah kiri bar alat
![Utility Step Image]()
-
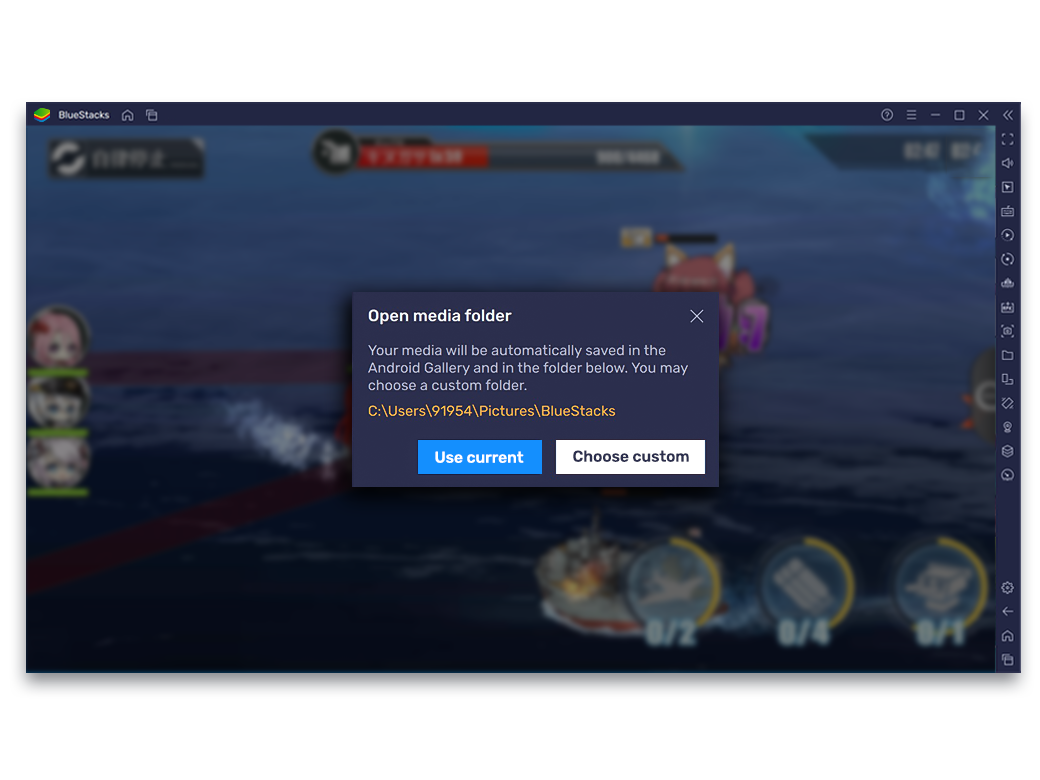
If it's your first time taking a screenshot, you will have to choose where you want to use the default one, Use Current, or Choose Custom. Use Current to save it in the C://Users/---/Picture/BlueStacks folder
![Utility Step Image]()
-
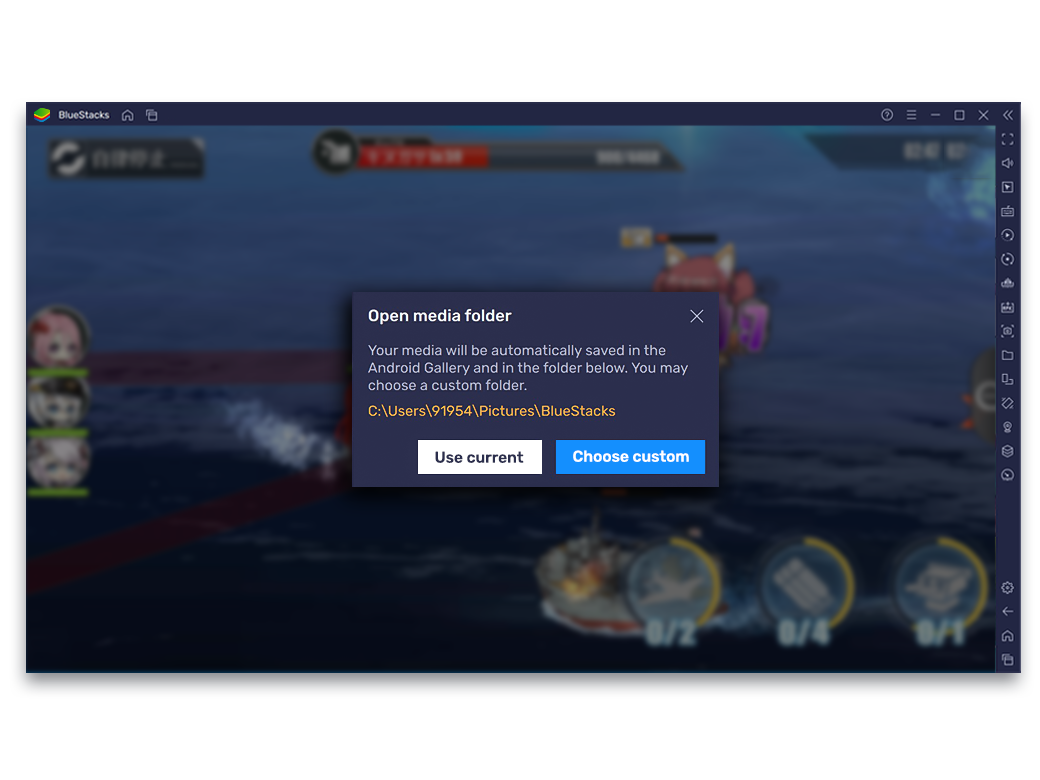
If you select the Choose Custom option, select the folder/location where you want to store the screenshots and click on OK
![Utility Step Image]()
![Utility First Asset]()
-
-
How to Access the Screenshots?
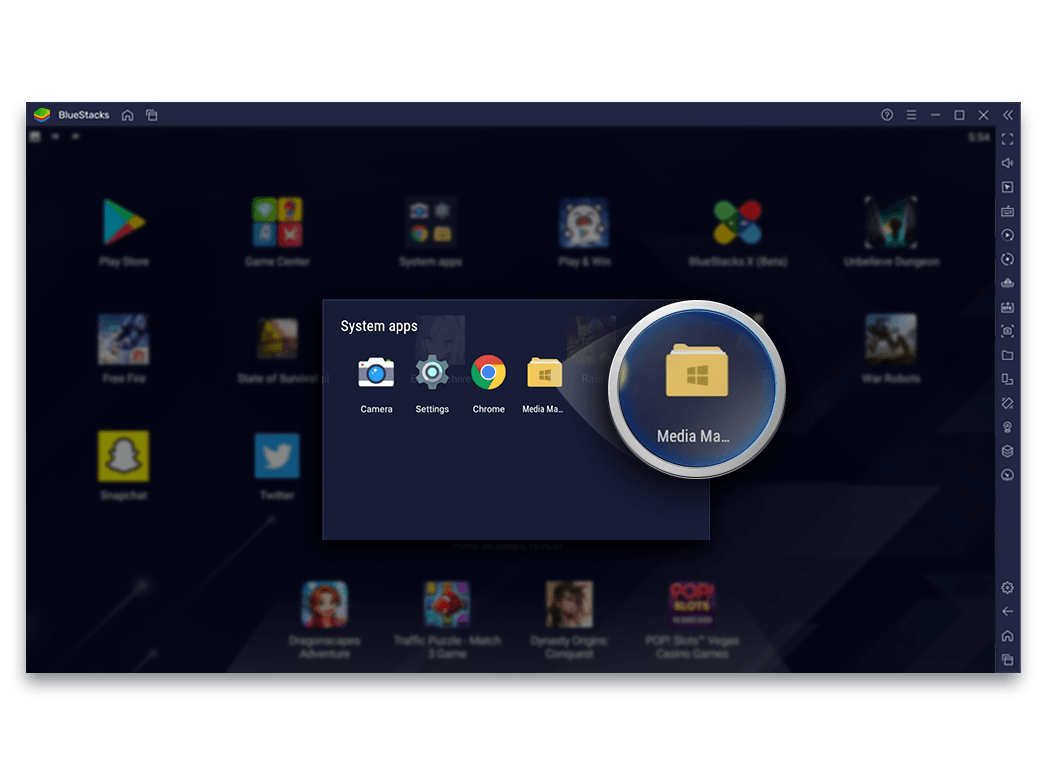
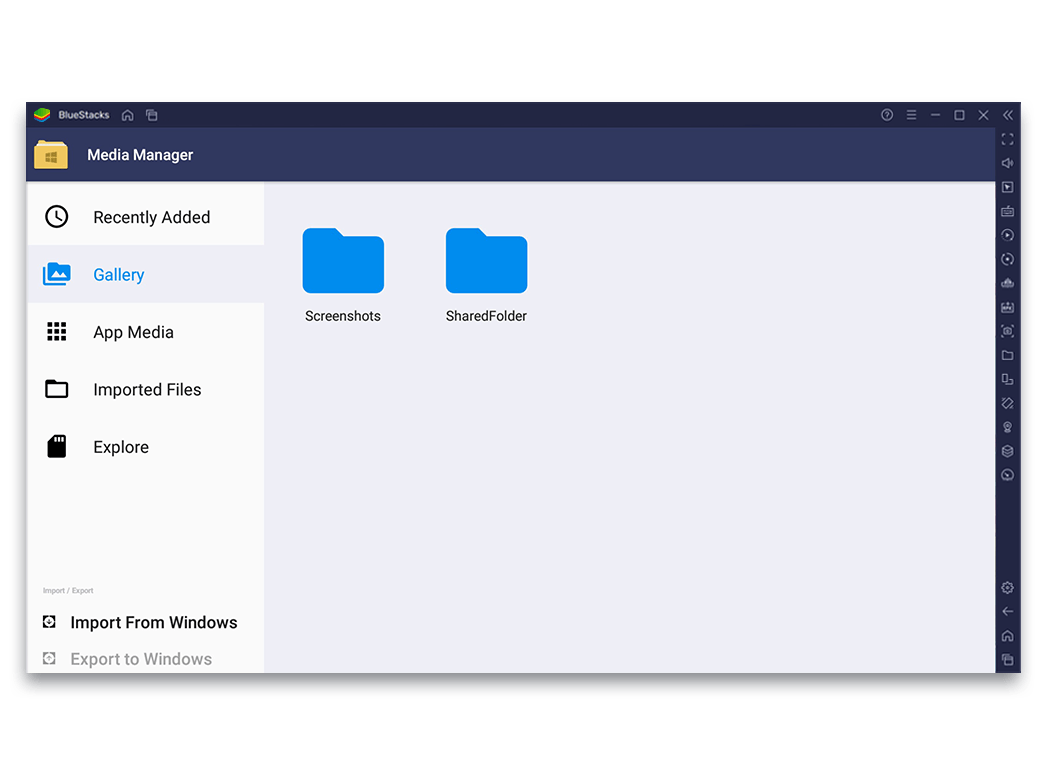
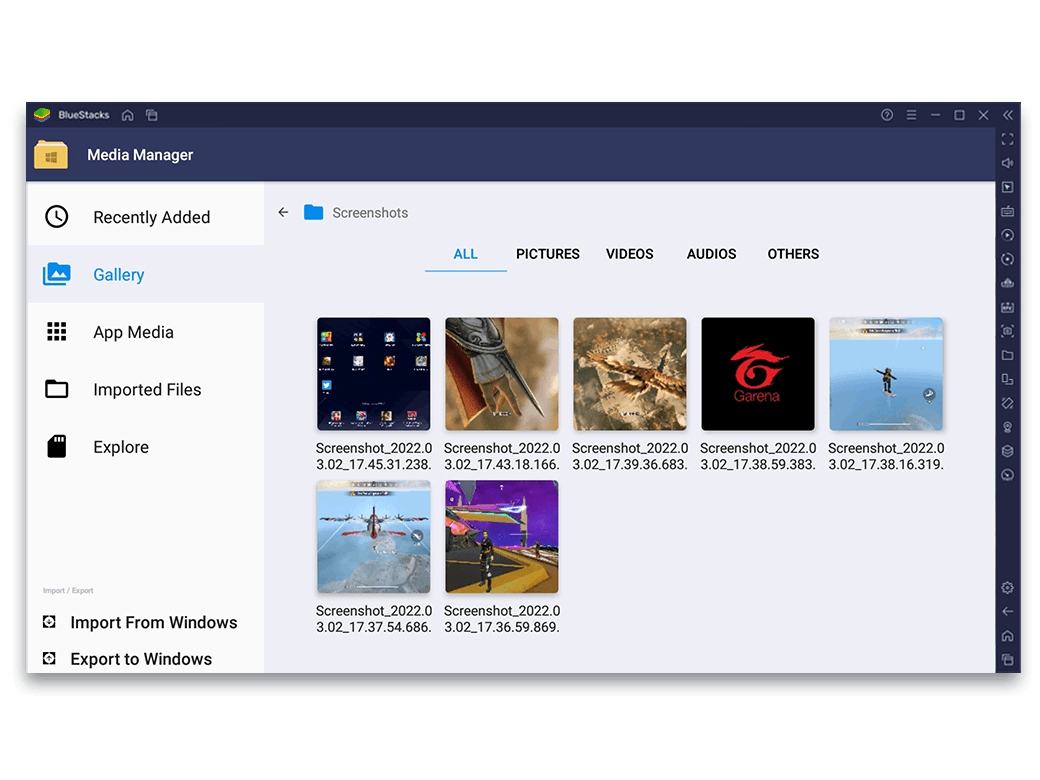
Once the screenshot has been saved, you can access it through the Media Manager on BlueStacks or from the Windows/Custom folder you selected.
To view all the screenshots of your gameplay, follow these steps.-
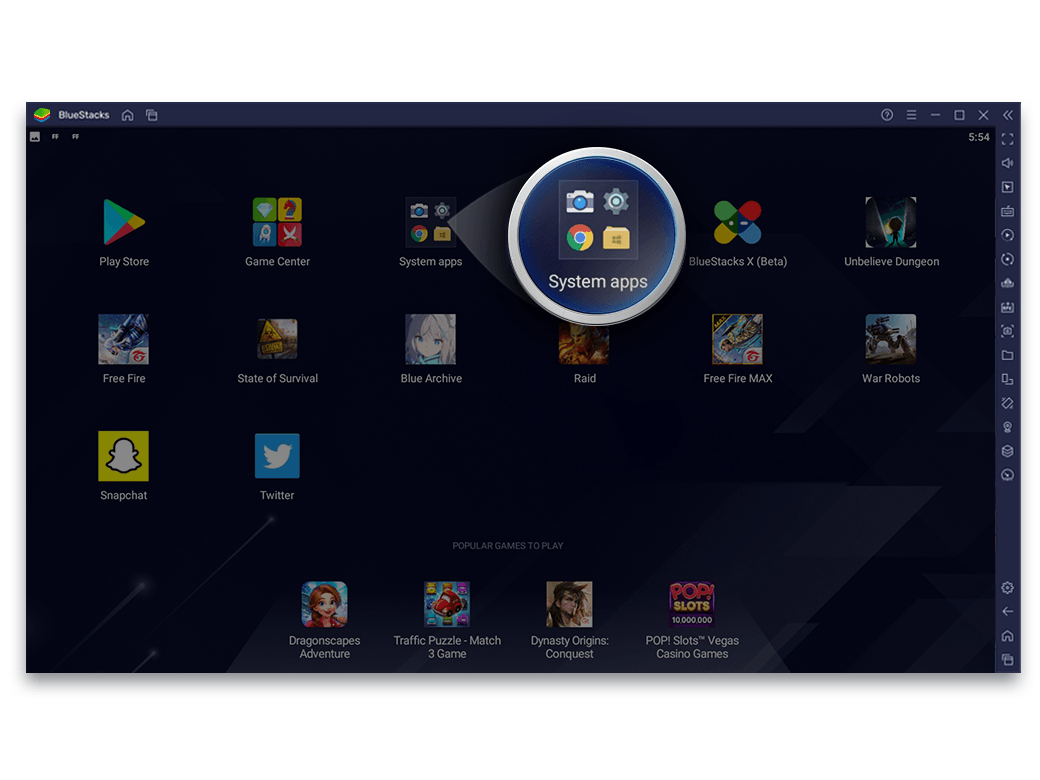
Go to My Games and select System Apps
![Utility Step Image]()
-
Open Media Manager
![Utility Step Image]()
-
Go to Gallery and select the DCIM folder
![Utility Step Image]()
-
You can view and delete the screenshots here
![Utility Step Image]()
![Utility First Asset]()
-
-
-
Pin to Top
Keep the BlueStacks window on top while multitasking
Keep BlueStacks above all other applications running on your PC. This way you can play your favorite games on BlueStacks and multitask without needing to minimize any window. What’s more, when you pin the BlueStacks window to the top, you can react much faster to crucial events. No need to switch between windows anymore. Save your village like a hero.
-
How to use Pin to Top
-
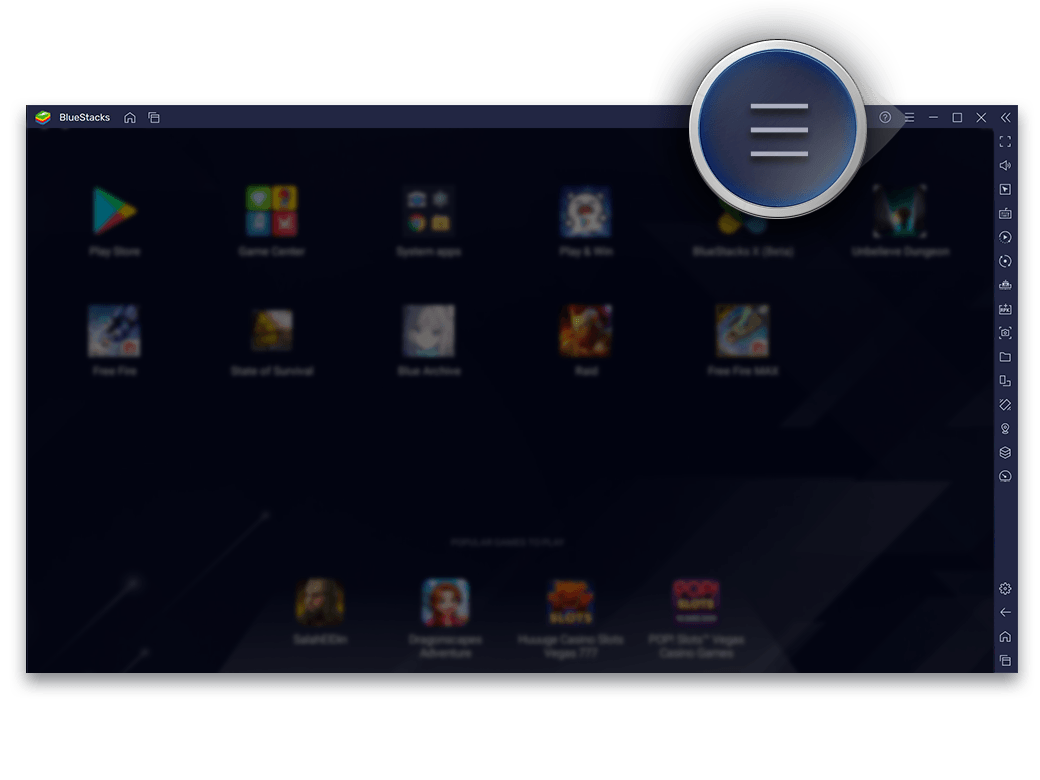
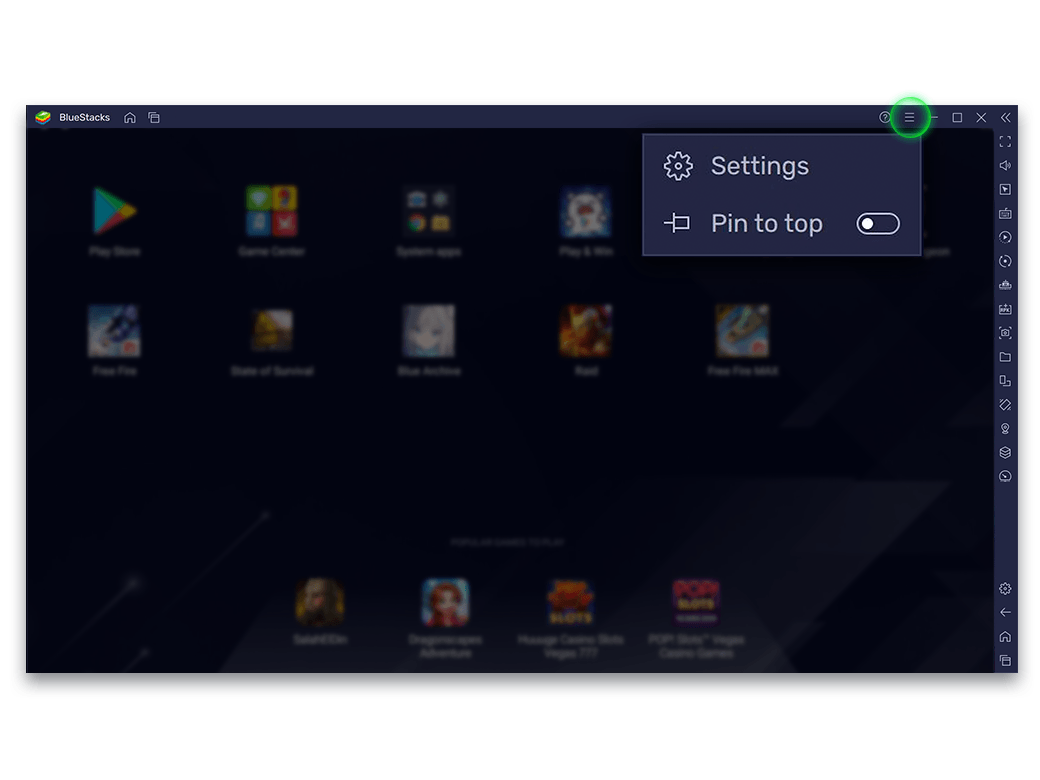
Launch BlueStacks and click on the Hamburger menu
![Utility Step Image]()
-
Enable the 'Pin to top' feature from the drop-down menu
![Utility Step Image]()
![Utility First Asset]()
-
-
-
Drag & Drop
Share images with your in-game community
Capture and share precious gaming moments, memes, videos, gaming strategy clips, and more with your in-game community with just a simple drag and drop. With BlueStacks, you can interact and share media with your teammates in the chat.
-
How to use drag & drop
-
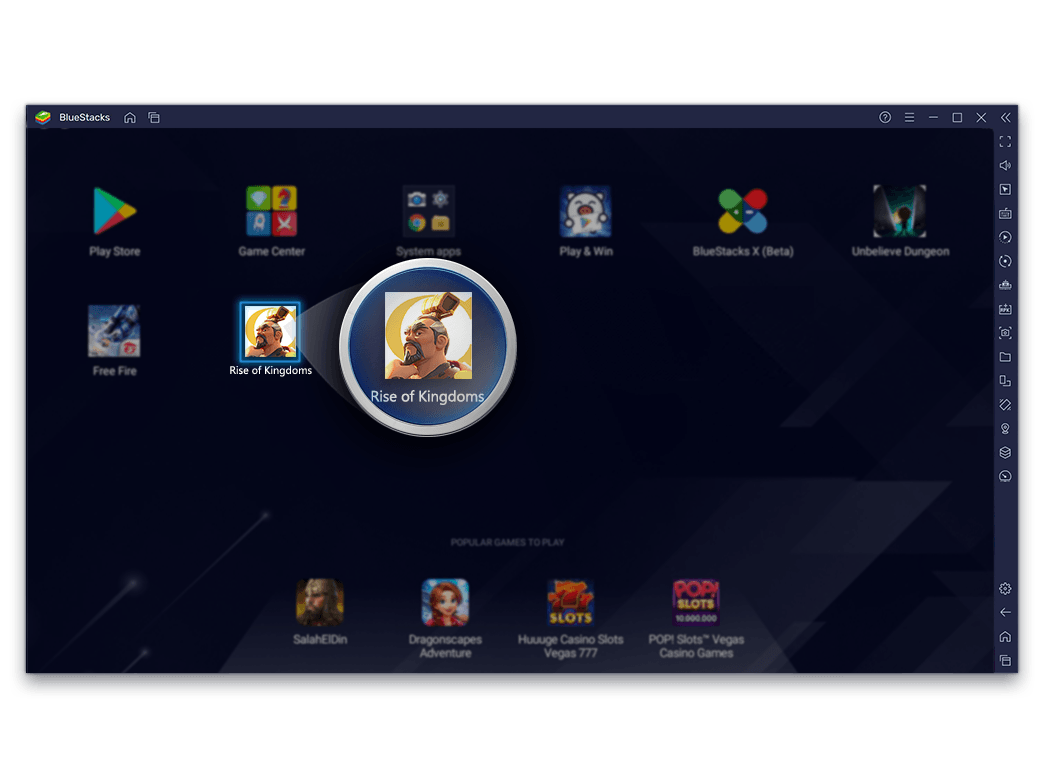
Launch the app where you want to share the media files
![Utility Step Image]()
-
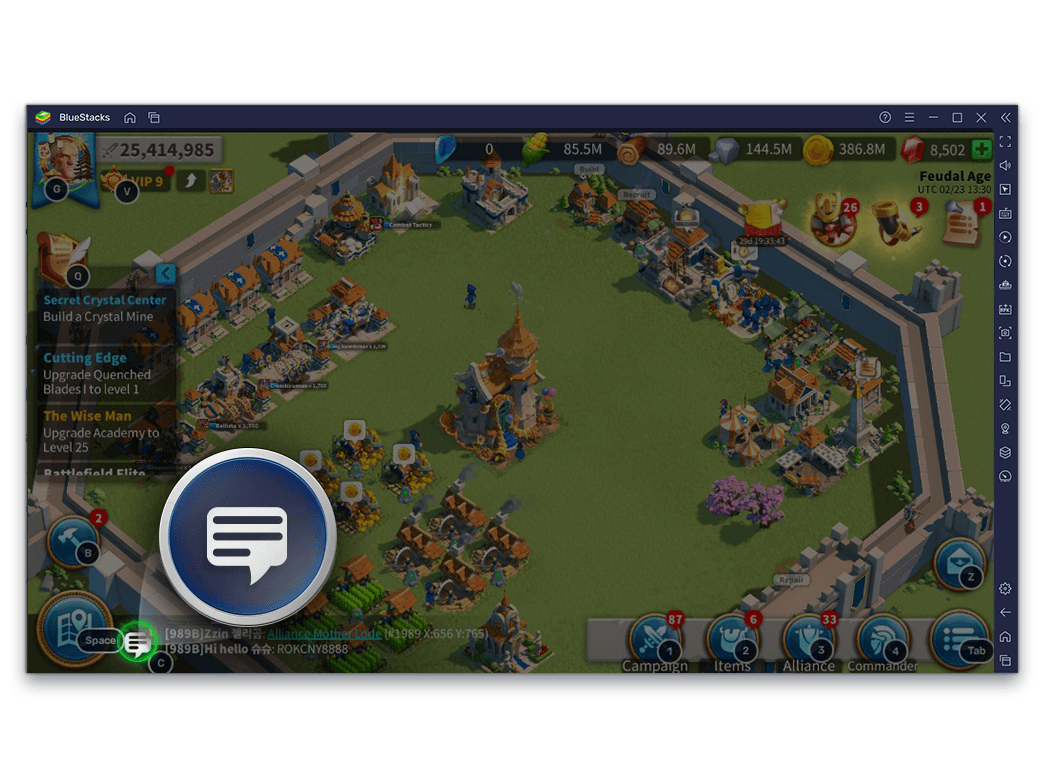
Open in-app chat
![Utility Step Image]()
-
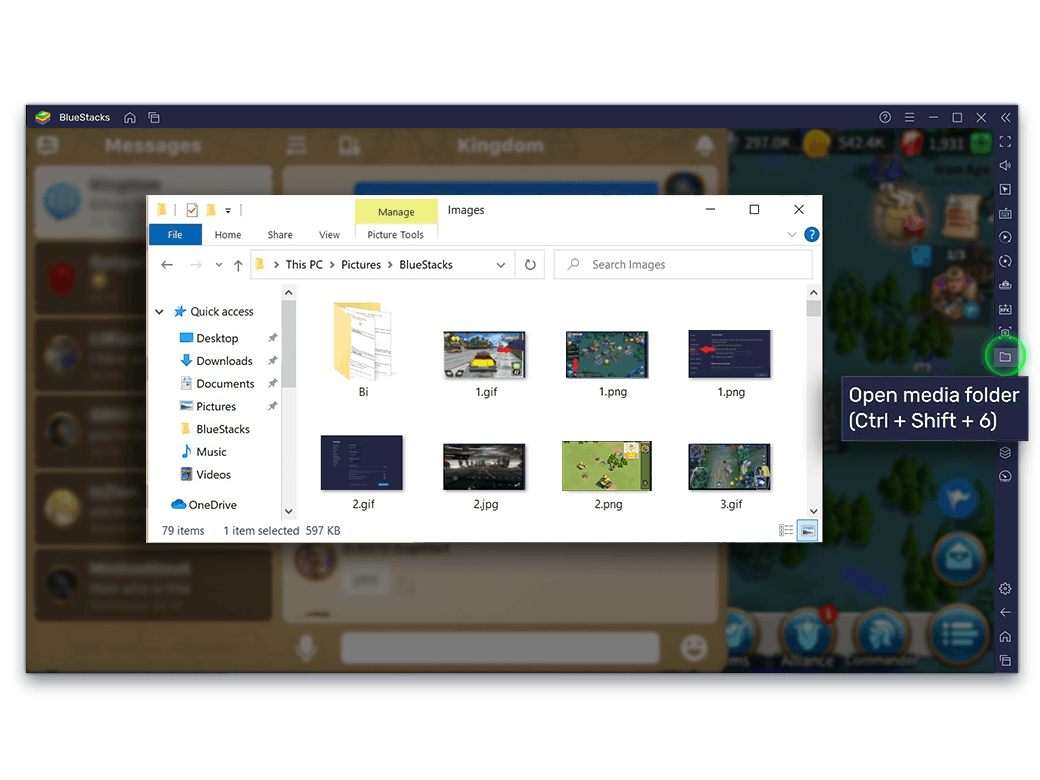
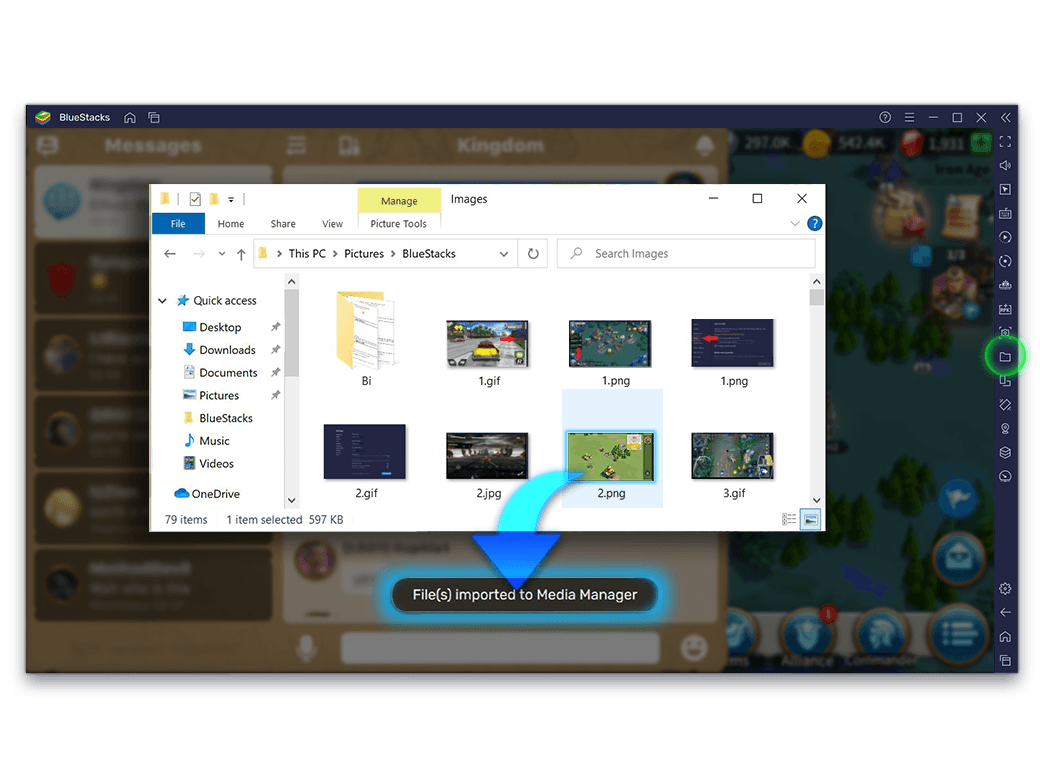
Open the Windows location where the media file is saved
![Utility Step Image]()
-
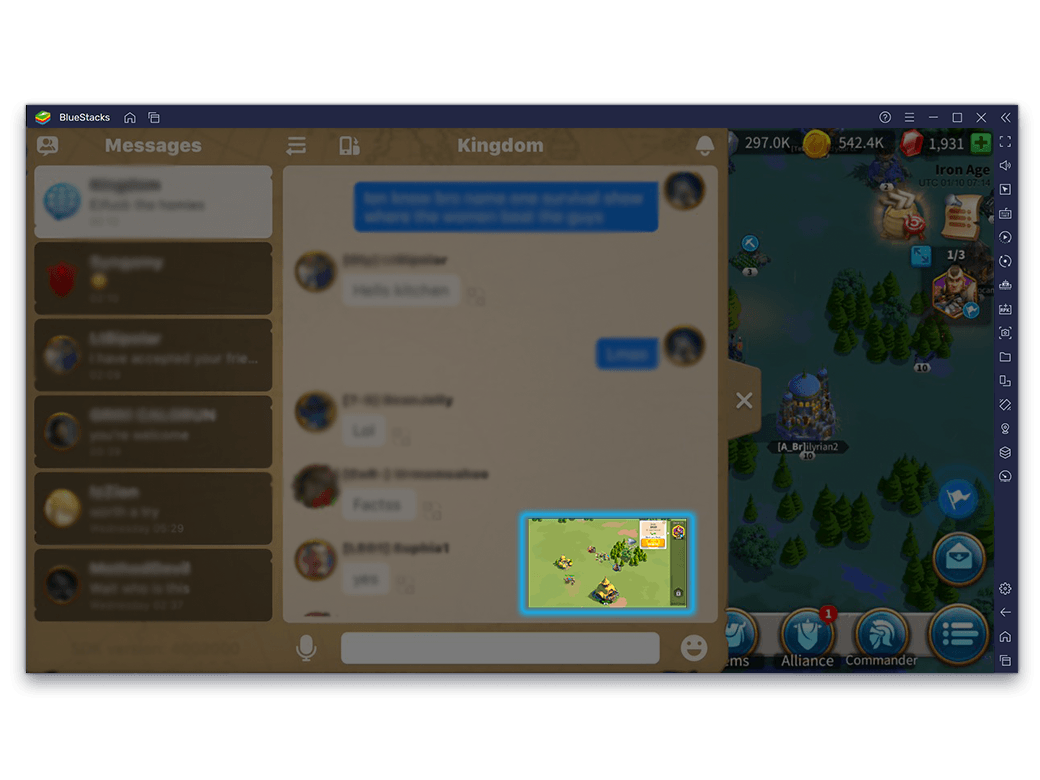
Drag the file to be shared and drop it in the app's chat
![Utility Step Image]()
-
Once the file is imported, you can go ahead and share
![Utility Step Image]()
![Utility First Asset]()
-
-
-
Installing APK
In case there is a game in some other language that you’d like to play but are unable to download due to Geo-restrictions, we recommend that you try and install its .APK* file. Before you do that, check if the .APK is available and download it from a trusted source because malware can be distributed through .APK files. Once done, install the game on BlueStacks by using the same .APK bundle/file.
-
How to install an app using APK
-
Download the APK file & launch BlueStacks
![Utility Step Image]()
-
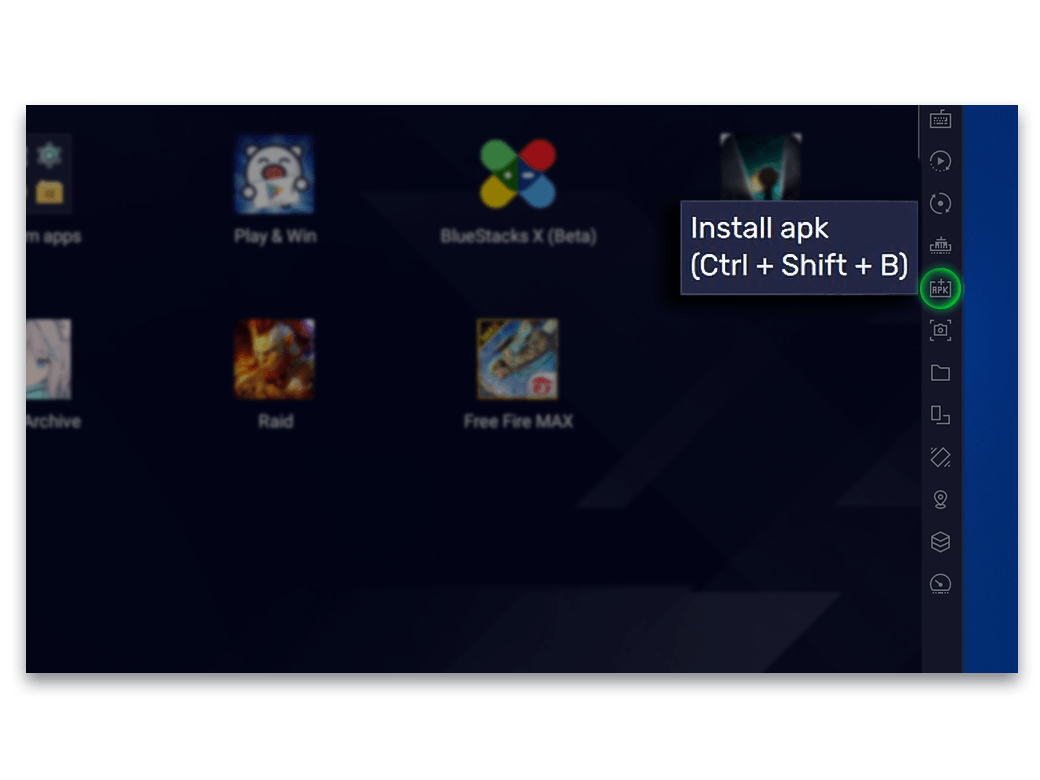
Click on the Install APK button from the Side toolbar
![Utility Step Image]()
-
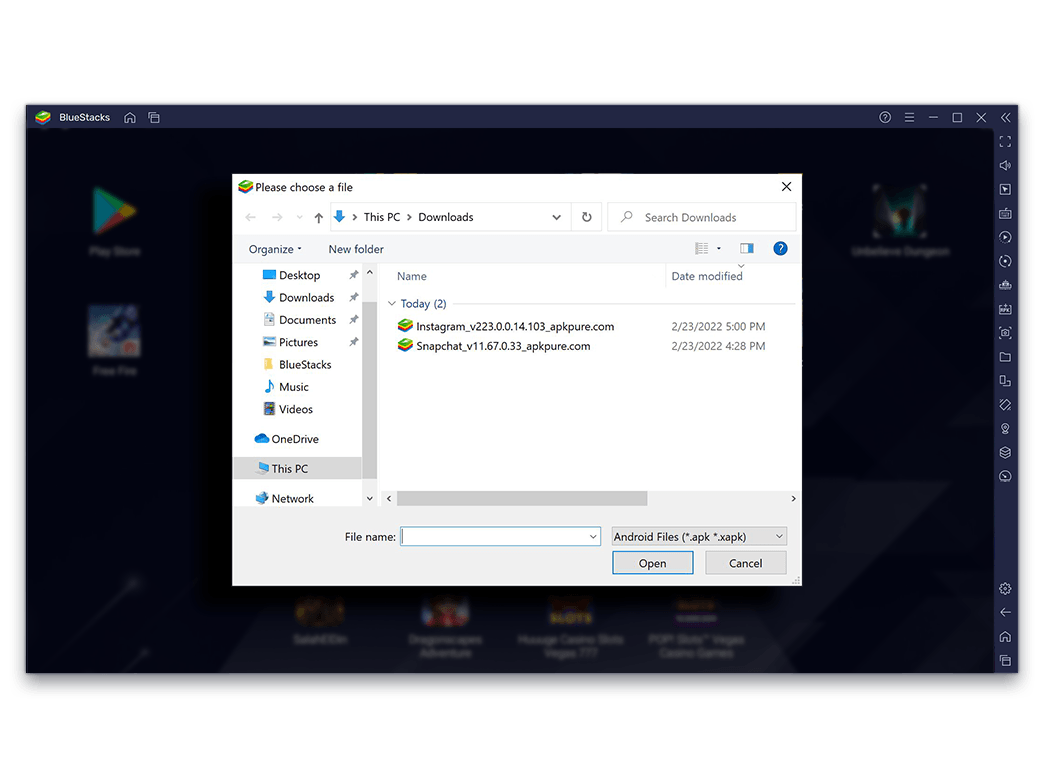
A Windows explorer pop-up will appear, navigate to the APK file
![Utility Step Image]()
-
Select the file and click on Open
![Utility Step Image]()
-
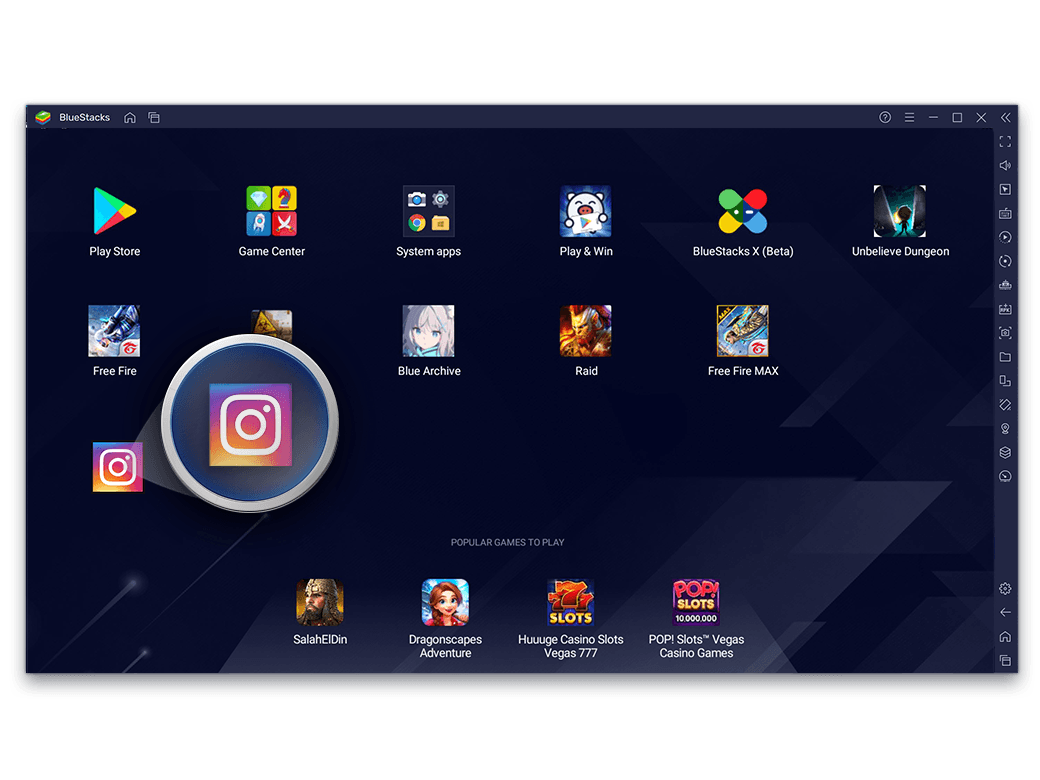
Once installed, the app will appear on the BlueStacks home screen
![Utility Step Image]()
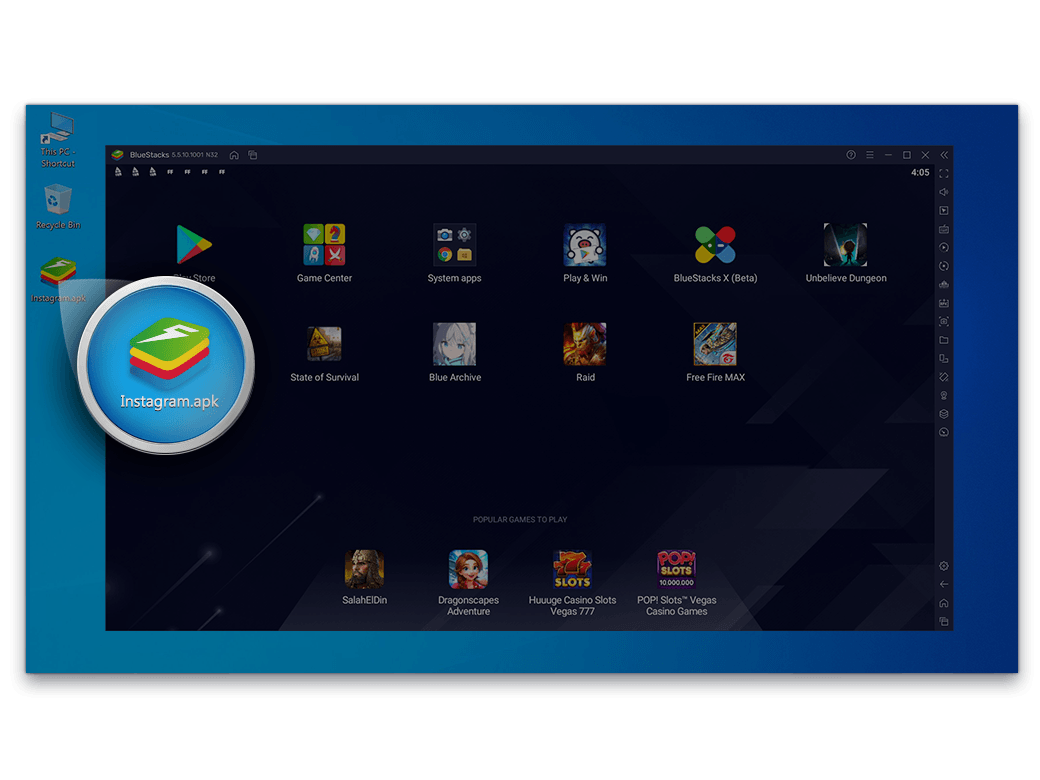
Alternatively, you can drag and drop the downloaded APK file to install it on BlueStacks
![Utility First Asset]()
-
-
