Dragon Nest M Battle Power Guide
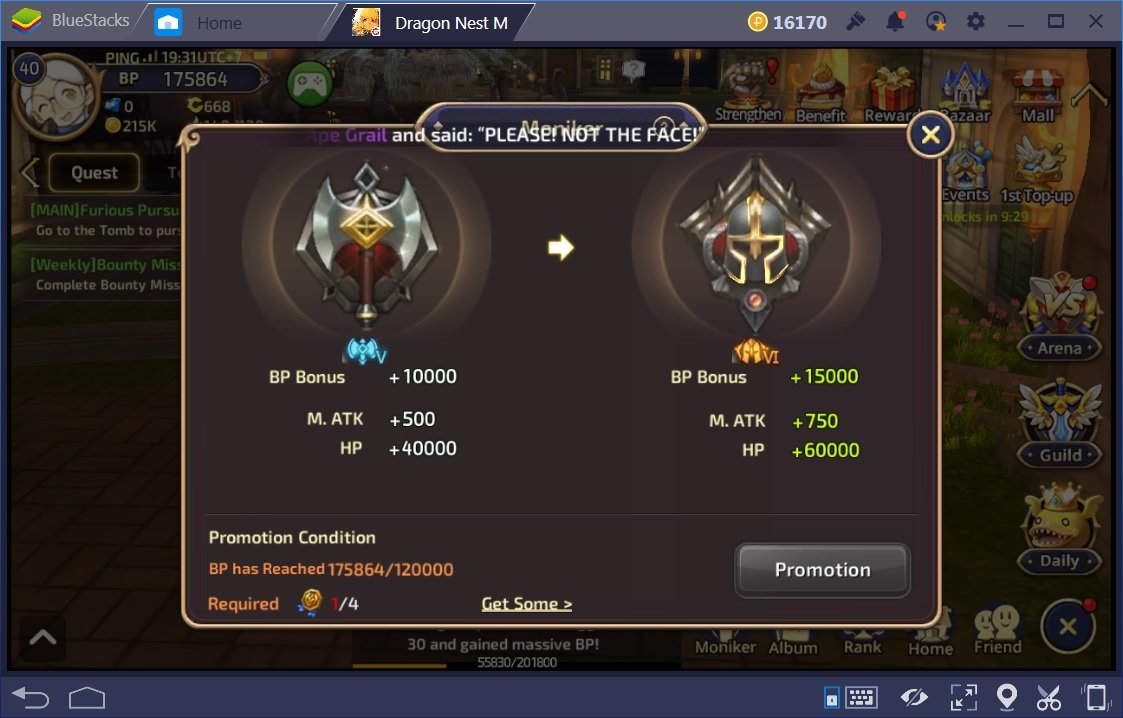
Your Battle Power goes hand in hand with your leveling. It’s highly recommended to push this number as far as possible throughout your gameplay. But there’s a catch to it. Unlike too many games, Dragon Nest M is setup so that your Battle Power is mostly needed for the PvE content. The PvP content doesn’t rely on your BP nearly as much. And yes, even though your BP might be too low for some content, there is a chance you can complete said content anyway.
How To increase your Battle Power
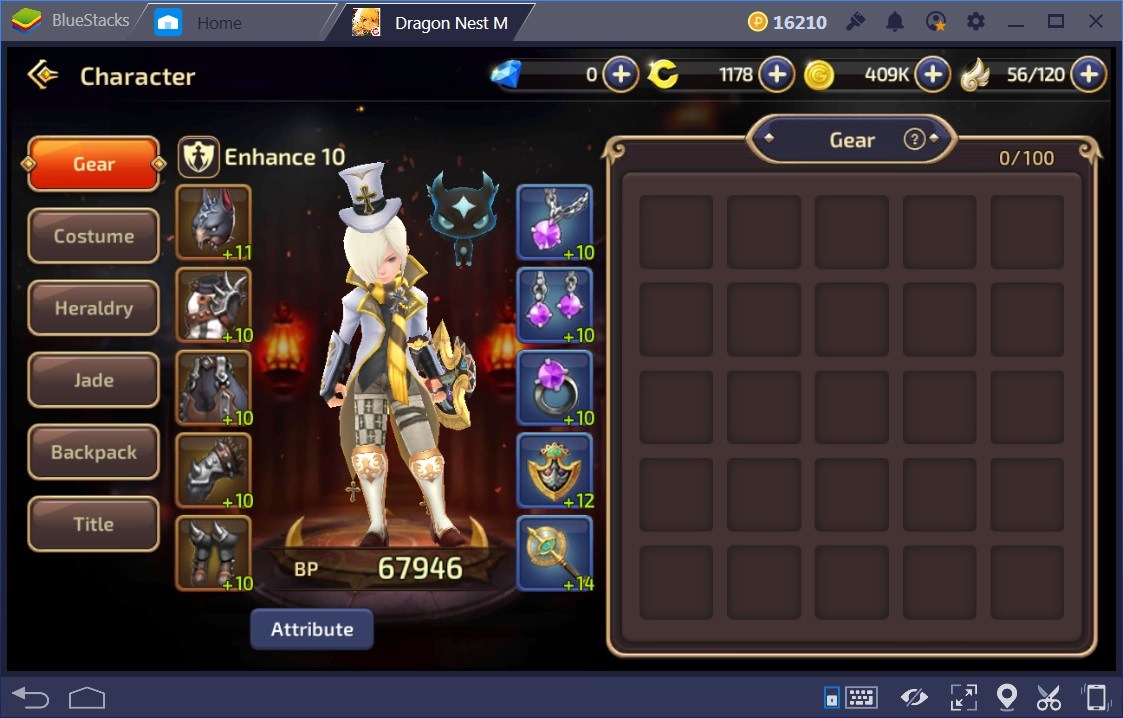
When you check the above screen shot, that’s a level 30 cleric with 67,000 BP. Seems okay for its level, right? It’s really too low. In order to fix that, the weapons and accessories have to be crafted or bought to complete the set. Starting with the Abyss items showing as equipped on the right of the screen shot, you can perform various upgrades on them.
The higher the item level, the more options to upgrade things will become available. Cerberus items are showing as equipped on the left of that cleric. Those have an extra option called Refining. Next is the Manticore set. Those items include 2 more options for upgrading purposes. Once you start upgrading things, your BP will increase accordingly.
Costumes
Next in line are the costumes. They do give stats and not just set your appearances.
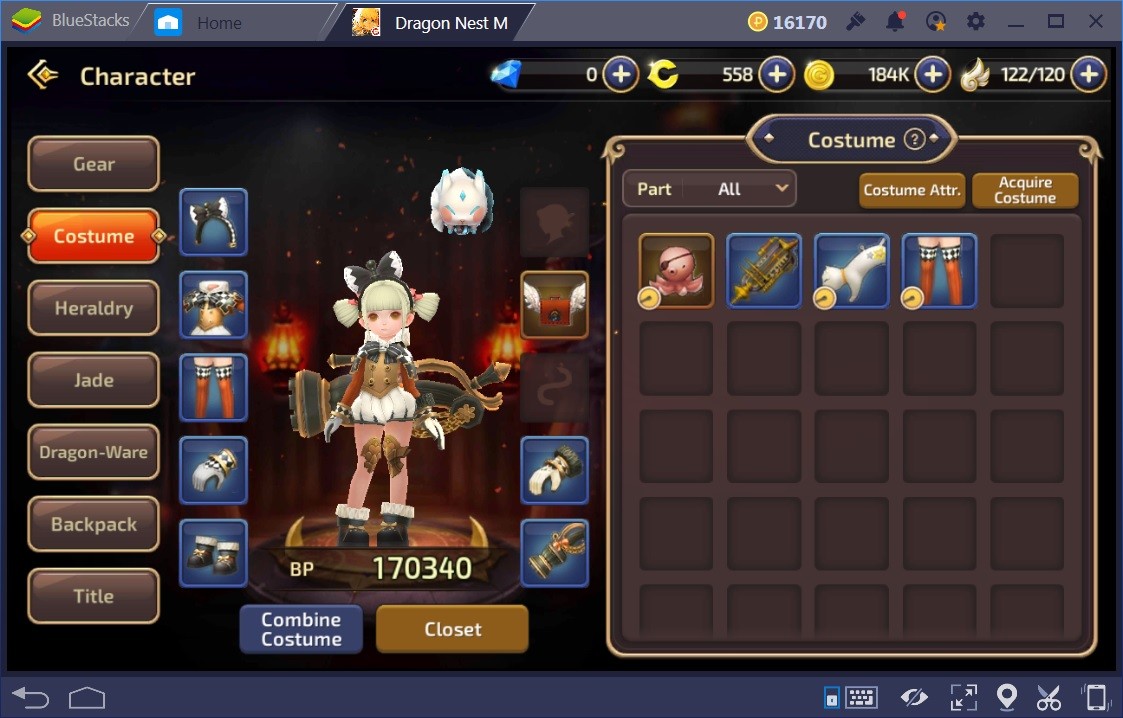
You can equip your costumes in this screen. When you click the Closet button in the bottom middle of the screen, you can set the appearances depending on what items you’ve gained. In the case of the academic showing in the above screen shot, that’s the permanent Chess Costume set.
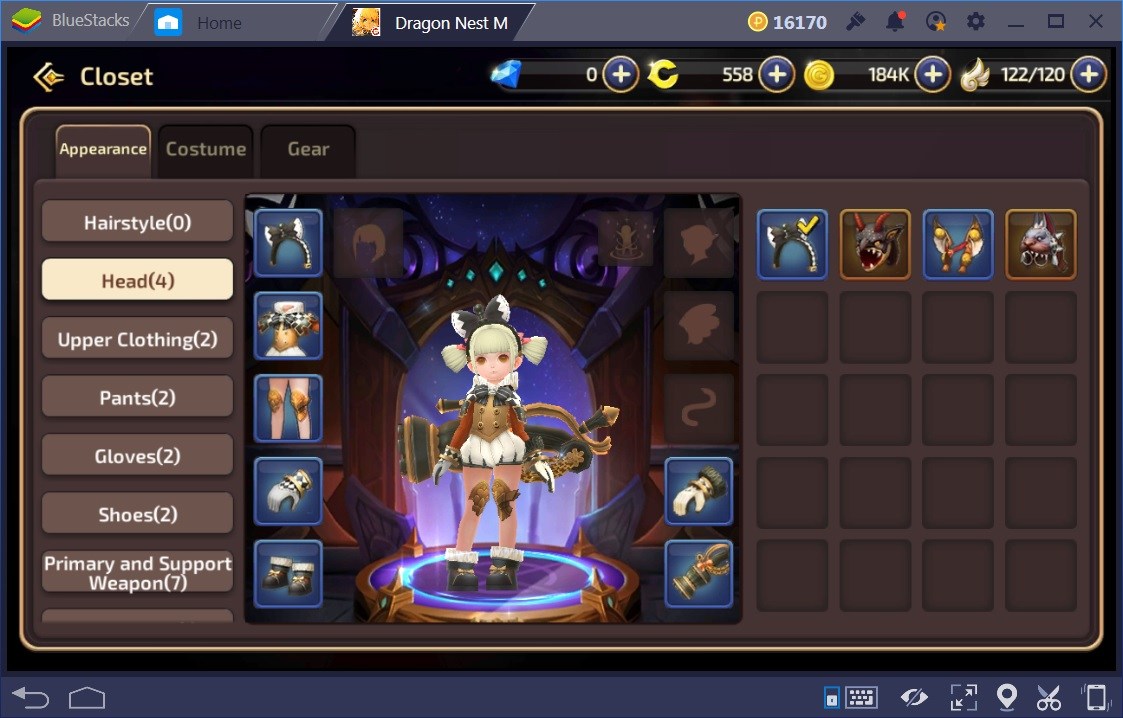
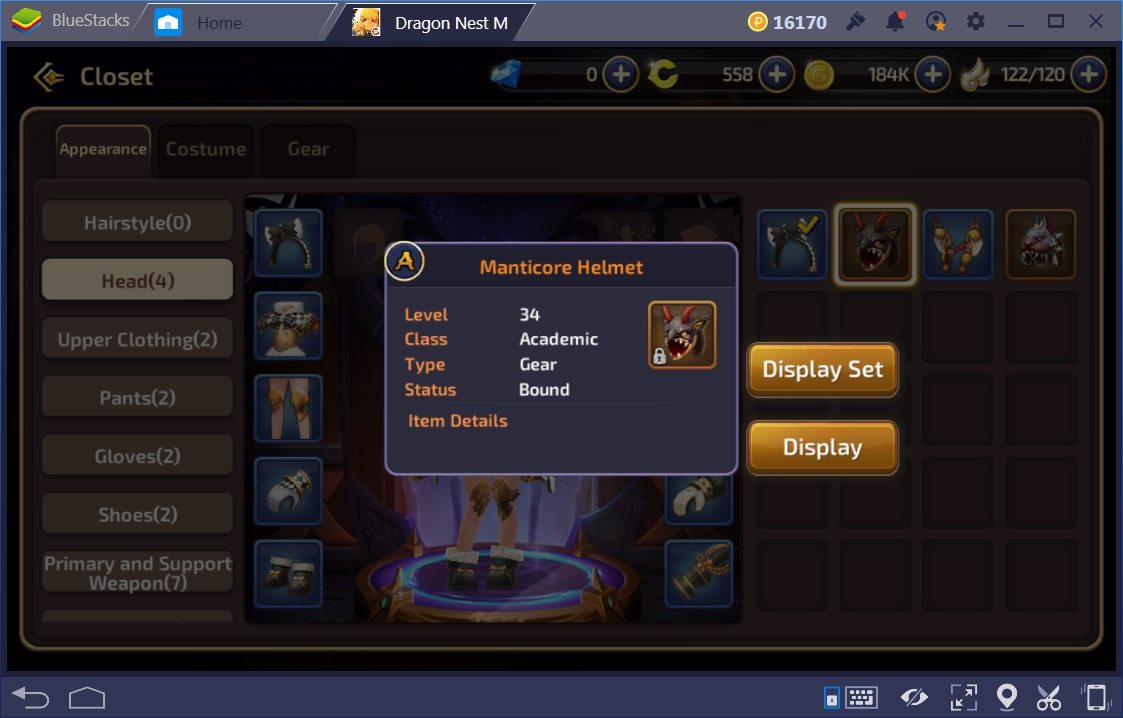
Click the item you want displayed and click the Display Set button. For each item in the costume set you have, it will be displayed. Any missing items from the set result in no change in appearance for those items.
Click on the Gear tab to activate BP bonuses for having a certain number of items in a set. This applies to your main items. You have to have at least 3 of the 7 items to activate the bonuses.
Looking through the rest of the character screen, you’ll see Heraldry and Jade sections. It’s a similar idea to the Gear and Costumes sections. Gain the items and upgrade them. Just mind your in-game resources while upgrading things. You’d be surprised how quickly you can run out of resources. All these things will provide the typical boosts to your battle power so you can handle higher level content without getting horribly killed. But this is just the start.
Mounts
Dragon Nest M provides you a free mount when you reach level 22. Once you activate a mount, you’ll have its BP/stats boost.
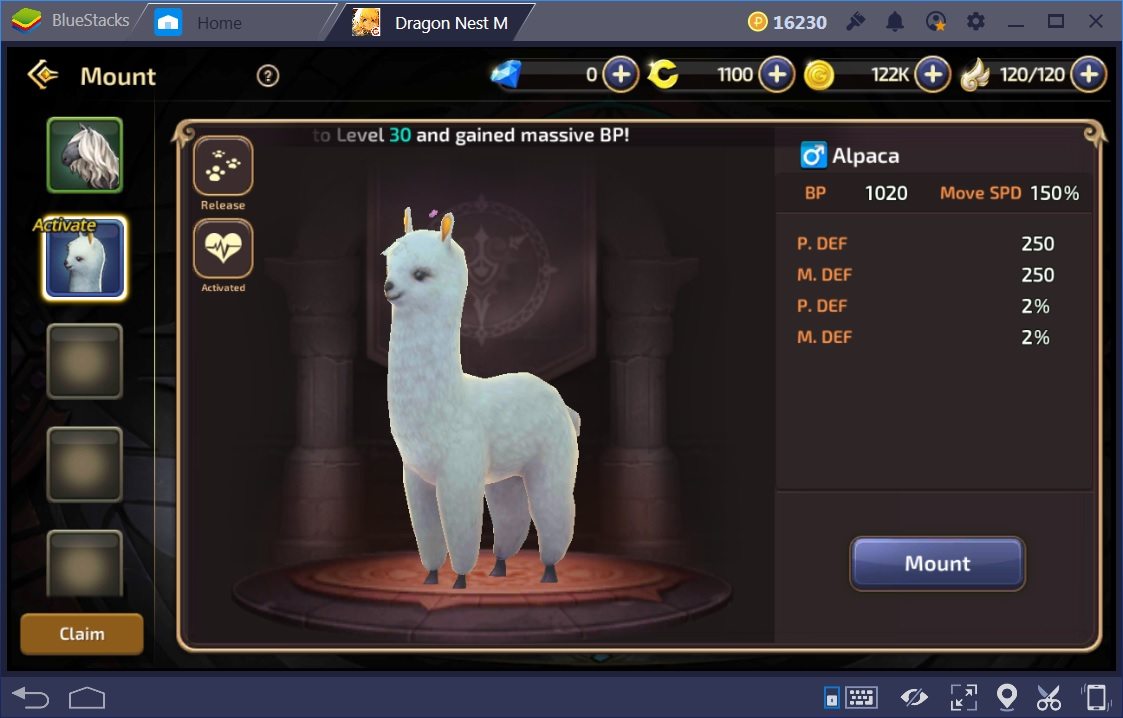
The BP and stats, as showing in the above screen shot, are always applied to your character for the currently activated mount only. That’s even if you’re not riding it. The better the mount, the better the BP boost. For example, the mount found in the Dragon Coin Market costs 1,000 Dragon Coins. It has twice the BP compared to this event reward Alpaca mount. You can also buy a mount from the Bazaar depending on your server (how old it is) and how many Dragon Coins you have. And yes, there’s even a space ship like mount you might be able to gain from the Pandora’s Heart boxes.
Fairies
The fairies in Dragon Nest M are very similar to the idea of pets from the PC version of Dragon Nest. You can deploy up to 4 fairies depending on your level.
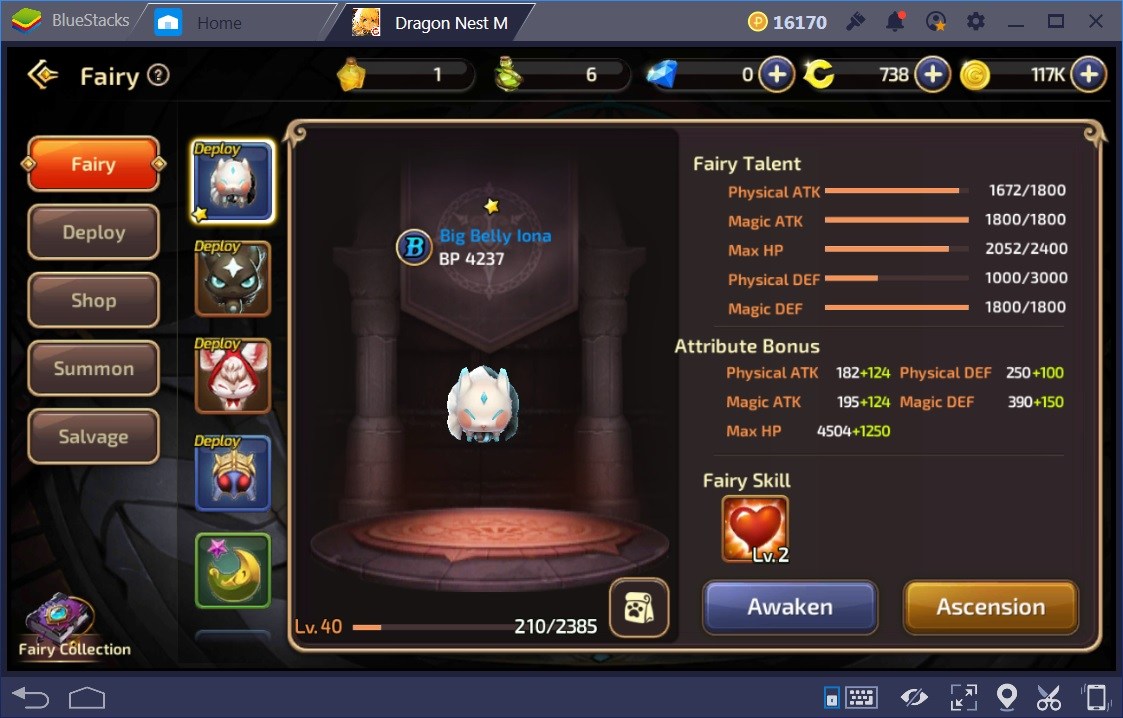
Each deployed fairy has a BP boost for your character and a talent. The fairy you deploy as the captain is the only fairy that will apply its talent to your character. Some fairies will boost attack power and/or attack speed while others are meant to heal or protect your character. Some can weaken opponents. So read the talent and its trigger carefully. Clearly a talent that boosts your physical attack is utterly useless on a magic attack type character. Some fairies require you to attack in order to trigger the talent. Others require you to get hit to trigger the talent.
When you decide on a fairy to include in your team of fairies, the best possible advice anyone can give you is to avoid the highly face-palm inducing “because it’s sooooooo cute” reason.
As amusing as this may seem, you’d be surprised how often this does happen!
Also note that even though the fairy’s rank (C, B, A, and S) has its uses, that doesn’t always mean you should set the highest ranking fairy as the captain. In the above screen shot you can see there’re 2 A ranked and 2 B ranked fairies deployed. But the B ranked Big Belly Iona is set as the captain. The healing talent was preferred to the other fairy talents in this case.
The Awakening section is a boost method for your fairy. You can apply this to all your deployed fairies. The Ascension section will increase the fairy’s talent level. You should use Ascension only on the fairies you want to set as captain. Awakening is instant and Ascension takes several tries to build up the talent level upgrade.
When you feed your fairies (the bag button with the footprint), only feed the fairies you want to keep and use. Typically this will be B and higher ranked fairies. For the most part, some C ranked fairies can have a really good talent for your character. But most of the time you should Salvage those to turn them into food for your other fairies.
You can get 5 free regular fairy eggs and 1 rare fairy egg each day. When you use those eggs is entirely up to you. It’s also entirely up to you to decide IF you’re going to spend in-game currencies to buy eggs. This will highly depend on how much you have left for upgrading your items.
Skills
When you activate or upgrade a skill, your BP will increase. It’s not a large increase but every little bit helps.
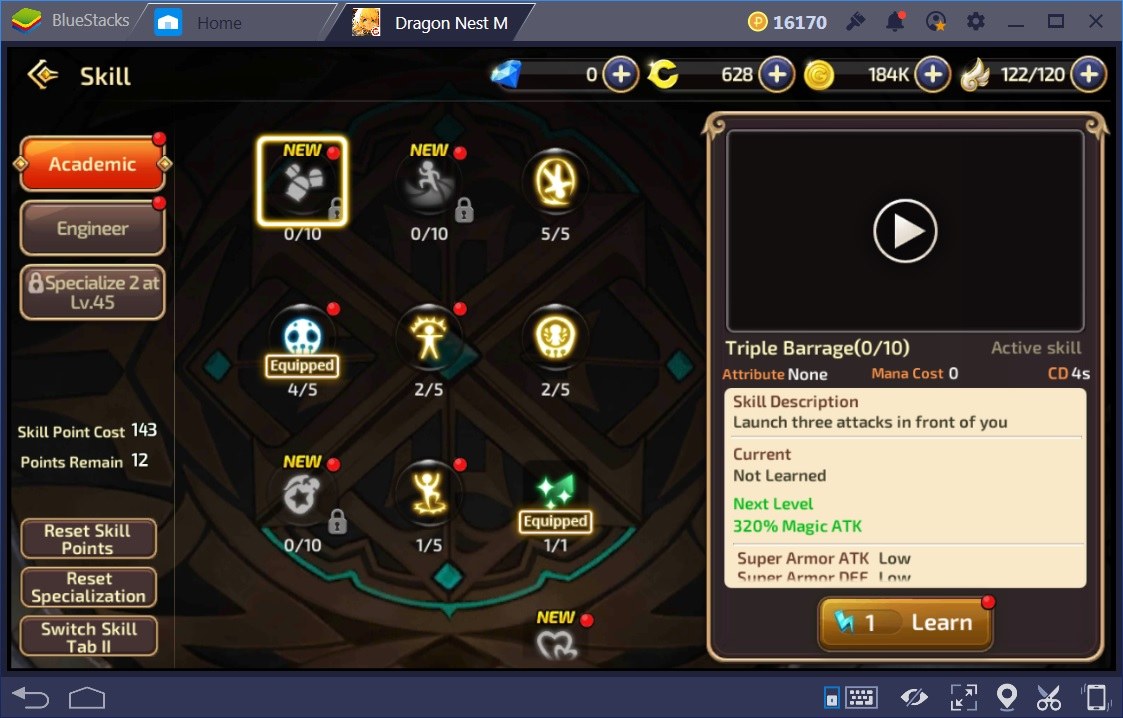
The skills you get depend on your character’s type, level, specializations, and your preference. Much of that highly depends on that last part. If you simply don’t like a particular skill for whatever reason, skip it and save your skill points.
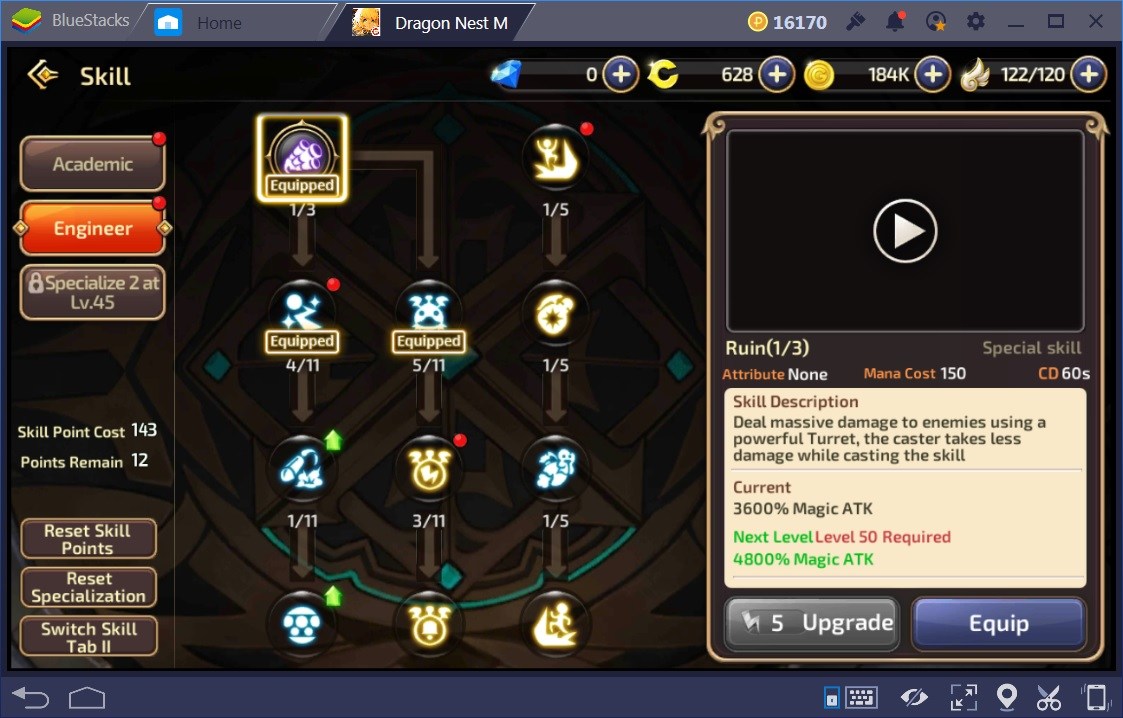
Unfortunately, you can’t always skip a skill entirely. Some lower level skills are needed to gain the higher level skills. As showing in the above screen shot, you have to check the activation lines to see what’s needed and when. Only activate those unwanted skills and don’t upgrade them. When you reach level 45, you have another specialization to select. Base that selection on which set of 3 skills is going to be the more helpful for your character. Be sure to read the skill descriptions first to find out which side will be more helpful towards your character. The Preview button is there exactly for that reason. Make note of boosts for skills you might NOT be using or don’t like.
Album
You gain album cards from the Continental Exploration.
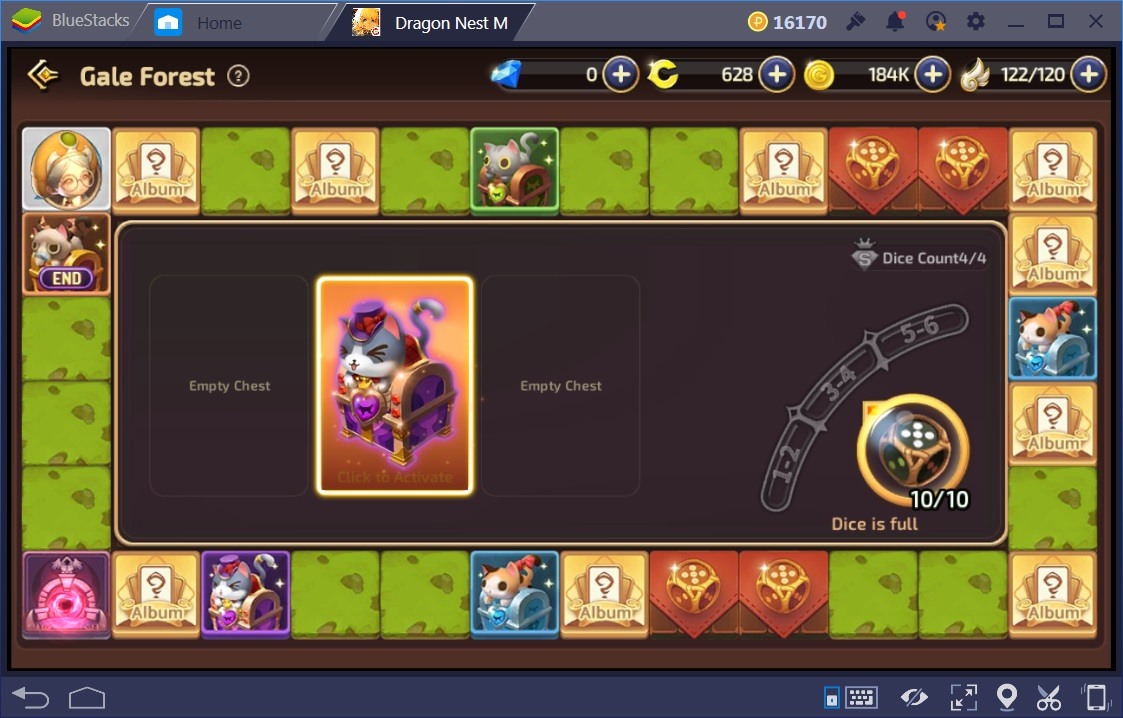
It’s a board game!! The aim here is to roll the dice to try to get the number you want to land on the squares you want to collect from. You can gain extra rolls (Dice Squares) and there’s another mini-game here. It’s a type of dodge ball game where you have to dodge attacks or mobs. In one such map, you have to dodge mobs carrying axes on a long handle. This one is the easiest since there’s a hidden path.
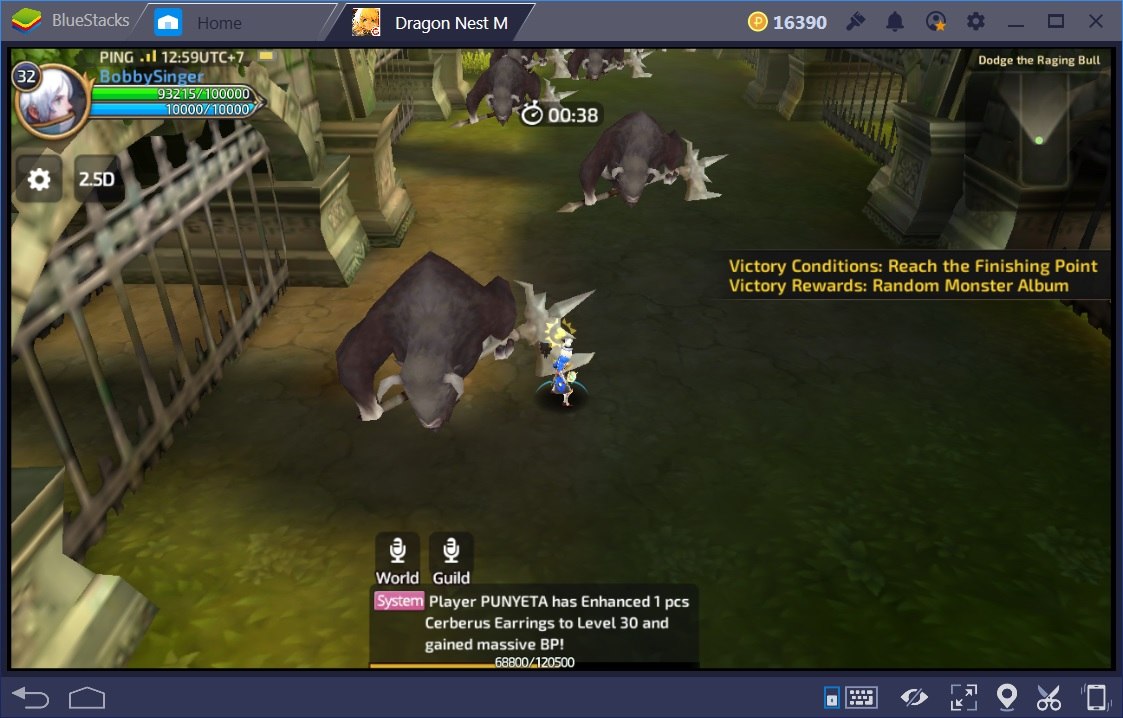
Line up your character in between the mobs and with the middle of the axe of their weapon. You’ll run right through it with no problems!! When you win this mini-game, and it’s usually pretty easy to do, you gain 4 album cards.
If you land on a box, you’ll gain that box type and you have to open it. The instant open costs DC depending on the opening time length. So a box that takes 8 hours to open (S Ranked) costs 80 DC to instantly open it. The others are 40 DC (4 hours) down to 10 DC (1 hour). Always instantly open album boxes according to your space needs as showing in the above screen shot. Leave the 8 hour box to be opened last. Basically, start it when you’re done in the CE and get back to it when you start the CE the next day.
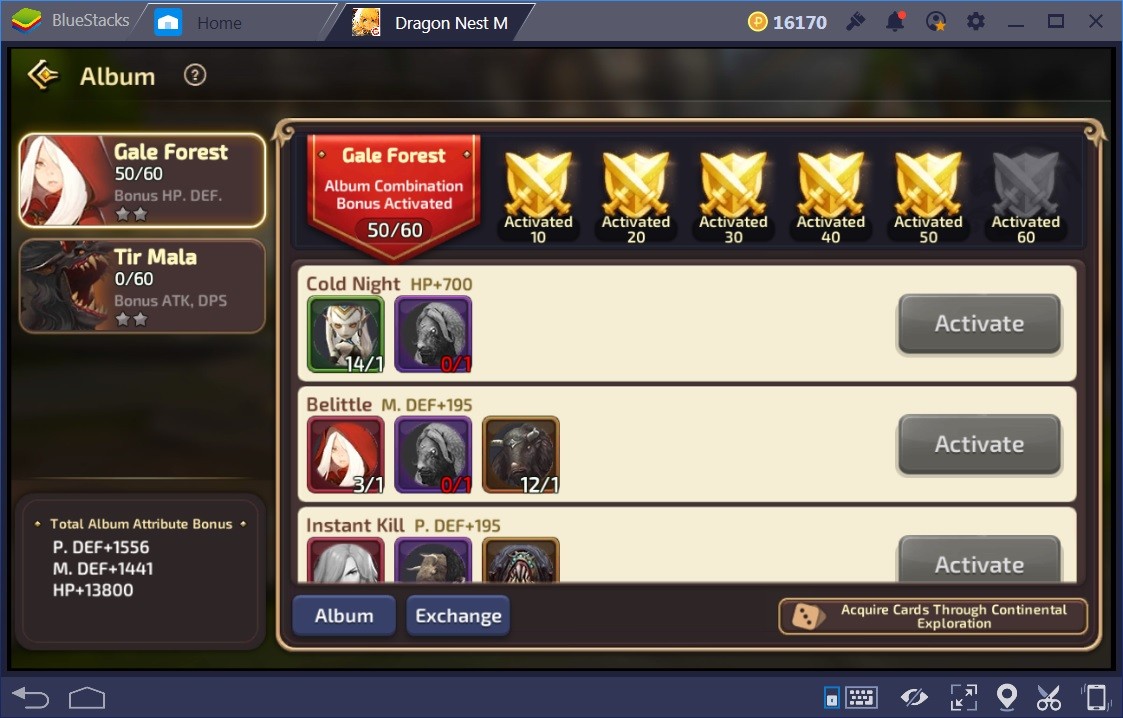
Once you’re done with the Continental Exploration, you can activate your newly gained album cards in the Album section. Each set in the album requires a certain number of album cards so it can be activated. The recommendation is to scroll down the list of available activations and find the sets that require the most cards first. Then base your activation on which stat you want boosted. Lastly, work your way back up the list and activate sets in the same way. You can see your current stat boosts in the bottom left corner of the Album section. It isn’t much but every BP boost helps.
Moniker
The moniker is a type of title for your character. Its battle power boost won’t hurt as well.

For the first 2 levels of your moniker, you’ll only need battle power to increase your moniker’s level. Levels 3 to 5 require you to have hero medals. To get to level 6, you’ll need palace medals. It does continue higher. You’ll have 3 ways to gain these medals. You can get them from the Saint Shop, the Guild Shop, and from the Guild Auction in the Bazaar.
The part to remember is to never directly buy the medals from the Guild Auction. This is known as “No Buyouts”. Yes, you’ll not only get kicked out from that guild, you’ll also be advertised about in the world chat. The only way the medals end up in the Guild Auction is from the various events. Even at that, that’s only if a certain number of your guild members participate in these events daily. The idea is to never directly buy the medals that appear there so that each guild member has a chance at it. Always bid on those medals.
To gain them from the Guild Shop, simply help out your guild. It’s easy enough to do and you’ll get Guild Points (GP) you can use to buy various things. You need to acquire Holy Medals from the Daily Quests. You can trade those for hero medals.
The Guilds
Joining a guild starts at level 14 to 15. Some were able to get into a guild at level 14 while others did so at level 15. There’re a lot of gains to help you out while being in the guild.
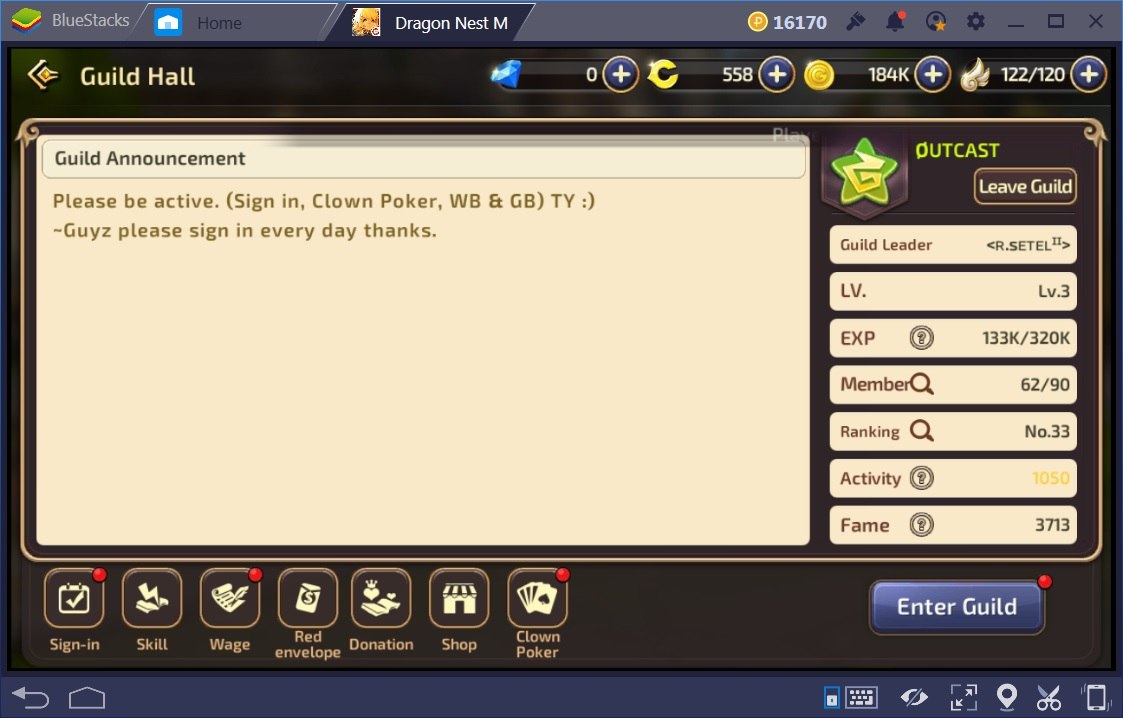
The recommendation when you sign in is to use the Platinum Sign-In. You’ll gain 2,000 GP in exchange for 100 Dragon Coins. The Skill section allows you to buy boosts for your character. The levels of these boosts depend on the level of the guild. The recommendation is to max level them all starting with the boosts that benefit your character the most. Essentially, all those boosts add to your BP. That’s why you should max level them all.
The Donation section is as the name implies. It helps you and your guild members. The Clown Poker is a game of poker for 5 rounds. The idea behind these 2 sections is to participate in them as much as possible. You’ll gain the GP which can be used to buy things to boost your BP.
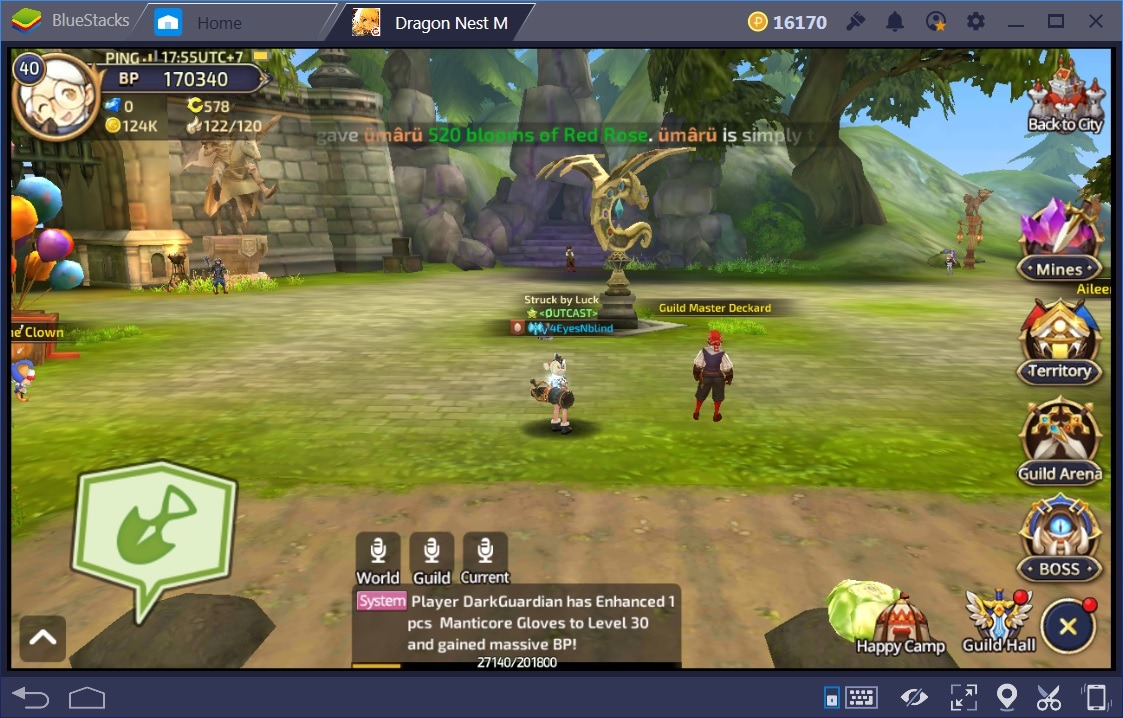
When you enter the guild, you can see various events you can join into. Again, help out your guild because it all ends up helping you and your BP. While you’re in there, you can plant specific seeds as showing in the bottom left of the above screen shot. There is more to the guild but for the most part, as long as you participate as much as possible, you’re all set.
Boss Rush
The Boss Rush is where you gain heraldry plate bags. Heraldries can be crafted from those plates. You can craft the same plate again in an effort to gain a higher powered heraldry compared to the ones you have equipped.
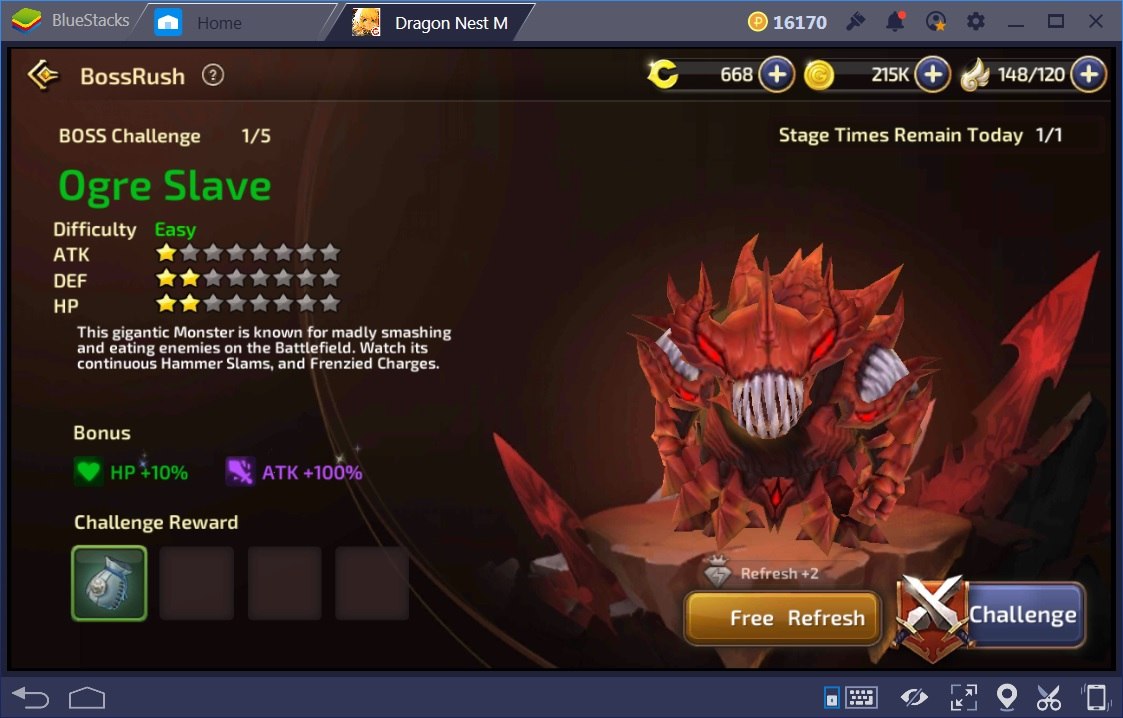
While you’re playing in the Boss Rush, your best bet is to save your Free Refreshes until boss #5. The first 3 bosses are usually pretty easy. Boss #4 starts to get difficult and boss #5 is the hardest. Be sure to check the bonuses before you click the Challenge button. If you’ve used up your 2 free refreshes, you can use gold to refresh the listed boss. You only get 1 chance at the Boss Rush per day so choose your boss #5 carefully. Also try to get a good mix of bosses to kill and rewards to gain.
Dragon Expedition
Here is where you’ll gain jades. It’s really the better bet since you can also gain Dragon Coins. Well, at least the DEX can save you some DCs from having to buy jades.
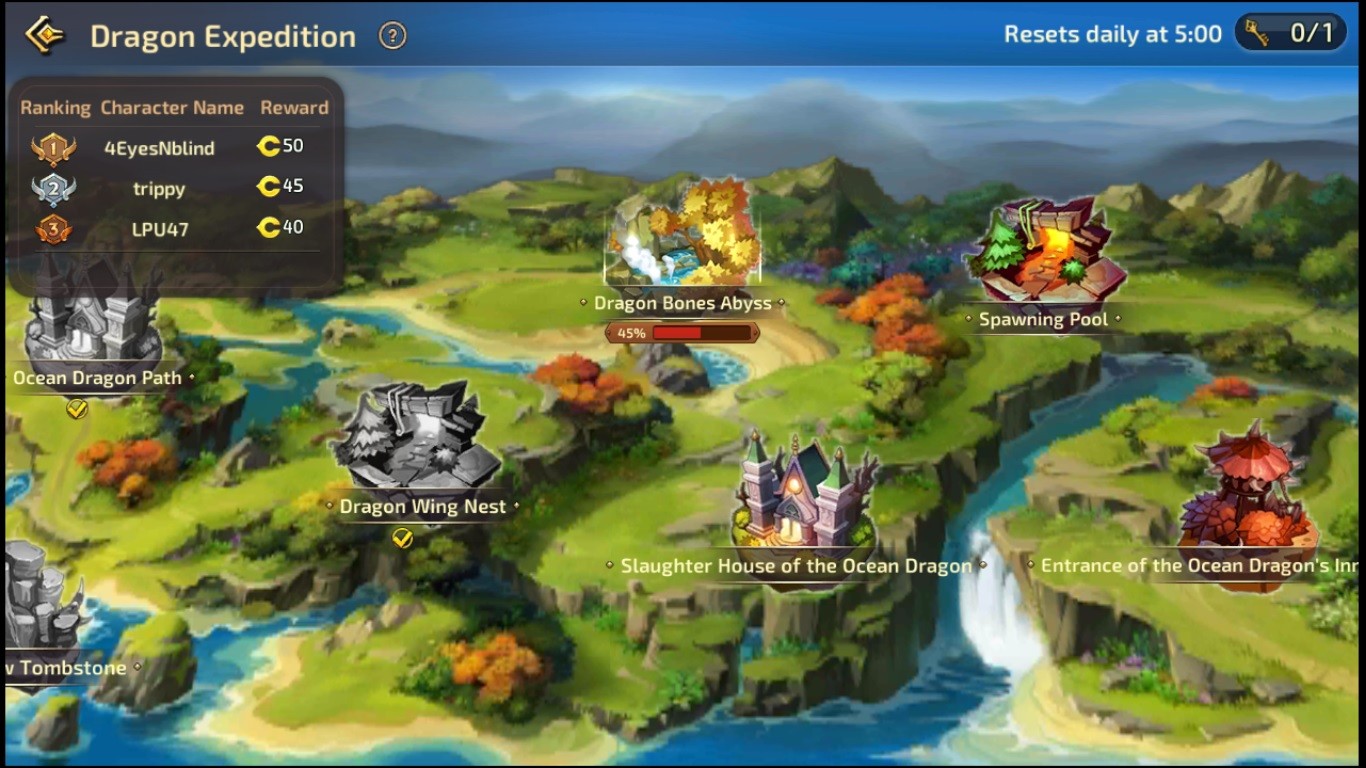
The Dragon Expedition is another boss battle setup. Even though your BP is too low for the level you’re currently on, you can still participate and gain jade bags. Like the heraldry bags, you find and open your jade bags in your inventory. Unlike the heraldries, you only equip and upgrade the jades. The higher the level of your character, the more jades you can equip onto your gear. The more jades equipped and the higher their level, the more BP you end up with.
Dark Boundary/Dragon Soul
The Dark Boundary is where you get Dragon Wares.
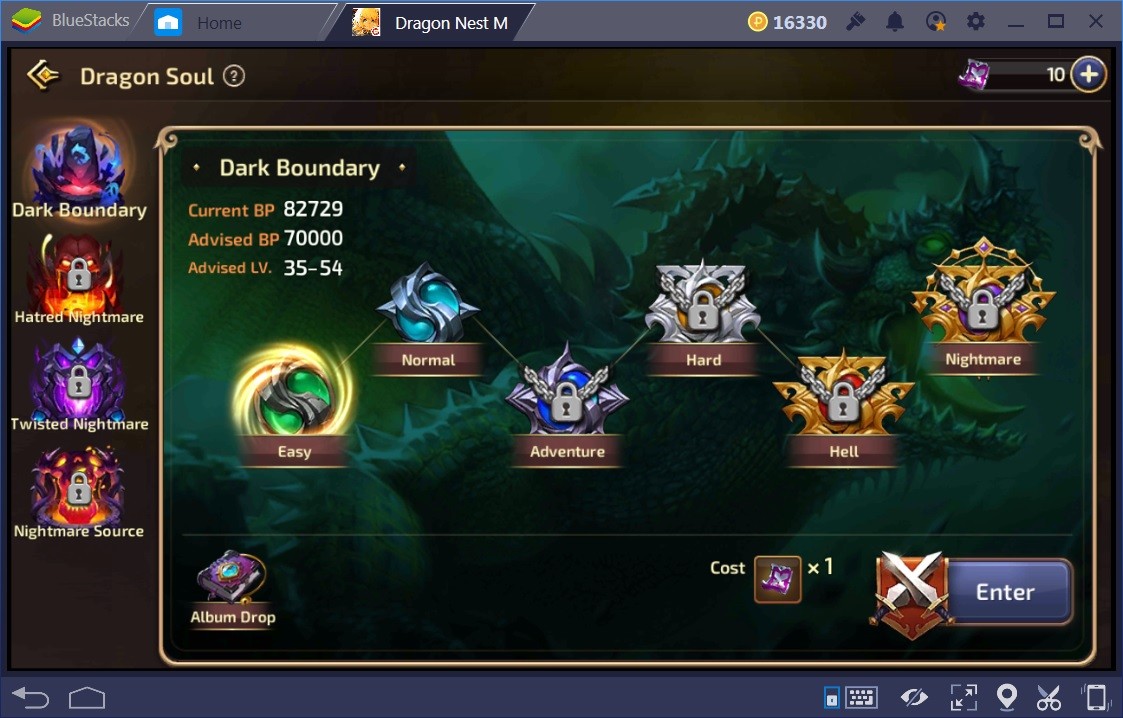
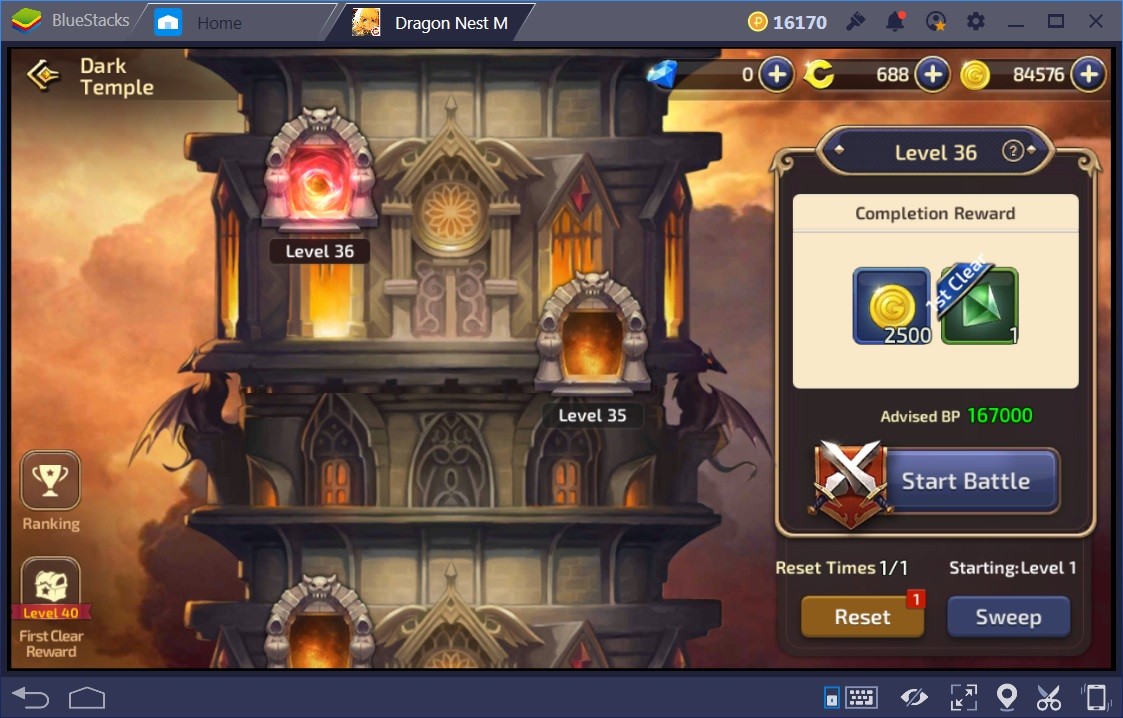
Do pay attention to the Advised BP and your Current BP in here. You will need your BP nice and high above the difficulty you’re about to go up against.
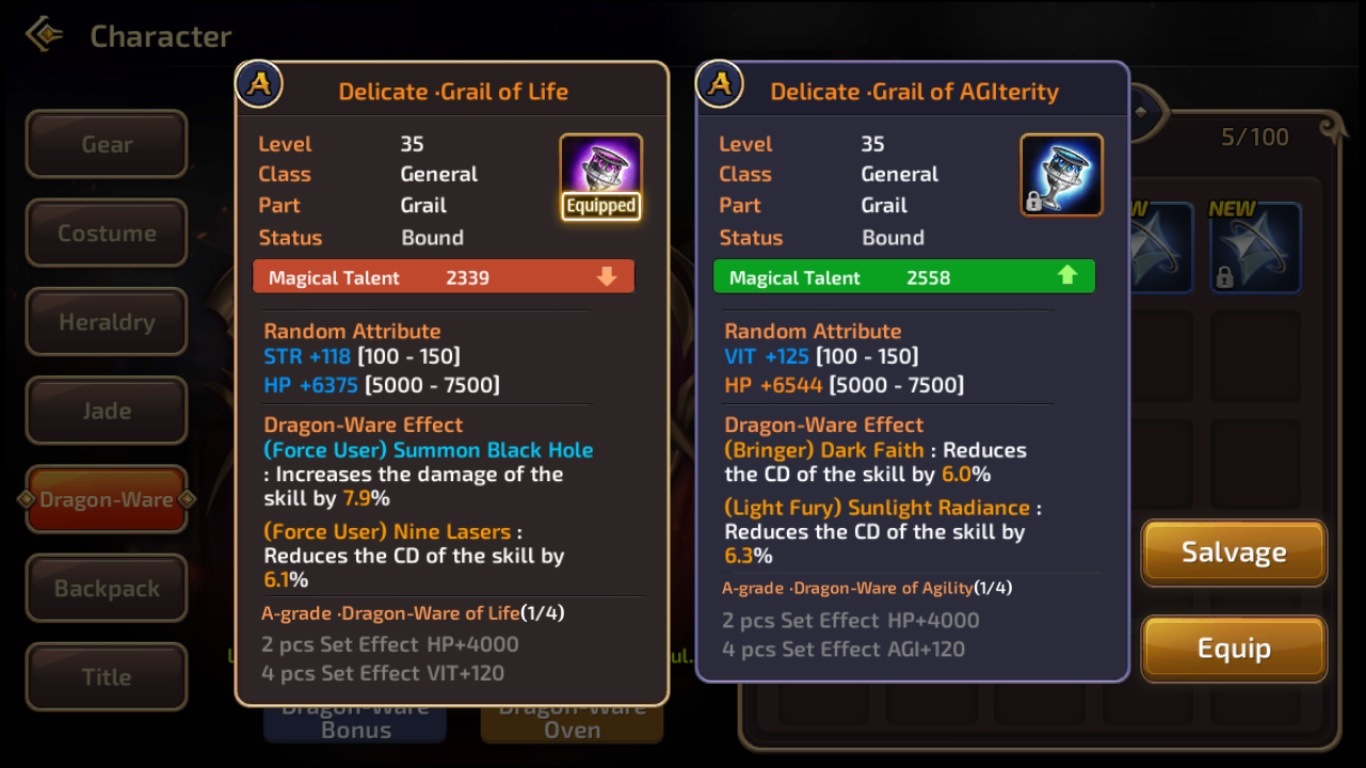
There are 4 different Dragon Ware types to equip. For the first time you gain any of the 4 types, you can just equip it and take the BP boost as is. When you gain more Dragon Wares, you can compare them to the one you have equipped and switch them if you want to. The recommendation is to first base your decision on the Magical Talent. Next, you should base things on the Random Attribute. Don’t worry too much about the Dragon-Ware Effect section until it applies to your character type. The boosts in the Effects section might seem pretty great. But then consider if you’re using the listed skills and how long their cool downs are.
For example, in the above screen shot, the Magical Talent definitely shows a BP boost. That’s a good start. Then compare the Random Attributes. In this case, it’s a magic attack type character. Naturally, the VIT boost would work better compared to the STR boost. If you have 2 or more Dragon Wares of the same quality/rank, you can test your luck with the Dragon Ware Oven. The recommendation most of the time is to Salvage them and get some gold.
Titles
You can gain titles from completing certain achievements throughout the game. Always equip the highest BP gain from a title. It’ll always show up as a red dot on Character/Title section when you gain a stronger title. Titles that have a lower BP compared to your current title won’t show up with the red dot. You can display any title you like.
All things considered, there are many ways to boost your battle power. It’s just a matter of which ones you’re able to use the best!!
We hope you gain immense BP by using the tips mentioned here and do well in the game. Do let us know what you think of this guide.

