BlueStacks Guide for Pokémon Unite on PC - How to Customize Your BlueStacks to Optimize Your Experience

Pokémon Unite has finally made its way into the mobile platform, which means that you can easily play it on PC with BlueStacks, and with all the benefits that come from playing on your computer. From improved graphics and performance, to much better and responsive controls as well as other interesting features, our Android app player can definitely give you the best experience in this new Pokemon MOBA game.
However, before you jump into the battlefield, it’s worth pointing out that, if you’re playing on BlueStacks, you might need to tweak some settings in order to get the best experience with your game. Luckily, we’ve prepared this handy guide to help guide you through the process of optimizing your Pokemon Unite on PC.
Optimizing Graphics and Performance
As is the case with most competitive titles, the game’s performance and visual quality can often make or break your experience, or even affect the outcome of matches. This is because, if you’re struggling with performance issues, this could also lead to dropped inputs, which in turn might make you miss an attack or lose an opportunity to get a kill. Fortunately, BlueStacks is much faster and powerful than any mobile device on the market. And if you have a relatively modern gaming PC, odds are that it’s much better in hardware than a Nintendo Switch.
With that being said, you can optimize your settings on BlueStacks and in-game to achieve great and stable performance throughout your gaming session in Pokemon Unite on PC. Here’s a step by step process on how to get the best graphics and frame rate:
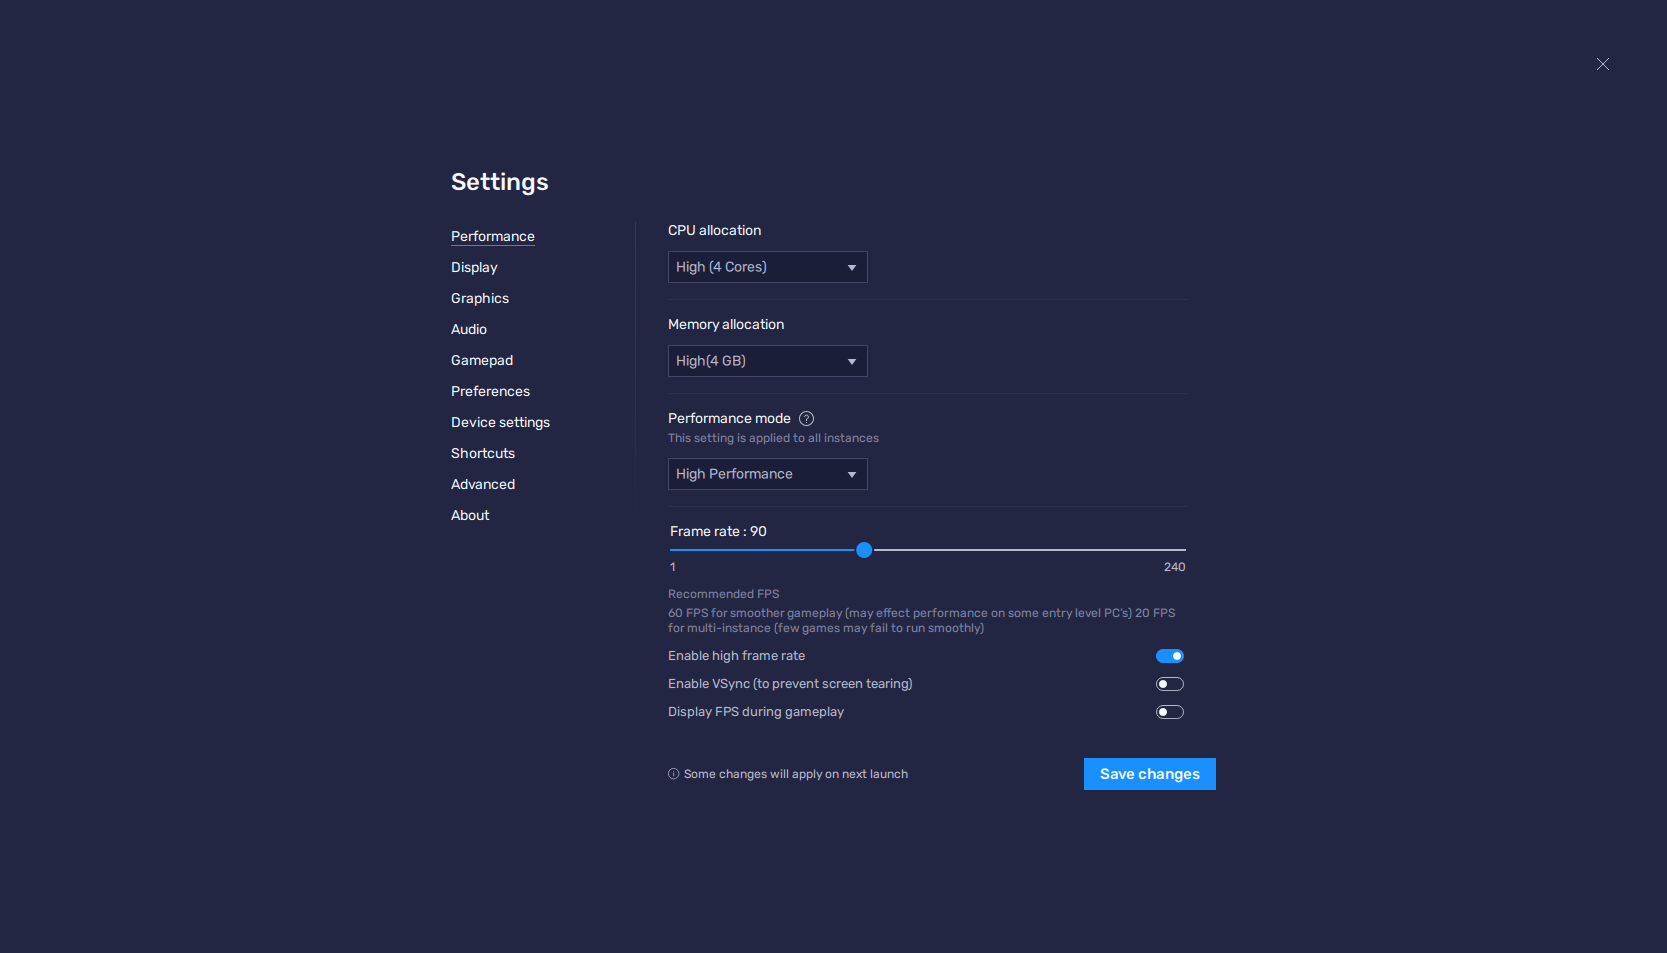
- Go to the BlueStacks settings menu, in the Performance tab.
- In this screen, configure the emulator to use 4 CPU cores, 4 GB of RAM, and set the performance mode to “High performance”. Finally, set the FPS slider near the bottom to at least 60 FPS.
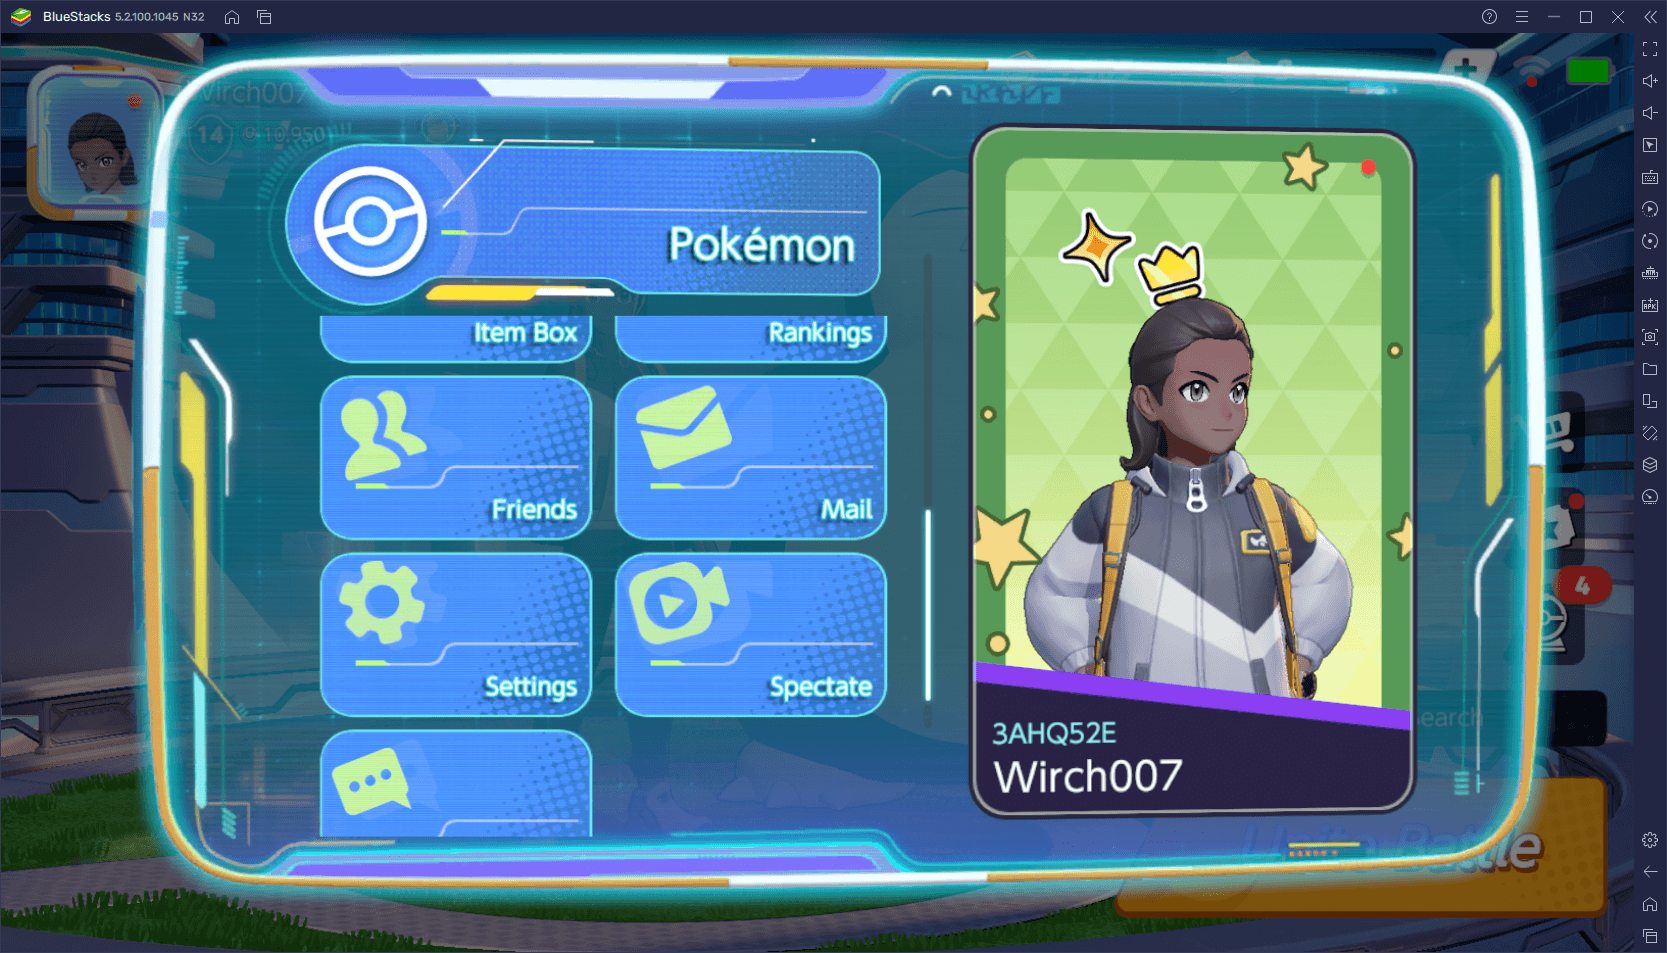
- Launch Pokemon Unite and head into the in-game settings by clicking on your avatar on the top left and scrolling down.
- Set your Frame Rate to “High”. You can also tweak the Graphics Quality setting according to your PC so that you can get the best possible visuals, without compromising on performance.
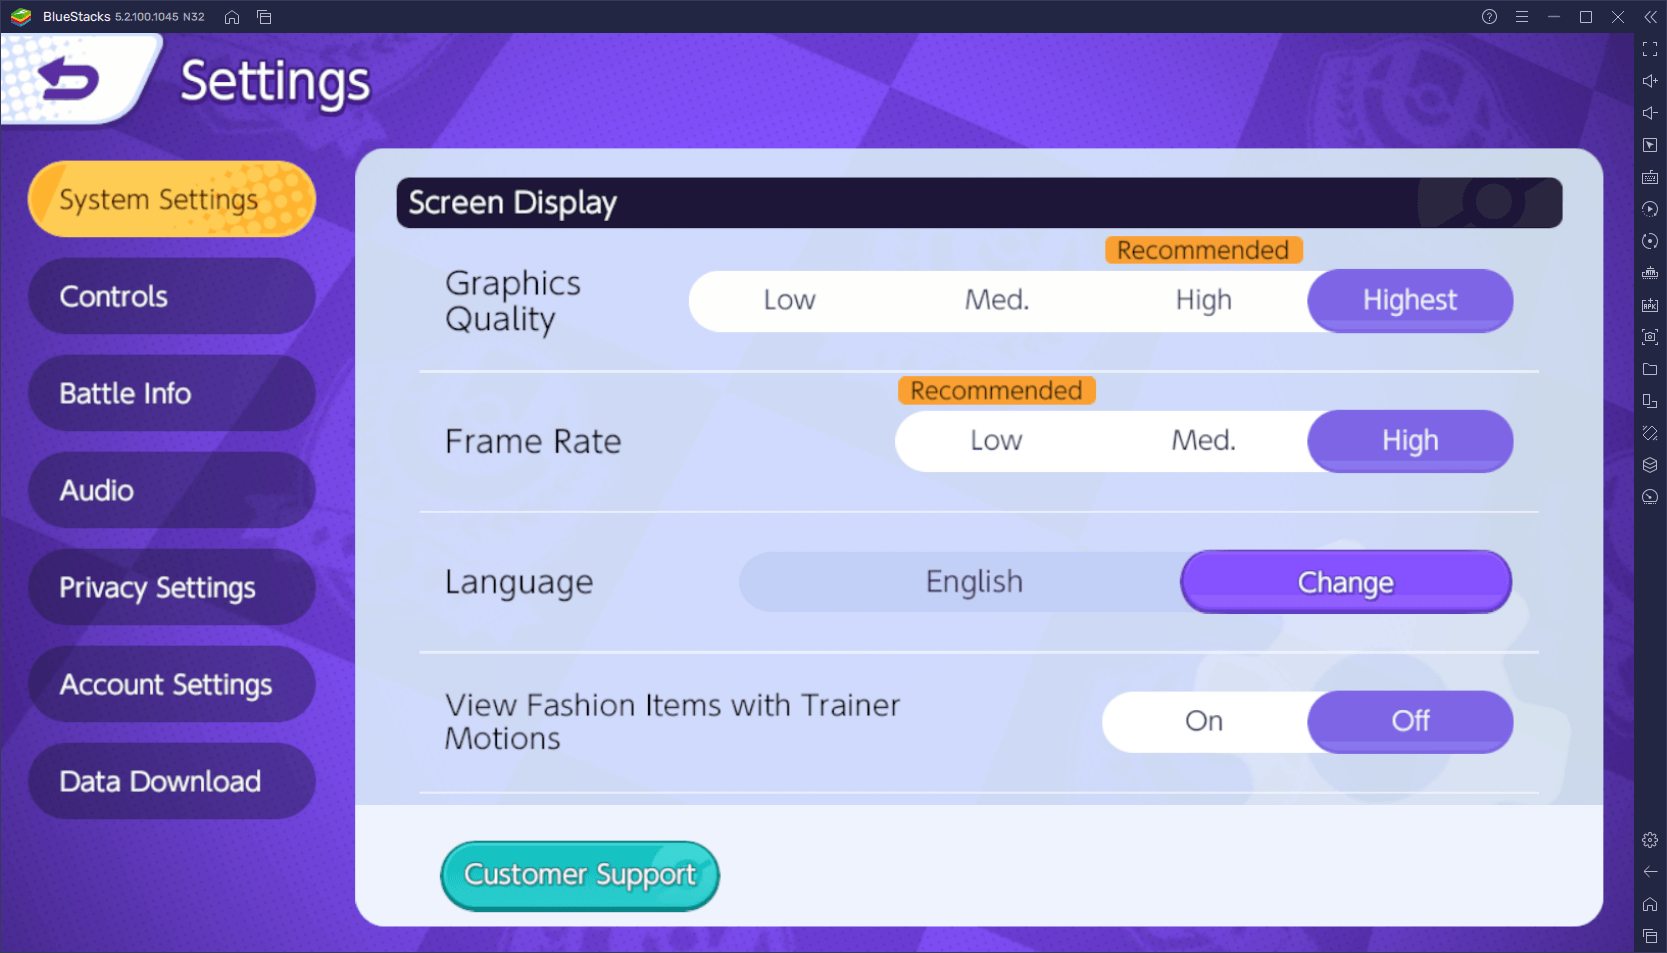
With these settings, you should be playing at a stable 60 FPS, with only minimal slowdowns during matches, at worst. With this smooth performance, you won’t ever miss a beat, at least due to lag or issues related to how the game is running.
Configure Your Keyboard and Mouse Controls
As we mentioned above, one of the benefits of gaming on your PC is the fact that you can use your mouse and keyboard to have much better control over your actions at any moment. After all, our peripherals often handle much better than, say, virtual buttons on a touchscreen. Besides, considering the most popular MOBAs are natively on PC, playing Pokemon Unite with mouse and keyboard feels quite natural.
Luckily, you can freely configure your controls in the game via the Keymapping Tool, by pressing Ctrl + Shift + A while in-game. In this screen, you’ll be able to check out the default control scheme, as well as configure the current bindings by clicking on them, followed by pressing the key you want to replace them with. Additionally, you can also add new shortcuts if necessary, by dragging them from the panel on the right and dropping them on the desired area. Just remember to give them a new binding.
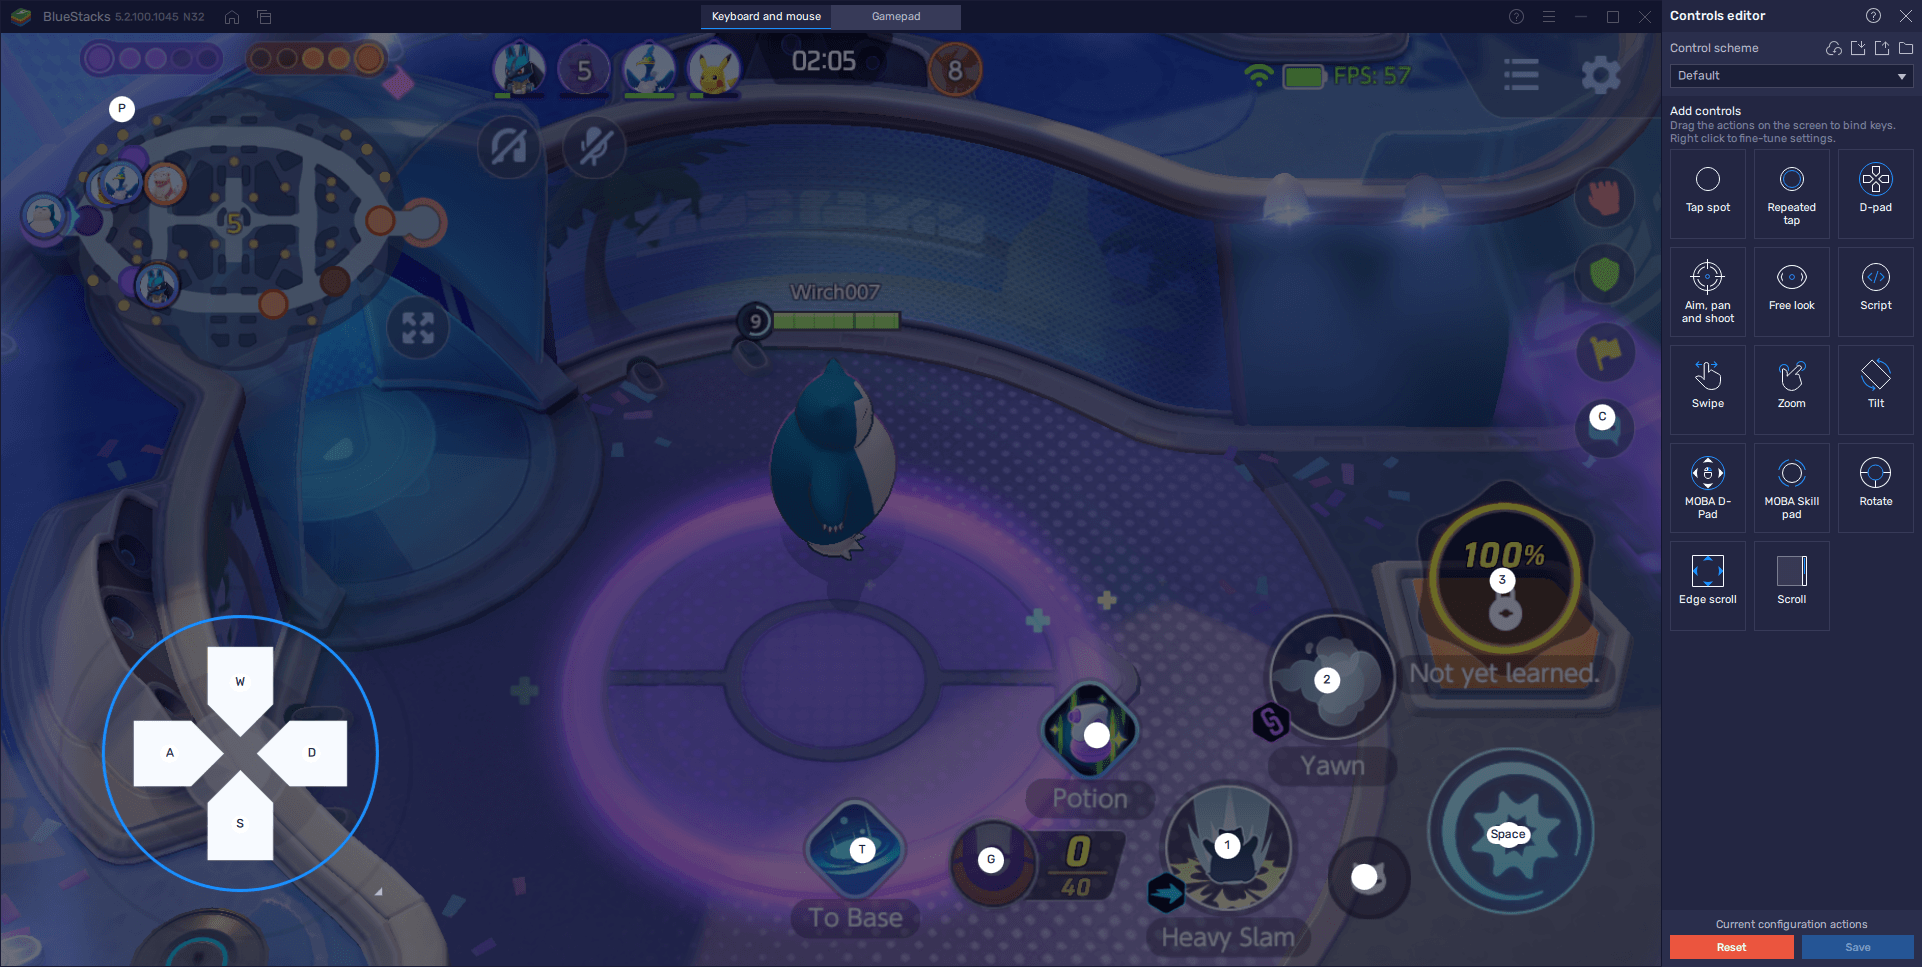
Lastly, when it comes to learning the controls in a new game you just installed, you can always press Ctrl + Shift + F6 to toggle the on-screen overlay. This feature will let you view your current controls at any moment, while in-game, which will serve as a visual aid while you get used to the bindings. You can turn them off at any moment simply by pressing the key combination once again.
Use Gamepad Controls for Maximum Comfort
Maybe you’ve been interested in Pokemon Unite for a while, but simply didn’t have a Nintendo Switch to try it for yourself. If this is the case, then this is your chance. However, even if you can install and play Pokemon Unite on PC, this still might not be as comfortable as gaming on your couch, and with a large TV. Luckily, BlueStacks lets you easily play with your gamepad so that you can just plug your PC to the large living room TV, hook up a controller, and throw yourself on the couch to enjoy an afternoon of comfy gaming.
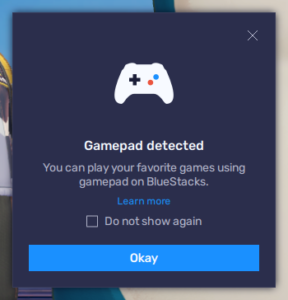
The best part of playing on BlueStacks with a gamepad is that it’s so easy to get started. All you need to do is run the emulator, and simply connect a controller via USB or Bluetooth. If done correctly, the emulator should instantly pick it up, which is indicated by an onscreen message as soon as it does so. Afterward, all you need to do is customize your gamepad bindings in order to use it in combat.
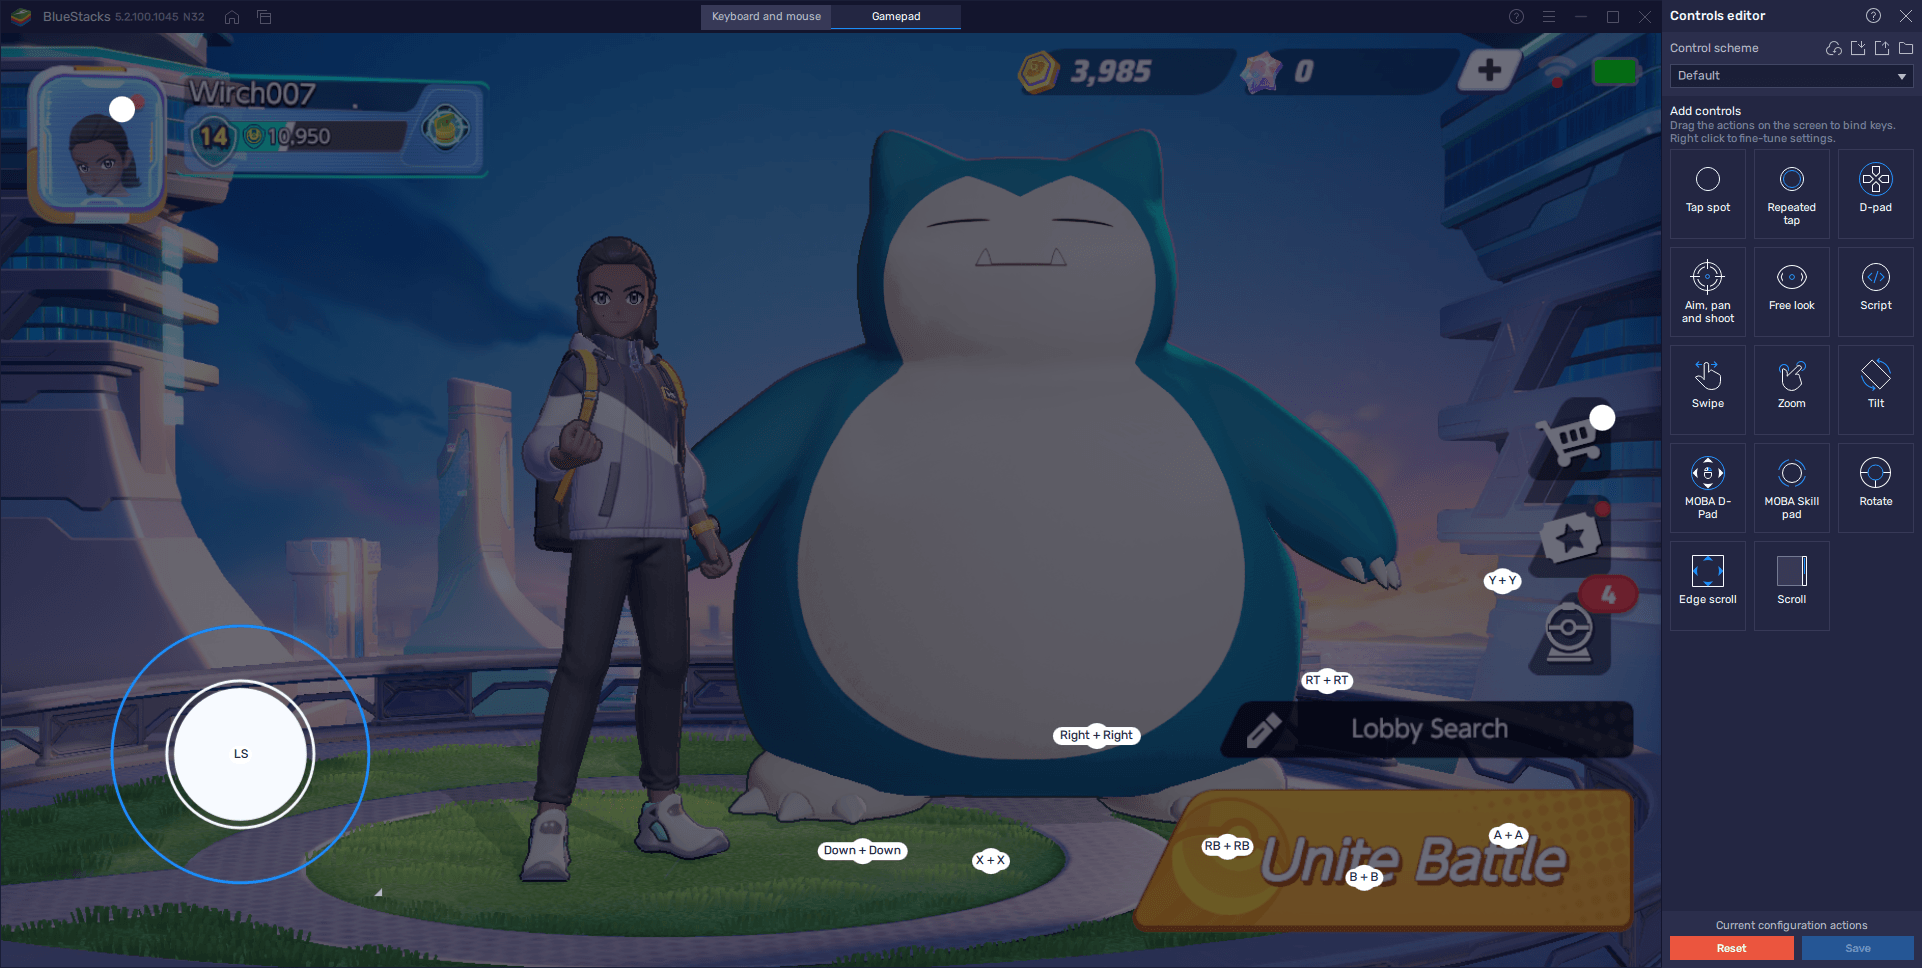
The process for configuring gamepad controls is the same as customizing your keyboard and mouse bindings. Simply open the Keymapping Tool, but instead of tinkering with the KB+M controls, click on the “gamepad” button on the top of the screen, which will swap your control scheme. Once you’re in the gamepad settings, all you need to do is click on the shortcuts and simply set your own gamepad controls, just like in the previous section. And if you need some guidance on how to set up your gamepad control scheme, simply refer to the image we left below.
With these three simple configurations and tweaks, you can enjoy to the fullest your experience with Pokemon Unite on PC, whether you’re looking to play it directly on your computer, or enjoy it on your couch with a gamepad.

