Warpath on PC - How to Use Our BlueStacks Tools to Crush the Opposition
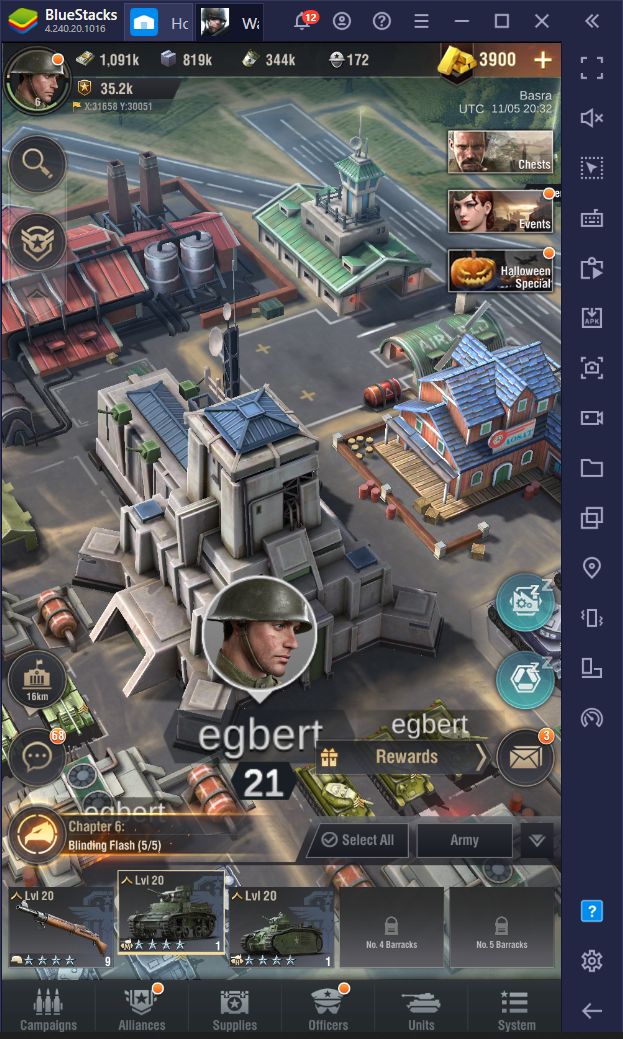
Though Warpath offers tons of fun with its innovative strategy mechanics, it’s a mobile-exclusive title designed to be played on phones. However, with BlueStacks, you can install and play this game on your PC easily, with just a few clicks. In this sense, you’ll be able to enjoy it on a large PC monitor, using your mouse instead of your fingers and unreliable touchscreen controls.
However, while gaming on your monitor is definitely a step up from playing on your small phone screen, this isn’t everything that BlueStacks offers. Our Android emulator has several tools at your disposal that can help to streamline your experience with most mobile games, including Warpath. We recommend taking a look at our BlueStacks Setup Guide to learn how to install and play this game on your PC.
Today, however, we want to talk about how to use our exclusive BlueStacks tools when playing Warpath, so that you can destroy your enemies with ease.
Crank Up The Graphics to the Max Without Any Issues
Though not technically something you can do with our BlueStacks tools, we wanted to begin by pointing out that Warpath has graphical settings that you can adjust in the options menu. If you’re playing this game on PC, and your computer fulfills the recommended requirements for BlueStacks, we recommend setting them to the max settings so that you can enjoy the best visuals and framerate, and without having to worry about any of the issues inherent to gaming on your phone such as overheating, and increased battery consumption, or any other nasty problems.
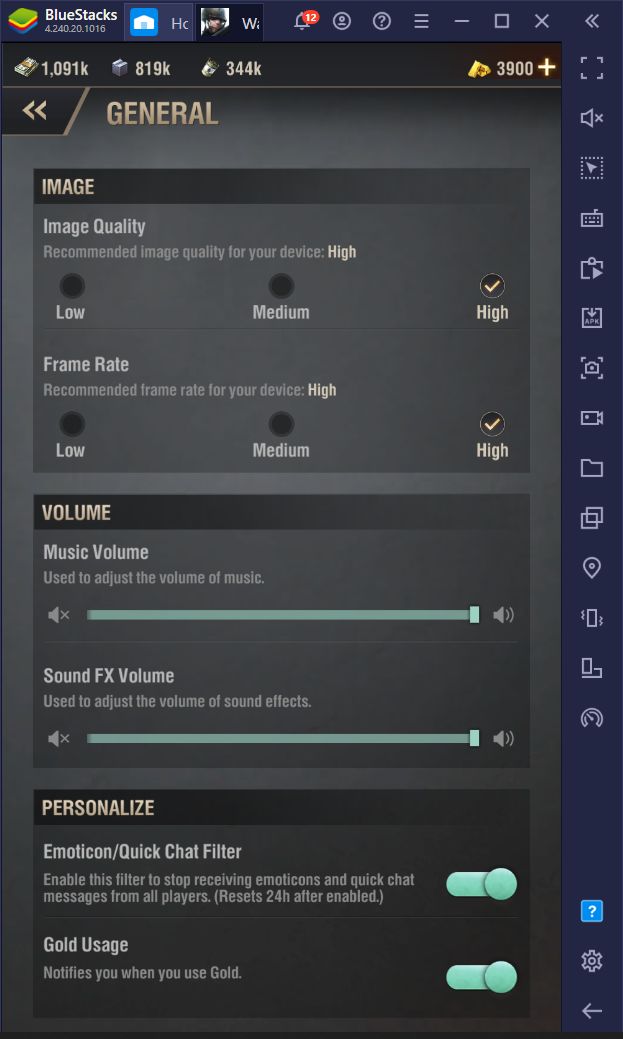
The visuals in Warpath are set to the lowest settings by default, so remember to adjust them accordingly before you start playing.
Navigate Menus and Control Your Army With Ease Using the Keymapping Tool
Now that we got the graphics out of the way, the Keymapping Tool is the next best way to improve your experience in Warpath as it allows you to access menus, select your army, and even perform certain upgrades, simply by using keyboard shortcuts and without having to click back and forth on your screen.
The way this feature works is that, by pressing Ctrl + Shift + A, you will access the Keymapping Tool proper and, by dragging and dropping the predefined shortcuts on the rightmost panel, to any location on the screen, you can then bind these functions to any button on your keyboard. In this manner, you can do all sorts of things without ever touching your mouse.
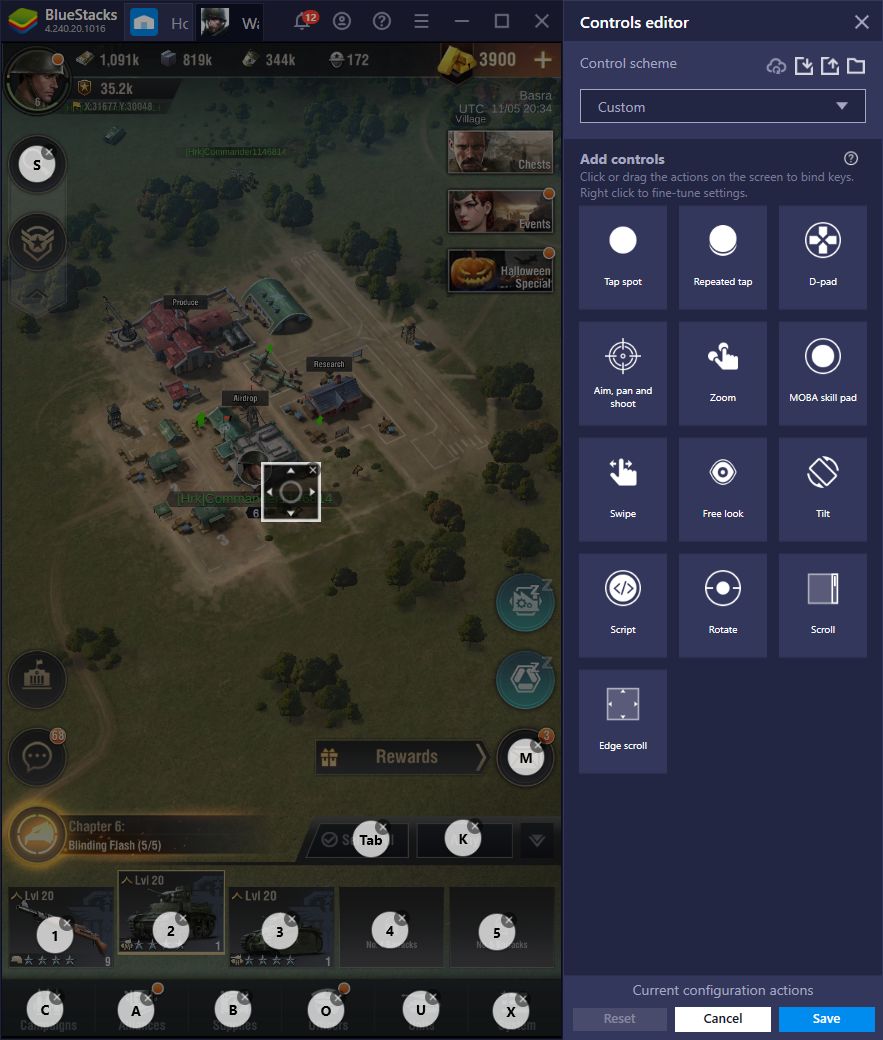
Some useful functions for Warpath that come to mind are the function that controls the zoom, so that you can zoom in or out with your keyboard. Another great feature that was recently introduced to BlueStacks, is the Smart Edge Scrolling feature, which allows you to pan the camera across the map simply by moving the cursor to the edges of the screen, much like in a PC RTS game.
Like these two, the Keymapping Tool has many useful features that can significantly streamline the way you navigate menus and control your troops in Warpath. We suggest experimenting with different setups until you create the one that works best for you.
Automate Research and Production With the Macro Recorder
One of the most important parts of optimizing your progression in Warpath, as we mentioned in our tips and tricks article, is to always produce materials in the Engineering Center, and to constantly be researching new tech in the Research Station. However, both of these tasks can take several minutes, or even hours to complete, and unless you’re online 24/7, odds are that you’ll have a few hours of downtime between projects.
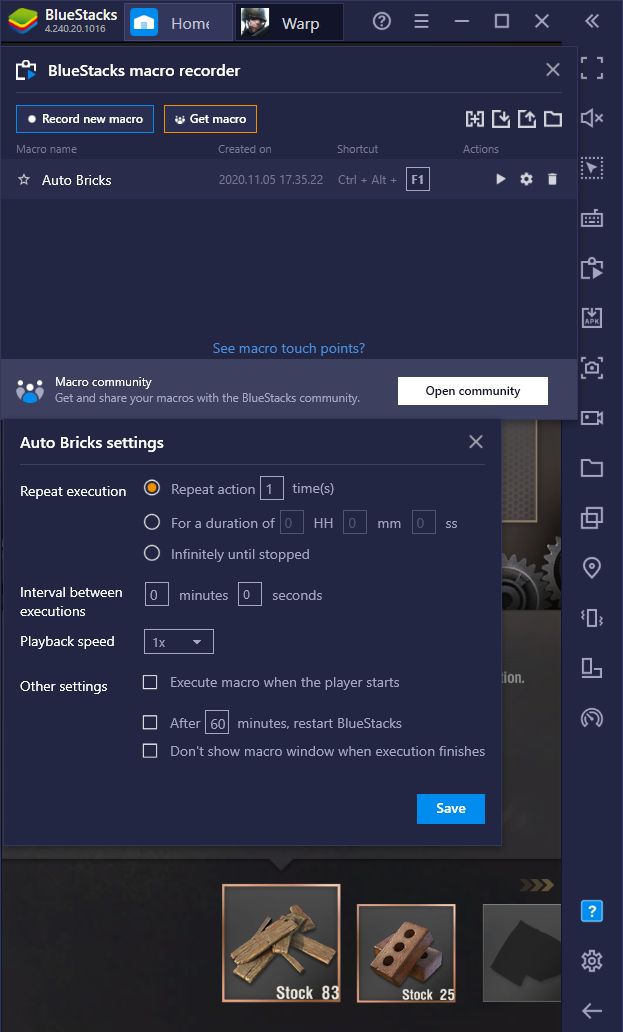
However, with the Macro Recorder, you can easily automate certain tasks in this game, and reduce your downtime considerably. For example, in order to automate the production in your Engineering Center, you must record yourself issuing an order, and then use the macro to perform this task with the press of a single button afterward.
What’s more, you can also set the macro to loop automatically after a certain time, further automating your production. For instance, if producing 6 Bricks takes around 30 minutes, you can set the macro to repeat at around this time, and if you did it correctly, your BlueStacks will automatically pick up the products and issue another order, all without you ever having to touch the game. The macros even work when the emulator is minimized or in the background, so you can easily be doing something else on your computer, and still automate your production.
Though it might require a bit more experimentation, and creating a custom macro for every research project (due to differences in research times), you can also automate research projects in the Research Station. If you’re going to be away from the computer for a long time, you can simply record yourself researching a specific technology, and then set the macro to repeat automatically at around the time when the project will finish, allowing you to research two or more levels while you’re away.
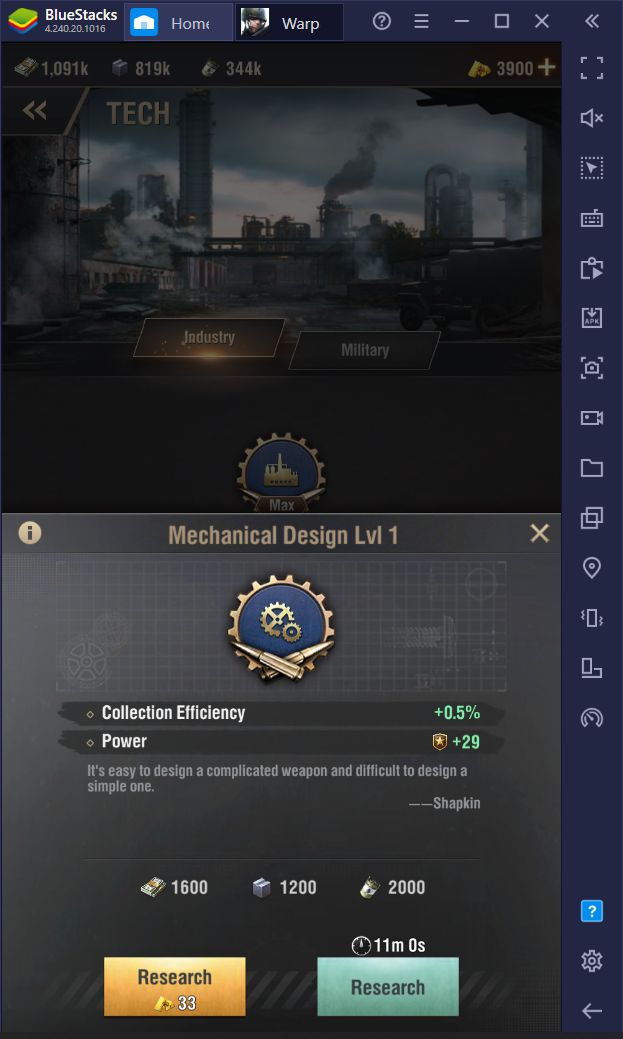
The sky’s the limit when it comes to all you can achieve by using macros, so give it a try and let us know how it went for you!
Multiply Your Firepower With the Instance Manager
One defining feature of the mobile strategy genre is that, more often than not, you’ll need help from other players if you want to survive. This is because, if you’re on your own, you will likely get targeted by big alliances that want to loot your resources, or simply want to eliminate you for being in the wrong place at the wrong time.
In this sense, you will always want to join a good alliance that will help to keep you safe at all times. Most players looking to raid your base will have second thoughts if they might anger an entire alliance in the process. However, finding a good active group of players to join is difficult as most of them either end up getting destroyed after a few wars, or their players simply end up quitting and the alliance slowly dies off with time.
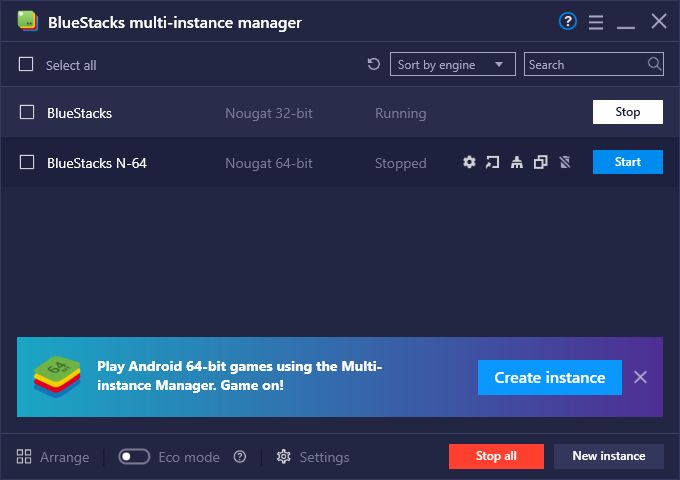
However, with the Instance Manager, you can effectively stop relying on other players, and simply play using multiple accounts at the same time. Instead of developing just one base, this tool allows you to create several BlueStacks instances, and access Warpath from different Google accounts, effectively letting you have numerous bases on screen.
For strategy games like this one, the most common uses of the Instance Manager is either to develop multiple towns equally and create an alliance using your different accounts, or to develop a main base and use the other alt accounts as farm cities to bump up your resource production. If anything, by creating an alliance using your different accounts, you can reap the benefits of playing with other users, without actually having to rely on other players.
Have you already tried using our BlueStacks tools to improve your experience with Warpath? We’d love to hear all about the creative ways you use our features to streamline your gameplay in this title, so feel free to leave us a message in the comments below!


