BlueStacks Macros - The Marvel of Automation
We’ve all been there: Playing an awesome gacha game, farming to power up your party, when it suddenly hits you: “I don’t want to do my dailies today!” We’re no strangers to the grind ourselves. Whether its farming stages for mats in Epic Seven or working on any of the many activities required to develop your base in a war game, some tasks are simply not fun to do once you’ve done them thousands of times in the past. If only there was a way to skip the grind…
Well, if you’re on BlueStacks build 4.130 or higher, you’ll have access to the Macros, a feature that allows you to record yourself completing some of these monotonous tasks, and then use these recordings to automate them in every subsequent attempt. When used correctly, this tool is a veritable marvel of automation, allowing you to skip the boring parts of a game, and focus only on the fun aspects such as beating levels, demolishing your enemies in PvP, or just having a blast, in general.
How to Access BlueStacks Macros
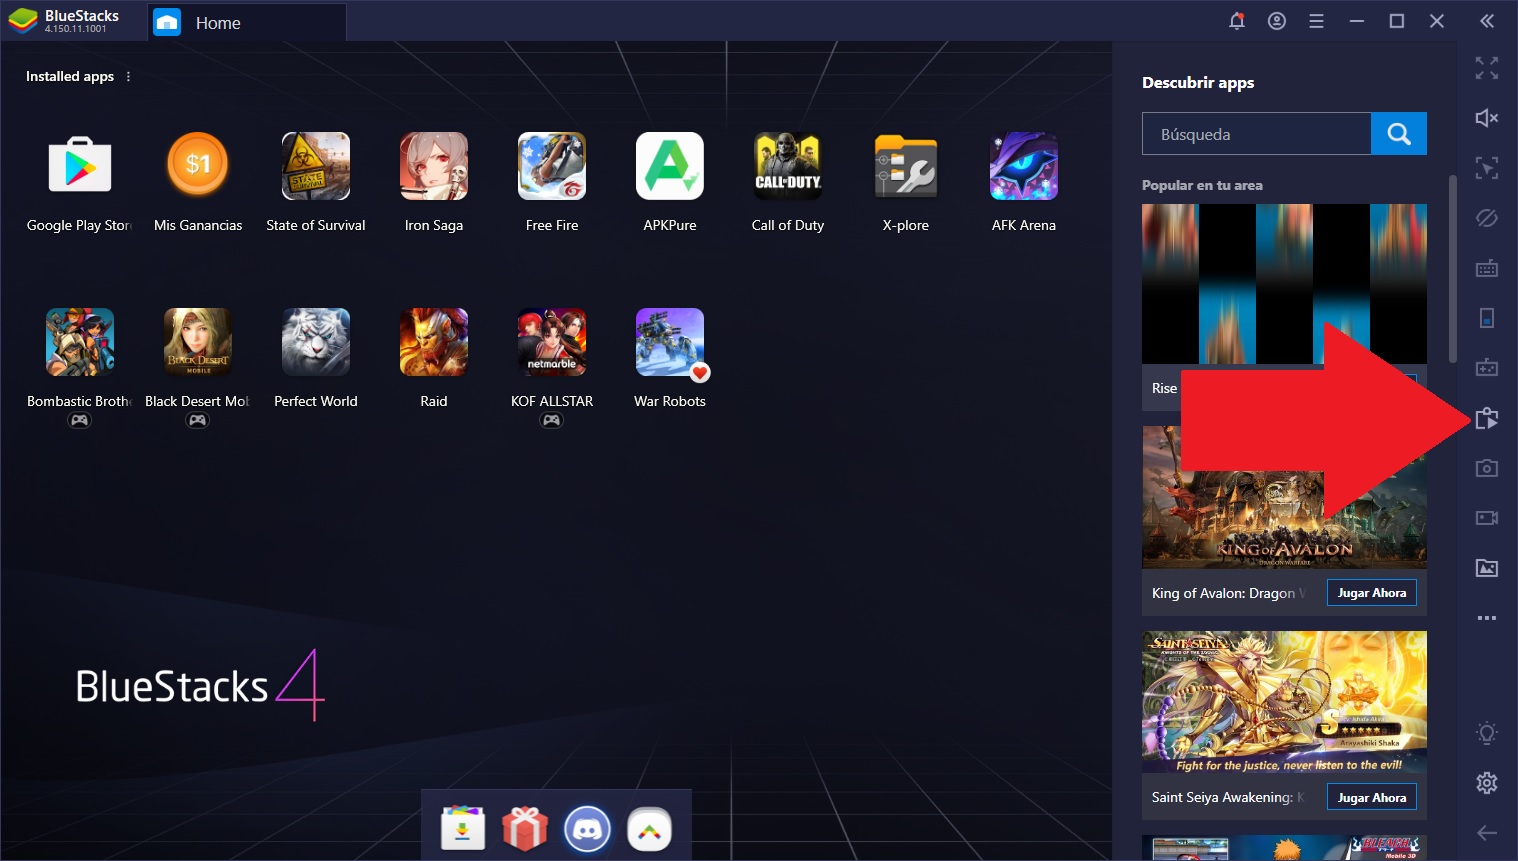
You can find this useful tool on the right panel of your BlueStacks window, represented by the icon with a clipboard. Alternatively, you can also open Macros by pressing Ctrl + Shift + 7.
Once you’ve opened the Macro Recorder, you can choose to do several actions, including record new macros, delete old ones, or even merge existing macros (which we’ll get to in a bit). Of course, before you’re able to make use of this tool, you’ll need to create a few macros.
Recording New Macros
As its name implies, this tool works as an actual recorder, which means that, at least once, you’ll first need to record yourself doing the task you wish to automate.
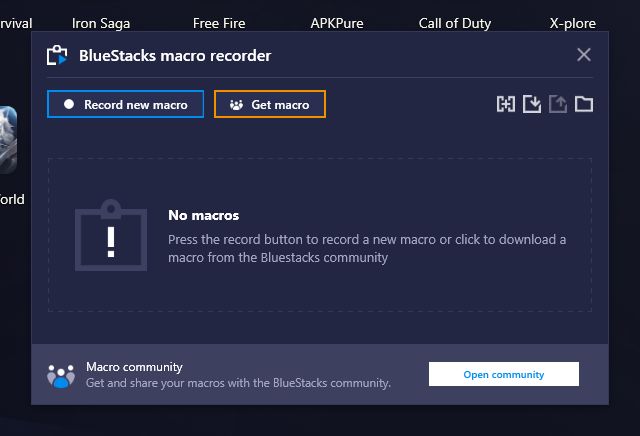
When you click on “Record New Macro” the macro window will disappear and a timer will appear on the top panel of the BlueStacks windows, indicating that the tool is running. At this moment, you will have to carefully record yourself completing the activity as methodically as you can. This means that you shouldn’t take any shortcuts or use circumstantial tools (i.e items) that won’t be available on every attempt, or else the macro will fail in the attempts where the said tools are actually unavailable.
If there are loading screens when you’re recording your macro, make sure to give it at least 5 to 10 seconds after each screen before continuing, to account for the times where loading might take longer than usual. Once you’re done, you must click the stop button to save your macro, after which the recorder window will appear once again.
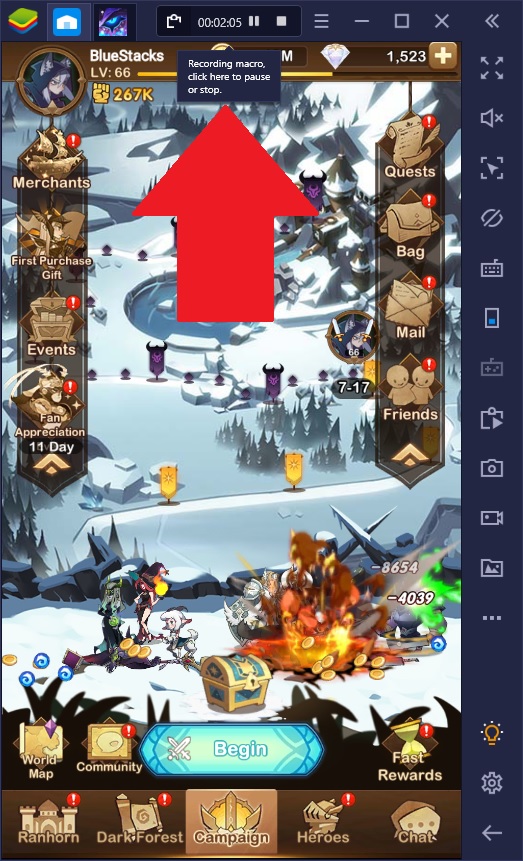
At this point, you must give your macro a name, and a key binding with which you will use it in the future. Make sure to label your macros correctly so that you always know what they do. Trust us; it’s easy to get these tools mixed up when you have tens of macros on your list.
Customizing Macros
You can customize a lot of your macros’ behaviors via the gear icon beside each item. In this new window, you can set a macro to loop for a number of times, across a certain time period, and even to have a delay between each execution.
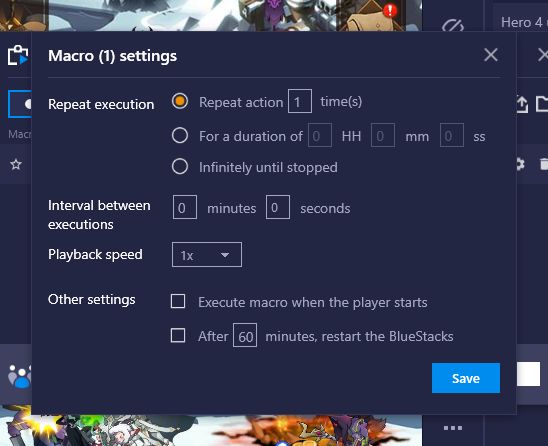
These parameters are ideal for when you want to automate actions across long periods of time, such as when you’re at work and would like to leave your city farming for resources. In these cases, BlueStacks will collect said resources and issue upgrades automatically. You can even configure a macro to launch as soon as you run BlueStacks so you don’t waste any time waiting for the games to load.
Merge Macros
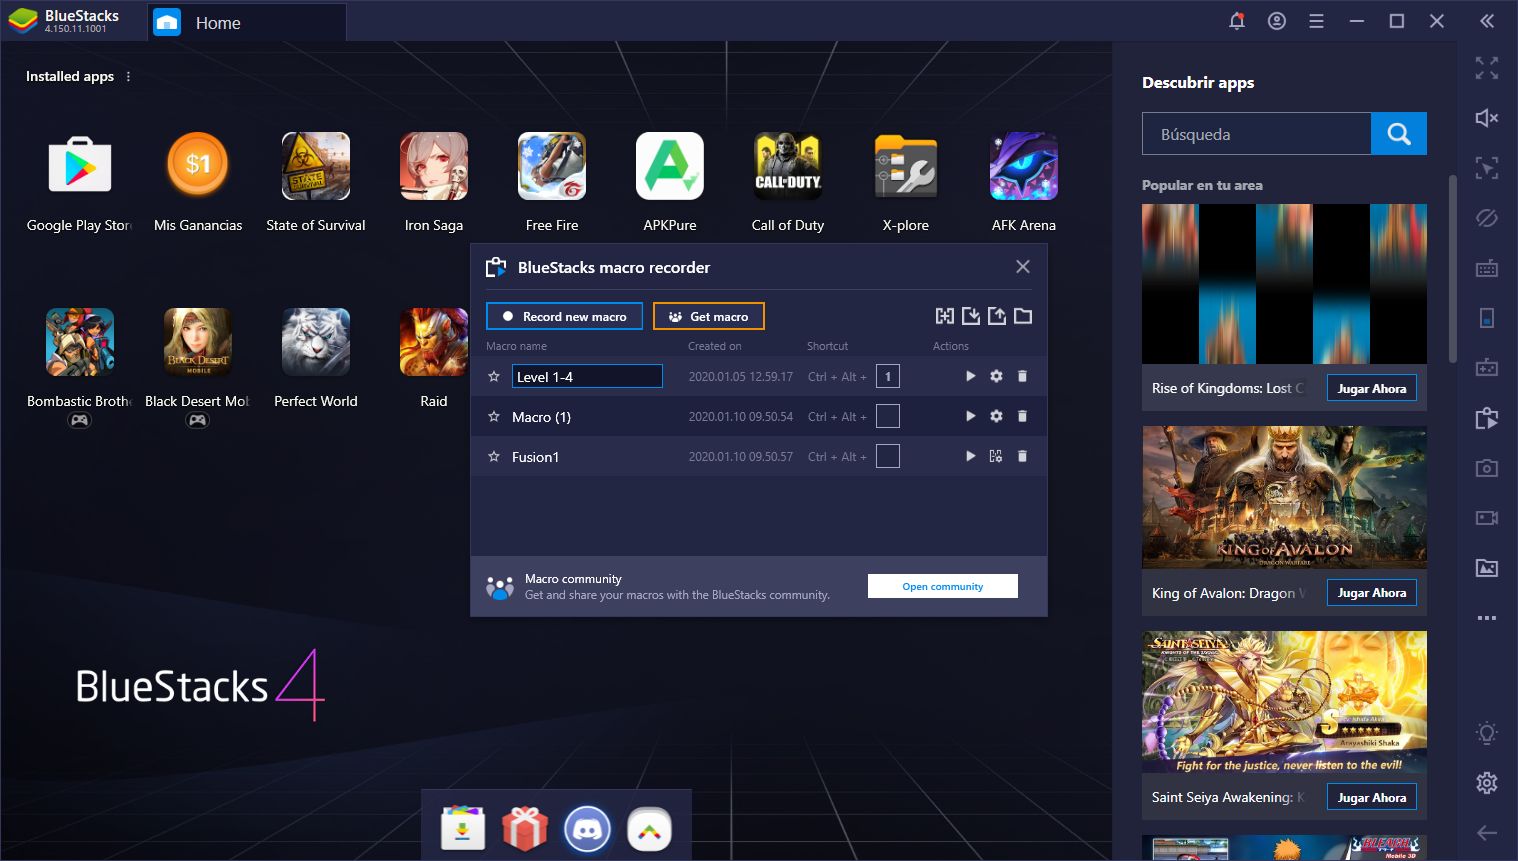
Aside from recording, deleting, and customizing your macros, you can also merge two or more of them to create a longer macro that could be useful in certain situations. The merge macro feature is accessed through its respective button in the Macro Recorder screen, which is the one that looks like two squares joined by a + icon.
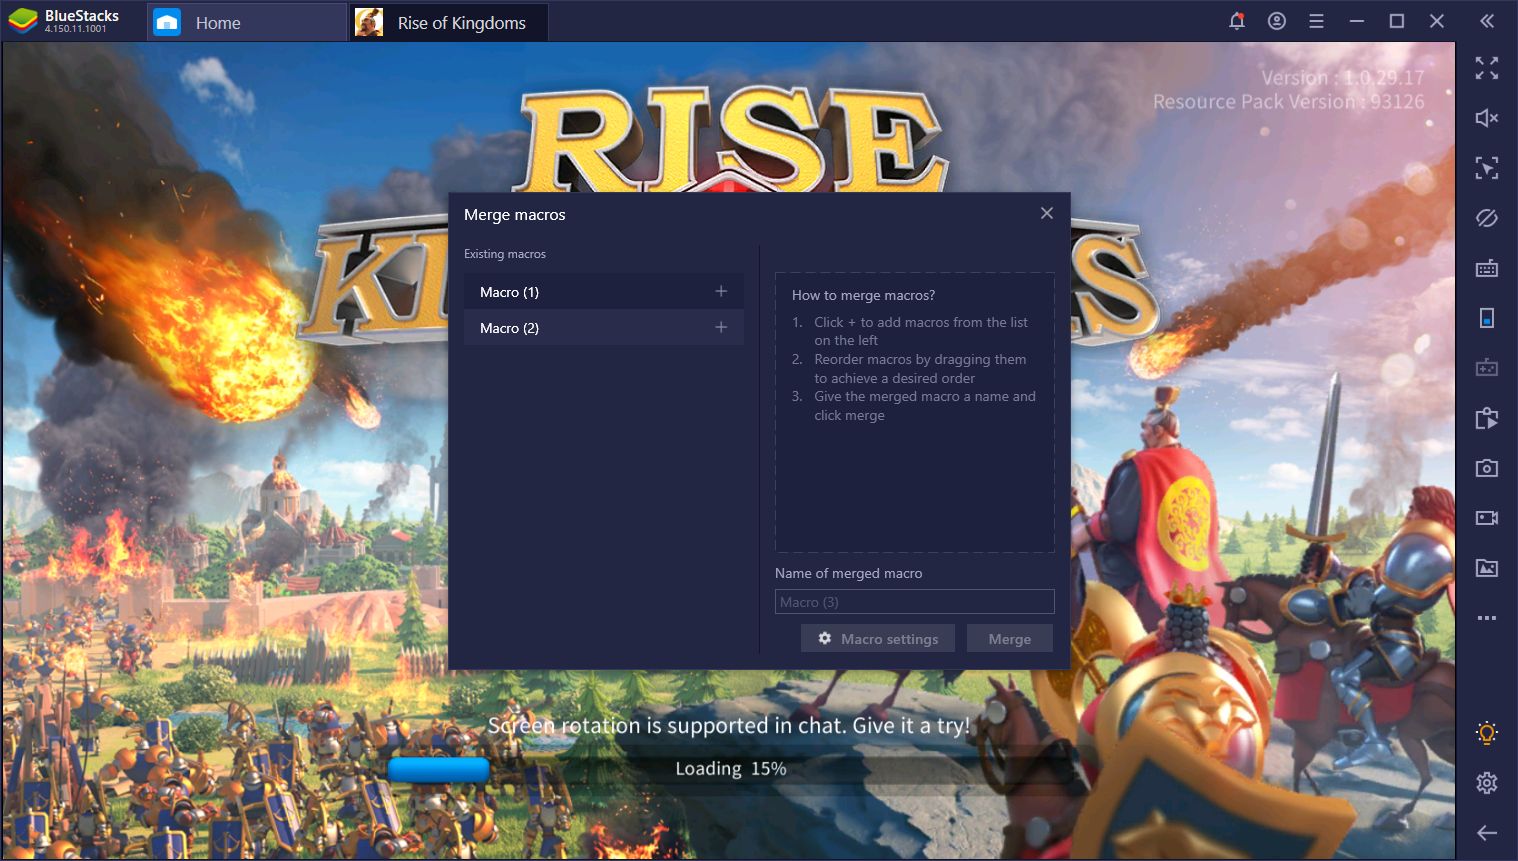
These macros are useful in specific cases where you need to combine the functionalities of two or more of them. Consider that, in Rise of Kingdoms, you can have a macro that skips the initial intro cutscenes, and another for completing the tutorial quests. By merging the two, you can automate starting the game without having to go through the boring starter quests. And this is just a single example of what you can do with this feature.
Importing and Exporting Macros
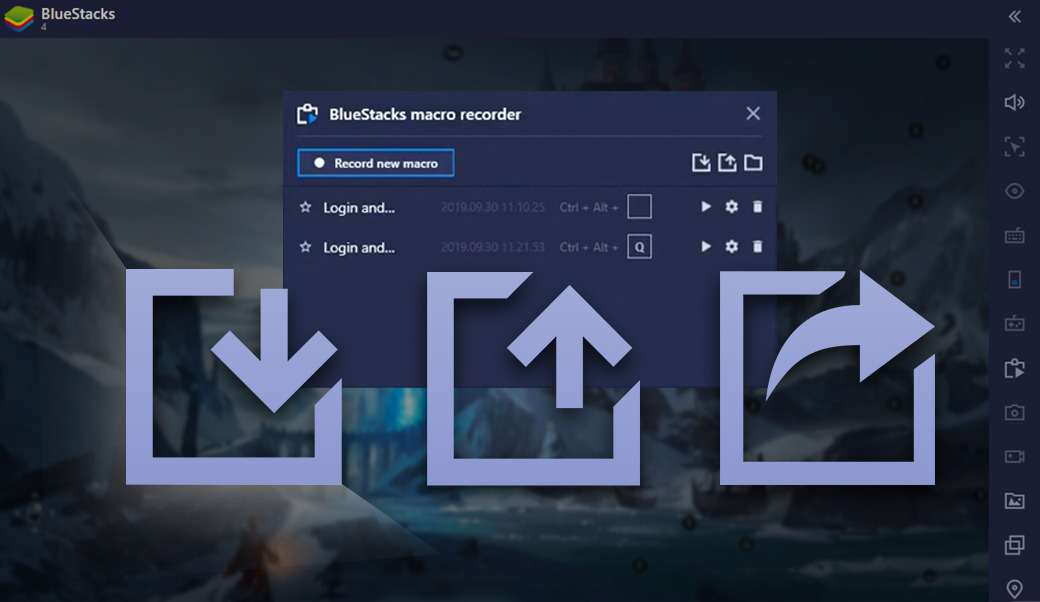
One last feature we’d like to talk about is the possibility of exporting your macros, or importing the ones created by yourself on other computers or by other users. By clicking on the “Export” button, you can save your created macros to any directory on your PC as a .json file. By backing up these files on a flash drive, or perhaps on any cloud service, you can keep your precious macros safe at any time. On the other hand, by clicking the “import” button, you can browse to these files on your computer, and add them to your BlueStacks.
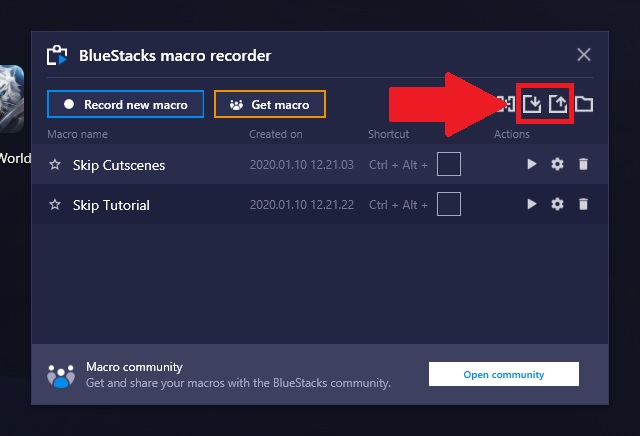
This feature is great not only for keeping your data safe but also for sharing your creations with your friends and other users so that they can play just as you do. And speaking of sharing, did you know there’s a community of users dedicated to creating useful and versatile macros for your favorite mobile games? While we’ll go into further detail on this feature in another article, you can access this community via the “Get Macros” button. If you want to find the best macros to optimize your progress in your favorite Android games, then this is the ideal place to look.


