Dorothy Operator Guide: Mastering the Trapmaster Specialist in Arknights

Arknights introduces a truly unique Specialist with Dorothy, a 6-star Trapmaster who uses deployable traps—called Resonators—to control the battlefield from anywhere. Unlike most units in this strategy game that rely on direct presence or line-of-sight, Dorothy creates a layer of tactical gameplay by allowing players to pre-plan trap locations, disable enemies with status effects, and deliver powerful nukes when timed right.

While not a frontline powerhouse or high-sustain DPS, Dorothy shines in her ability to offer global support through smart trap placement. Her skills change how each trap behaves, giving you flexibility between burst damage, stalling, and AoE crowd control. Understanding these options and managing her trap limit effectively is key to using her well.
Trapmaster Overview: How Dorothy Works
Dorothy falls under the Trapmaster Specialist archetype, a subclass that lets her deploy traps that don’t count toward the unit limit. This gives her a major advantage in flexibility—she can offer full support while taking up very little space in your deployment plans. Resonators are triggered when a ground enemy steps on them, causing a skill-based effect like damage, slow, or bind. However, traps can’t be placed on occupied tiles, nor can they hit airborne or invisible units.
Trapmasters function a bit like Marksman Snipers in terms of range and base attack speed, but Dorothy trades raw damage for tactical control. Each skill changes the trap’s behavior, so the role she plays will depend entirely on which one you choose.
Here are some quick facts about Dorothy:
- Class: Specialist
- Archetype: Trapmaster
- Position: Ranged
- Tags: Summon, Crowd-Control
- Trait: Deploys Resonators that trigger when stepped on by ground enemies
- Availability: Standard Headhunting (6★)
Talents and Trap Mechanics
Dorothy’s talents define her effectiveness more than her basic stats. Her first talent, Resonator, gives her the ability to store and deploy traps—starting with 4, scaling up to 8 at Elite 2, and further increased by potentials. She automatically places 1 or 2 Resonators within range upon deployment, which means she can be effective from the moment she hits the field.

Her second talent, Dreamer, adds a stacking ATK buff every time a trap is triggered. Each activation adds +2% ATK (up to 10–12 stacks), letting her gradually build power over time. This benefits all three of her skills but is especially impactful when using fast-respawning Resonators.
These traits make her ideal for stages with consistent waves of enemies or slow-moving bosses where she has time to ramp up damage and prepare layered traps.
Skills: Trap Variations and Tactical Control
Dorothy’s core strength lies in how her traps behave depending on the skill she’s using. Each of her three skills fundamentally changes what her Resonators do when triggered, and because they’re all passive effects, you don’t need to micromanage activations—the strategy is all in the setup. Whether you want pure damage, stall utility, or full-map AoE pressure, there’s a trap variation for that.
Her skills all share one very important trait: when activated, they grant her one Resonator. This gives her a reliable way to cycle trap usage throughout the battle. Choosing the right skill for the stage you’re playing makes all the difference in how effective she’ll be. Here’s how each skill works in practice and what situations they shine in:
Skill 1: Dangerous Entity Removal
This is Dorothy’s most straightforward skill and her best choice if you want consistent single-target burst and a global DEF shred. When a trap is triggered, it deals heavy physical damage (up to 450% ATK at max level) and reduces the target’s DEF by 35% for 5 seconds. It also immediately gives her one new Resonator every time the skill is activated.
This skill can help with armored enemies and supports physical DPS operators like Exusiai or Schwarz. Its global potential means you can assist allies anywhere on the map, provided a trap is in place. However, its biggest drawback is that it only affects one target, so it doesn’t scale well against groups.
Ideal Use Cases:
- Supporting lane-holders like Mountain or Lappland against high-DEF enemies
- Global DEF reduction utility
- Single-target damage support in fast-clearing stages
The main strategy with S1 is to keep placing traps on cooldown and anticipate where the most heavily armored enemies will pass. Displacement operators, like pushers or levitators, can help re-open tiles to re-trap enemies that are otherwise stuck on an occupied space.

Skill 2: Quicksand Generation
S2 is all about crowd control. When a Resonator is triggered under this skill, it binds all nearby enemies in a small AoE for a few seconds. If only one enemy is hit, the bind duration is extended up to 6 seconds, making it one of the most powerful single-target stalls in the game.
While the AoE and control uptime isn’t as strong in multi-target situations, the skill becomes incredibly valuable against elite threats or bosses that need to be delayed. With careful timing and the help of displacement units, you can create near-infinite stall loops on certain enemies.
Ideal Use Cases:
- Delaying high-threat bosses or elite units
- Controlling blinkers like Crownslayer or Blacknight
- Pairing with high burst executors (like Phantom) to maximize bind duration damage
One challenge with S2 is the inability to place traps directly under occupied tiles. To work around this, consider using push-type operators to move enemies off a tile just long enough to plant another trap. This trick keeps the bind chain going and buys even more time for your main DPS.
Skill 3: High-Speed Resonating Troubleshooter
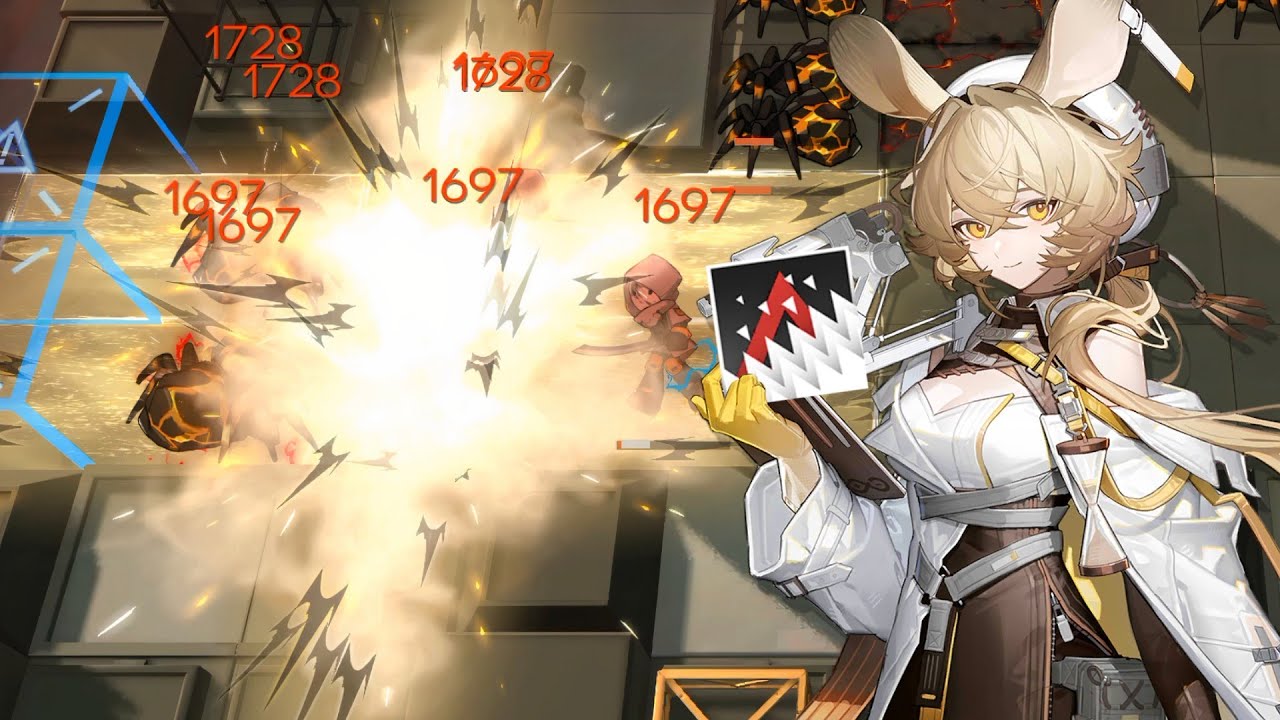
Dorothy’s S3 is her most popular skill, and for good reason—it provides continuous AoE Arts damage, global range, and the ability to trigger chain reactions. Each trap detonates in a cross pattern and slows enemies on impact. The best part? Detonated traps also force nearby Resonators to trigger after a delay, letting you set up explosive domino effects.
This setup makes S3 incredibly good for stage control, enemy wave clearing, and constant map-wide pressure. With a 350% ATK modifier at M3 and a manageable SP cost, it’s one of the most reliable trap-based nukes in the game.
Ideal Use Cases:
- Clearing waves with consistent Arts damage
- Soloing or duo-clearing certain stages with smart trap placement
- Combining with SP chargers or ATK buffers for scaling damage over time
Since traps explode in a pattern and can chain, learning trap layouts and timing becomes important. It’s not about raw DPS but about placement, rhythm, and adaptation. A well-prepped S3 cycle can devastate a squad of enemies before they reach your frontline.
No matter which skill you choose, Dorothy’s gameplay is built around trap planning and map control. While S3 is her most flexible and high-impact option, S1 and S2 still serve valuable niche purposes and make her one of the most adaptable Specialists in the game. Mastering when and where to deploy her Resonators is what separates casual users from players who get the most out of her kit.
Building Dorothy: Where to Invest
If you’re planning to use Dorothy regularly, S3 is the clear M3 priority. It scales the best, fits the widest number of situations, and rewards skilled planning. S1 is worth considering if you want her as a physical support unit or need global DEF shred. S2 is niche but amazing for stalling, so it’s a good side investment if you’re working on stall comps or executor setups.

Recommended Development Path:
- Promotion Priority: Elite 2 to unlock S3 and her full Resonator count
- Skill Mastery: S3 > S1 (for support) > S2 (for stall setups)
- Modules: TRP-Y module adds RNG double-damage trap effect and boosts ATK/HP
- Potentials: Potential 5 enhances Dreamer’s stack cap and adds +2 to deployable Resonators
Her Operator Module is also worth picking up. The double-damage trap proc can make a real difference in longer battles, especially if you’re running S3 and stacking ATK buffs through Dreamer.
Synergies and Team Composition
Dorothy doesn’t work in a vacuum—her success heavily depends on the rest of your team. Operators who manipulate enemy position (pushers, levitators) can help make room for new traps, while buffers like Warfarin or Bard’s Guardi give her the raw ATK to make her Arts damage really sting.
Pair her with:
- Push Strokers (e.g., FEater): To clear trap tiles and recycle placement
- Levitators (e.g., Irene): To allow trap placement under enemies mid-battle
- ATK Buffers (e.g., Warfarin, Bard’s Guardi): To scale S3’s nuke potential
- Executors (e.g., Phantom): To burst down targets during S2 binds
Since traps don’t count against the unit limit, Dorothy is flexible and doesn’t compete for deployment space. That makes her easy to slide into a variety of teams if you’re looking for utility and coverage without sacrificing core DPS slots.
Dorothy stands out not by being a meta damage dealer, but by offering high-level tactical flexibility. From stalling elites with precision binds to chaining explosions across the map, she brings something fresh to any team. Whether you’re planning trap zones in advance or reacting quickly to changing battlefield conditions, Dorothy rewards smart, deliberate play.

And if you’re looking to make trap placements even smoother, don’t forget to run Arknights on PC with BlueStacks. You’ll get better controls, faster reaction times, and the visual clarity to make each trap count. Whether you’re nuking waves or stalling bosses, BlueStacks helps you play at your best.


