Enhance Your Draconia Saga Experience on PC with our BlueStacks Features

Playing Draconia Saga on BlueStacks can significantly elevate your gaming experience. BlueStacks offers a range of powerful tools designed to enhance gameplay in this RPG, such as Keymapping, Multi-Instance, and Macro Recorder. These features provide better control, efficiency, and multitasking capabilities, allowing you to fully enjoy the magical world of Arcadia. In this guide, we’ll explain these tools and how to use them effectively to get the most out of your Draconia Saga adventure.
Use the Keymapping Tool for Enhanced Controls
In games with action combat like Draconia Saga, having precise and responsive controls is crucial. BlueStacks’ Keymapping Tool allows you to play using a mouse and keyboard instead of clunky touchscreen controls, giving you superior control over your character’s movements and attacks. This feature lets you stay on the move and avoid enemy attacks easily; while also keeping the pressure on so you can outplay and defeat all the competition. This is quite important when you consider all the avoidable attacks in this game, which frequently makes players bob and weave through AoEs in between enemy moves.
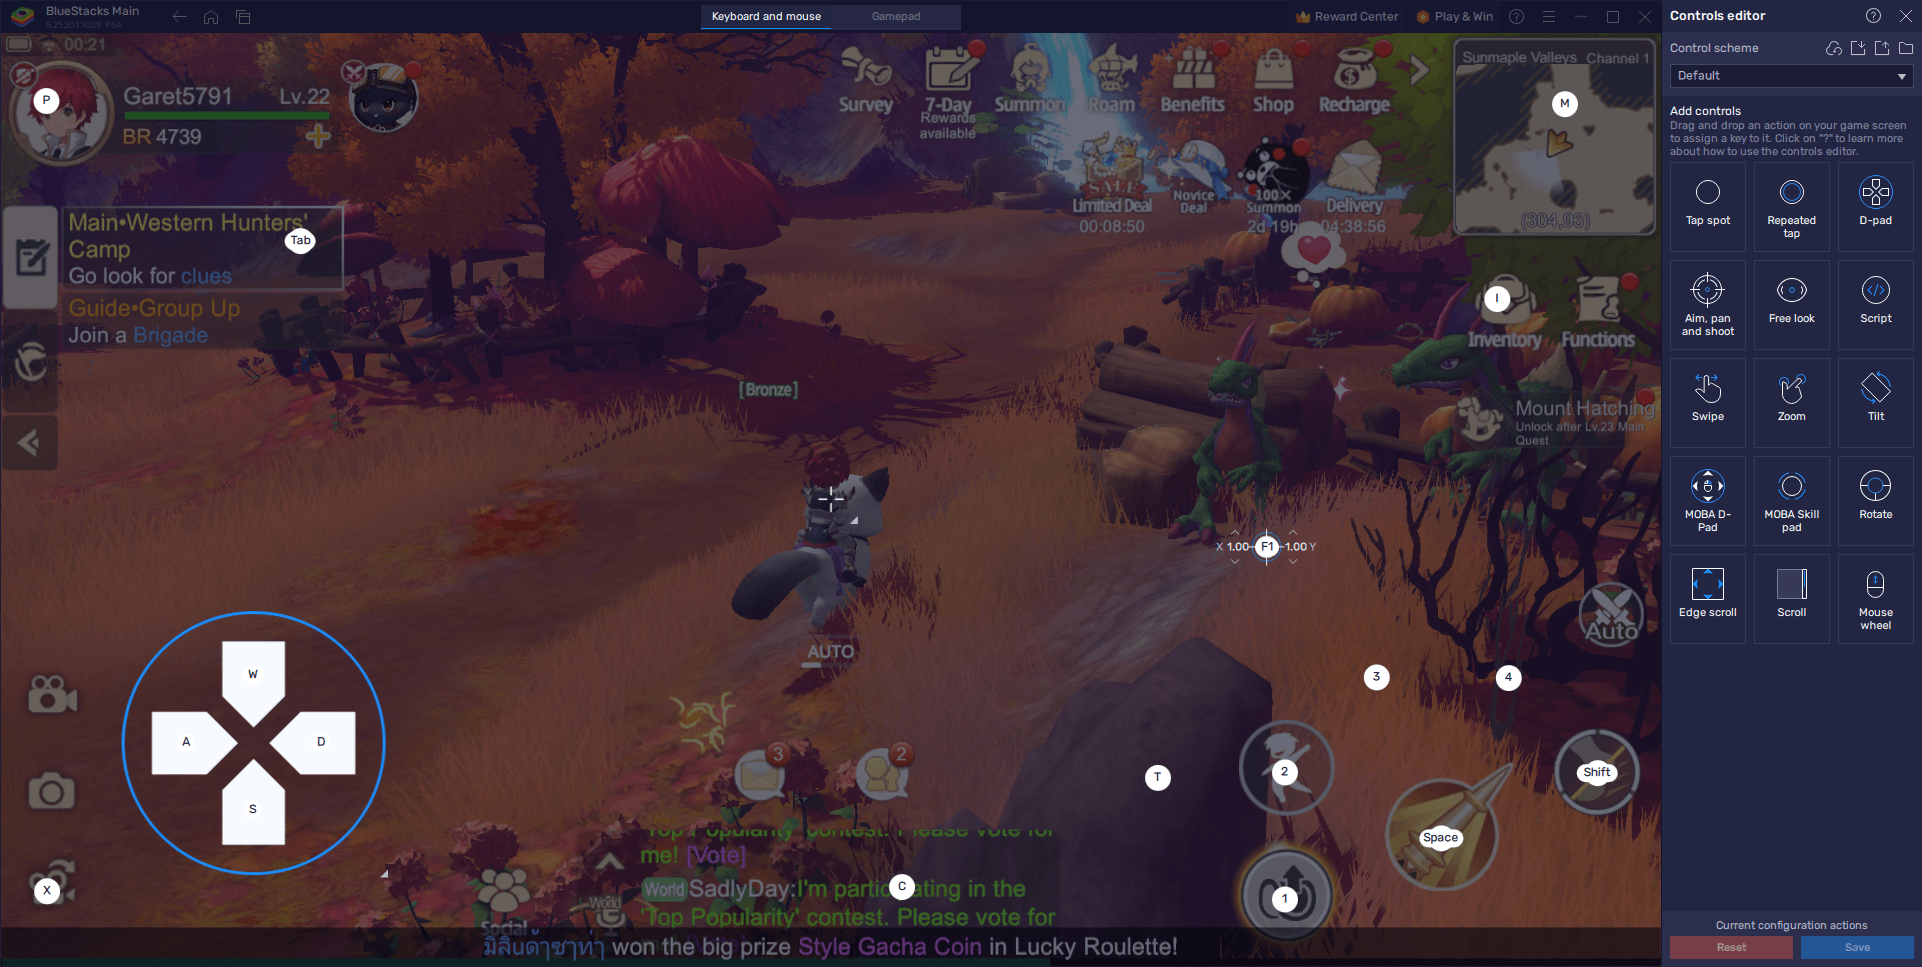
To access the Keymapping Tool, press Ctrl + Shift + A while in-game to bring up the Advanced Editor screen. In this screen, you can visualize your current bindings, modify them by clicking on them and pressing the button you wish to replace them with, or delete them by clicking on the X icon that appears when you hover over any binding. You can even add new functions to the current scheme by dragging and dropping them from the functions panel on the right, onto wherever you need them on the screen, followed by assigning them a binding. Once you’re satisfied with your control scheme, click on the “Save” button on the lower right to implement your tweaks.
Using this tool, you can customize your controls to suit your playstyle perfectly. For instance, you can bind frequently used skills to keys that are easy to reach, ensuring that you can react quickly in the heat of battle. This level of customization allows for a more immersive and responsive gaming experience, making it easier to execute complex maneuvers and stay ahead of your enemies.
Max Out Graphics Without Sacrificing Performance
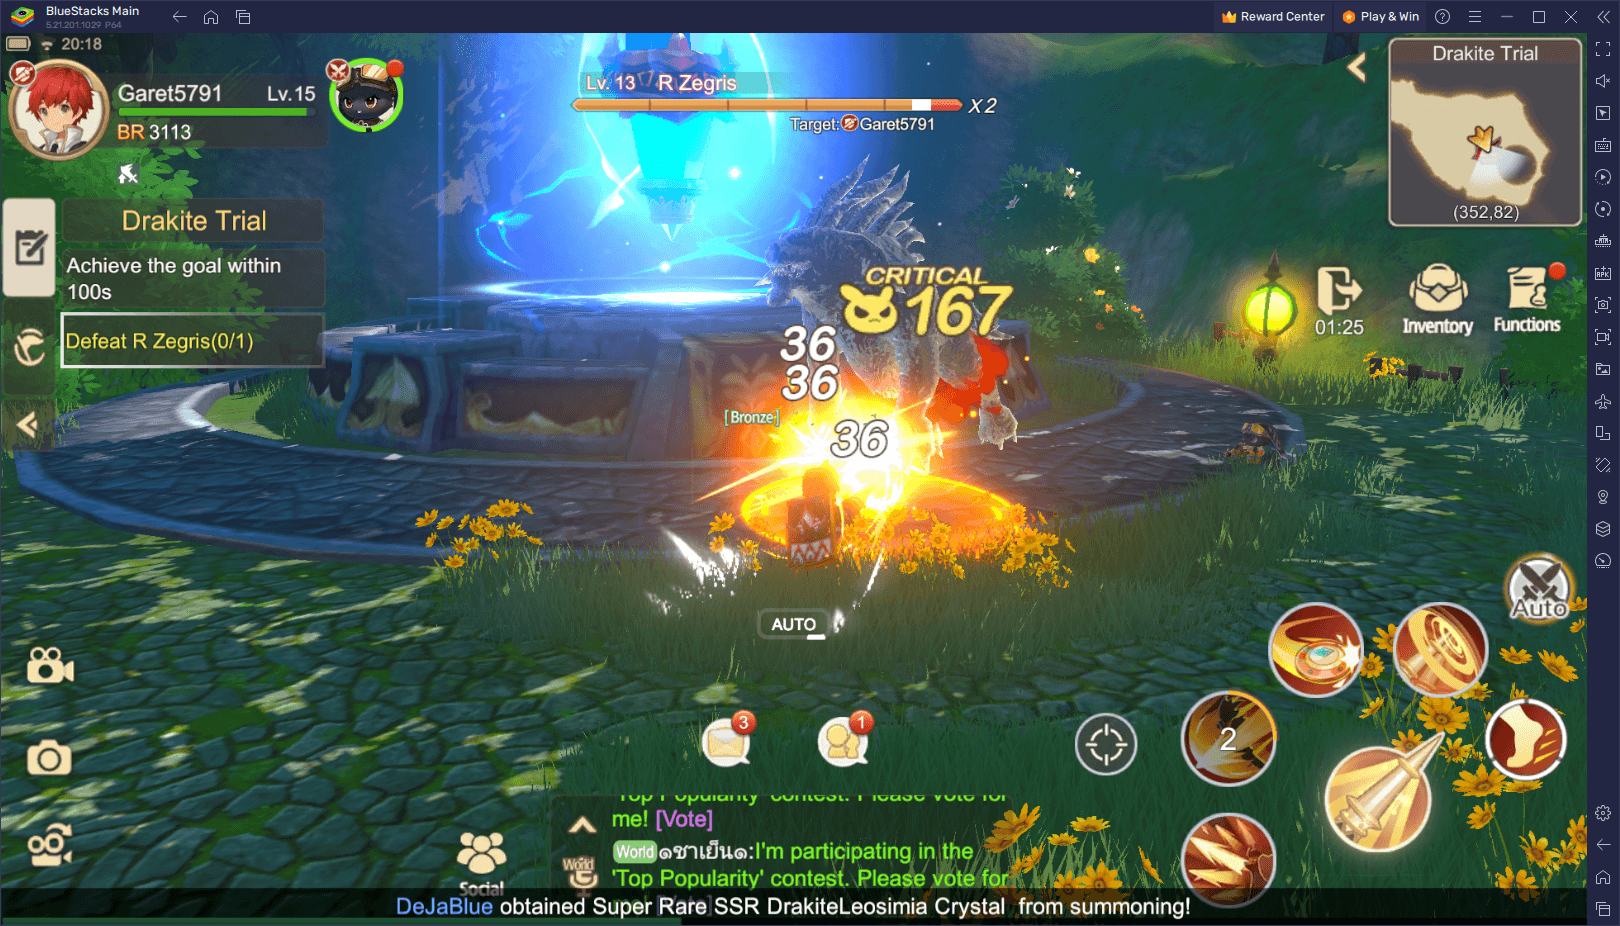
BlueStacks can max out the graphics in any game while keeping stable performance, which is particularly important in visually intensive games like Draconia Saga. In fact, one of the best tips and tricks for this game is to play on BlueStacks, mostly because the difference between low graphics and the higher settings is astronomical in terms of visual quality. Moreover, better visual clarity and a stable frame rate mean you won’t lose any inputs, which is crucial during difficult fights where a few mistakes can cause you to fail.
To optimize your experience, follow these simple steps both in your emulator settings and in-game:
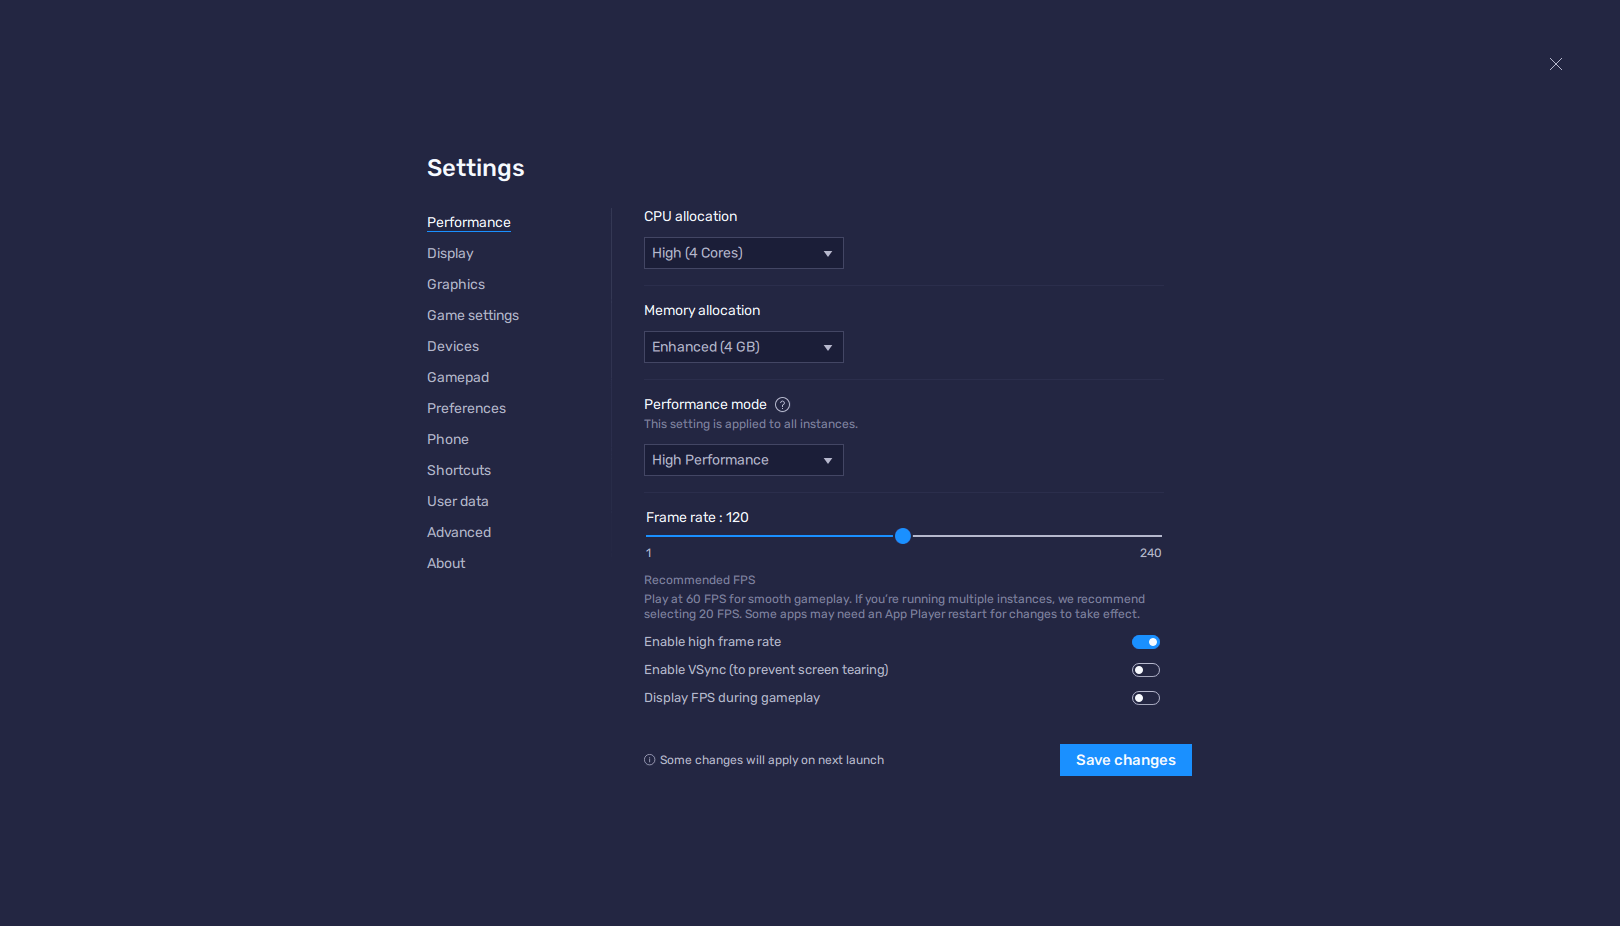
- In the BlueStacks settings, go to the “Performance” tab.
- Check that your emulator is using at least 4 GB of RAM, 4 CPU cores, and that the Performance mode is set to “High performance”.
- Set the FPS slider underneath to at least 60 FPS, and finish by clicking on “Save changes” on the bottom right.
- Launch the game and head to the in-game settings.
- Set your graphical options to the highest settings.
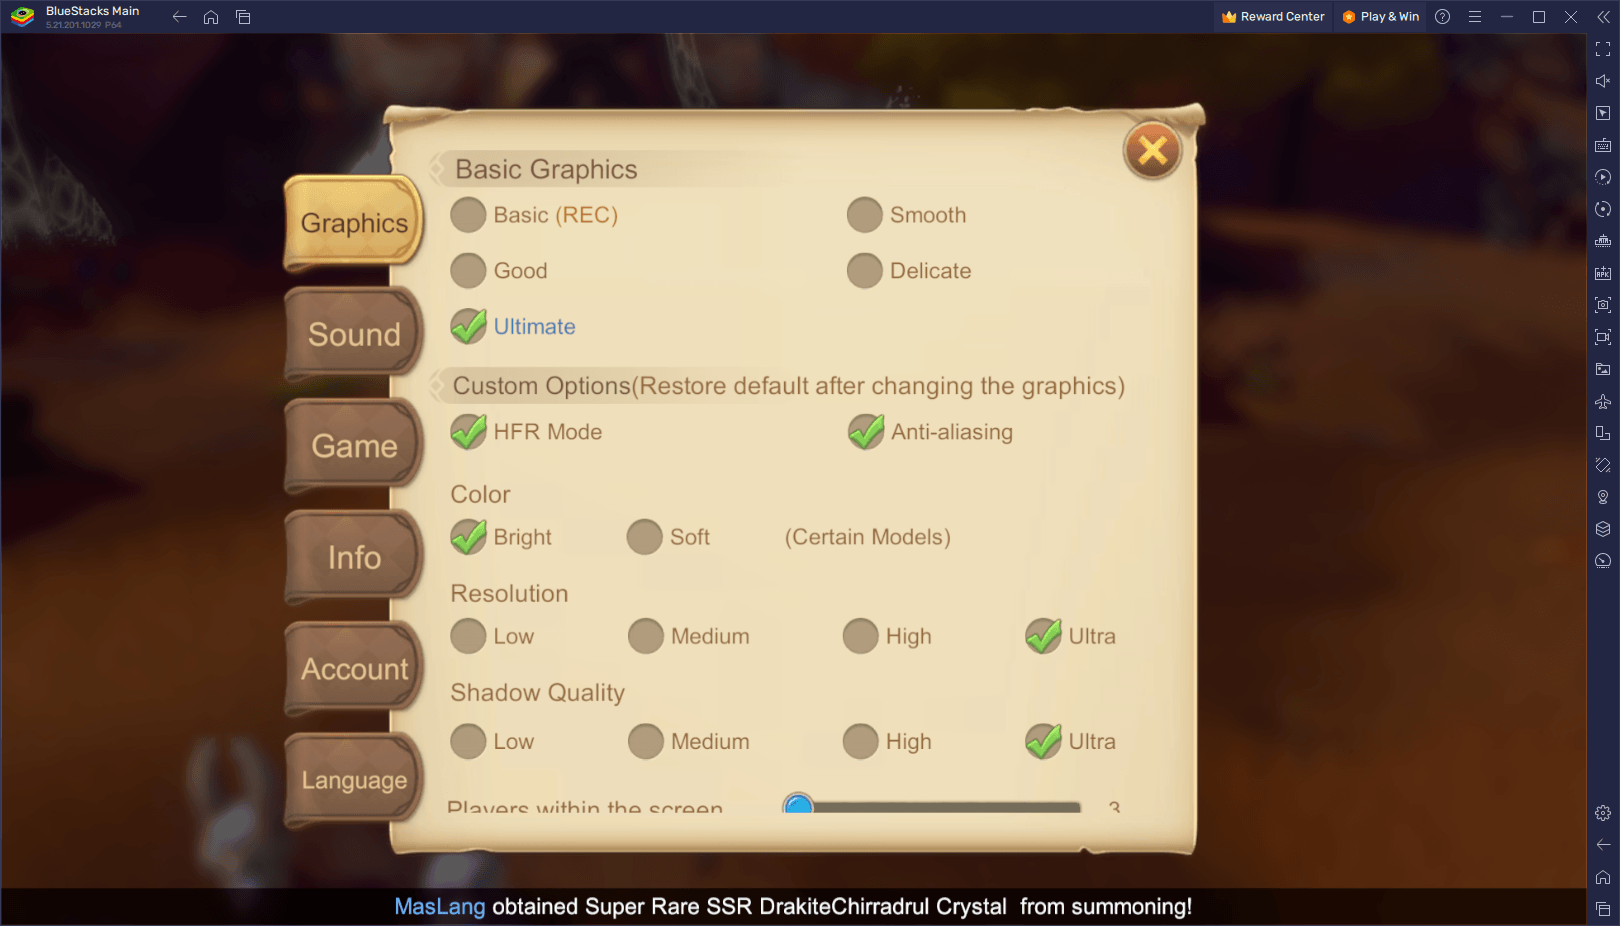
With these steps, you’ll ensure that you’re getting the best experience, free from any performance issues. High settings will provide crisp visuals, while maintaining a stable frame rate ensures smooth gameplay, allowing you to focus on mastering the challenges in Draconia Saga without any distractions.
Automate Tasks with the Macro Recorder
While Draconia Saga offers a robust auto-questing and auto-combat system, it has one major drawback: it doesn’t auto advance dialogs. This means you need to frequently check back to progress through dialogs and cutscenes, which defeats the purpose of the idle features. This limitation is quite irksome since, like we mentioned in our beginner’s guide, progressing through the story is one of the most important things to do if you’re new. The Macro Recorder in BlueStacks can solve this problem by automating the process of skipping dialogs.
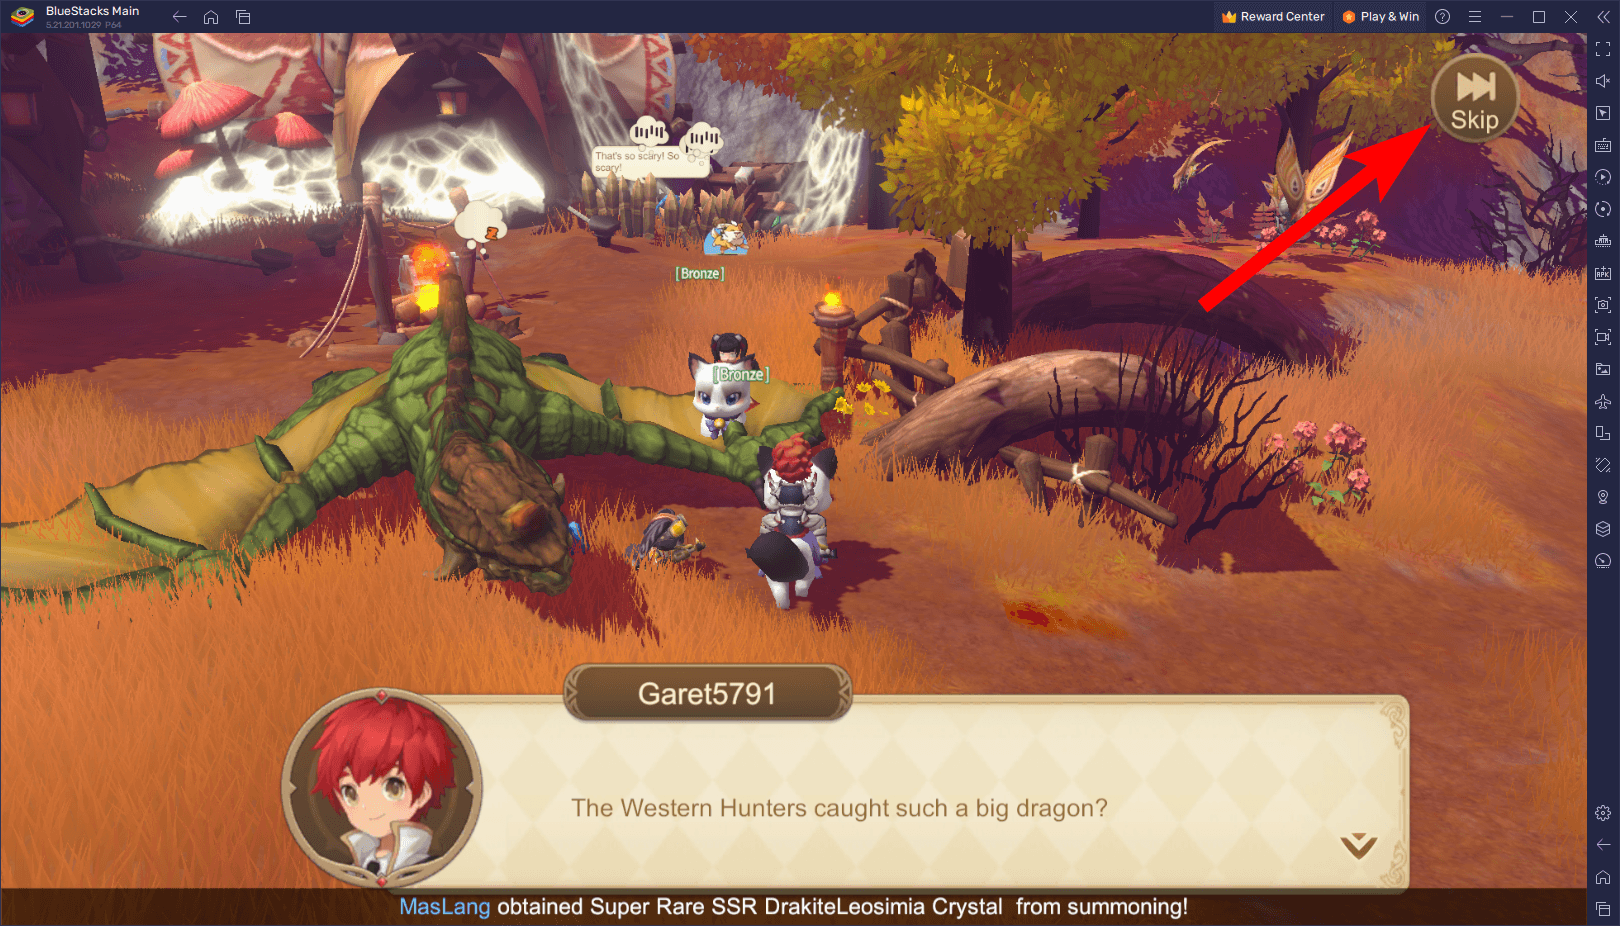
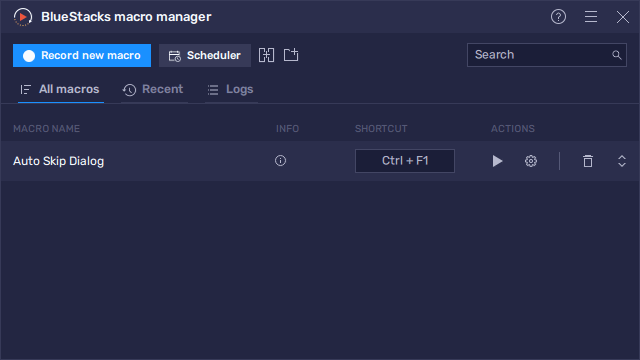
To access the Macro Recorder, press Ctrl + Shift + 7 to bring up the macro interface. Click on “Record new macro”, and then perform the actions you want to automate while the recorder is running. For instance, you can record yourself clicking on the “Skip” button in dialogs and cutscenes. Once you’re done, stop the recorder and give your new macro a name and a key binding. Once your macro is done, you can press the assigned button to launch it.
By looping this macro infinitely, you can ensure that while the game is playing itself, the macro is constantly clicking on the area where the “Skip” button appears. This allows you to progress through the story completely automatically, taking full advantage of the game’s idle features without needing to manually advance dialogs.
BlueStacks provides several powerful tools that can significantly enhance your Draconia Saga gameplay. By using the Keymapping Tool, you can enjoy superior controls and more precise gameplay. Moreover, maxing out your visual settings ensures that you get the best image and smoothest frame rates at all times. And with the Macro Recorder, you can automate repetitive tasks, allowing you to focus on the more exciting aspects of the game. Follow these tips to get the most out of your Draconia Saga adventure and enjoy a seamless, engaging experience in the magical world of Arcadia. Enjoy playing Draconia Saga on PC or laptop with BlueStacks!