New Update: Unlock 90 FPS in Garena Free Fire with BlueStacks
For a serious gamer like you, having a higher frame rate means a lot more than just an incredible gaming experience. It can be the difference between a ‘Booyah’ and ‘Try Again Next Time’. You may have precise aim, Level 4 Armor, a truck load of Glue Walls and the best available weapons but if the FPS is not tuned to its highest, your path to gaming glory will be full of roadblocks. High FPS eliminates stuttering, reduces tearing, and makes it easier to spot opponents in an intense combat situation. It also leads to crisper graphics and smoother animations. When there’s a lot happening on the battlefield and on your screen, you wouldn’t want anything less than that. Would you now?
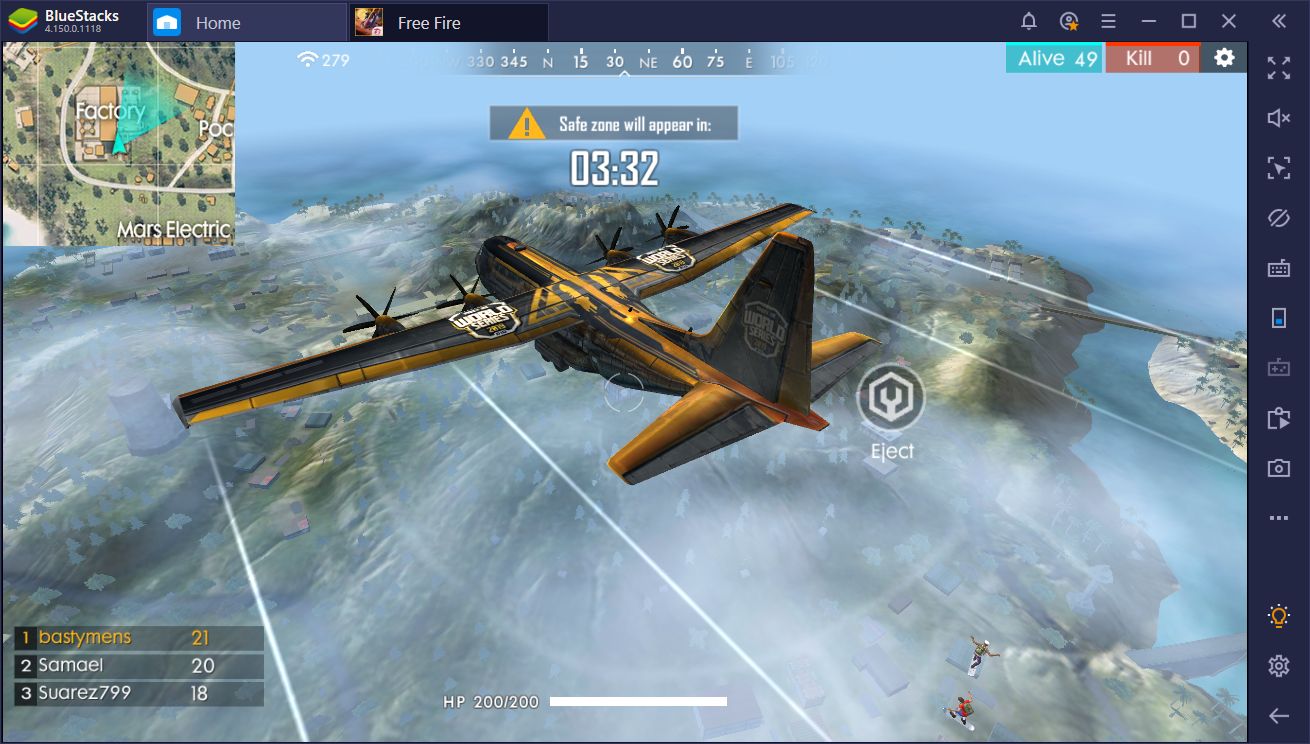
Achieve High FPS with BlueStacks
We have an exciting update for Free Fire fans. Now it is possible for you to play the game at upto 90 FPS on BlueStacks.
Here’s what all you need to do to get that coveted “High FPS”.
Recommended System Requirements
BlueStacks Settings
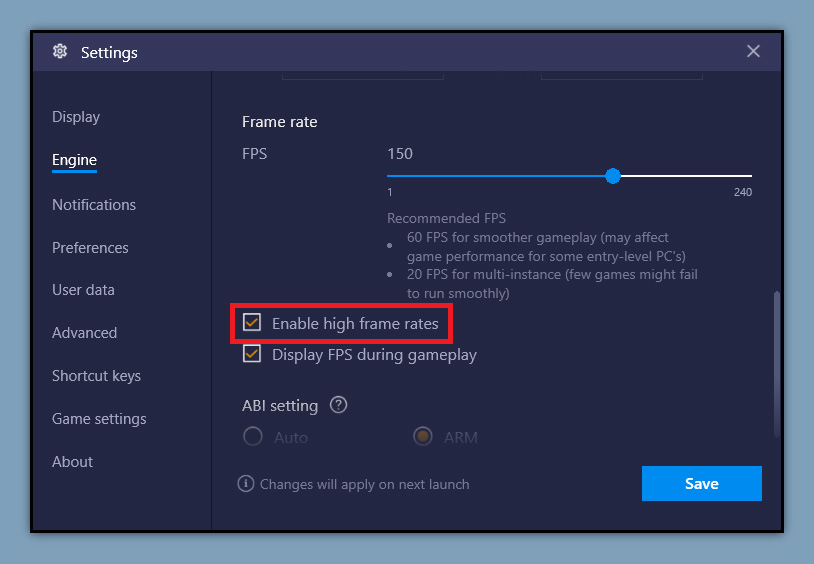
Step 1: Enable High FPS
Go to the “BlueStacks Settings” menu. It can be accessed using either:
(a) Hamburger menu at the top-right
(b) Gear Icon in the toolbar on the right
Under the ‘Performance’ tab in ‘Engine’, set the ‘FPS Slider’ to something greater than 100 FPS. As you can see here, we have set it to 150.
Also, check the ‘Enable high frame rates’ checkbox to adjust the FPS. Click to ‘Save’ and you’re good to go.
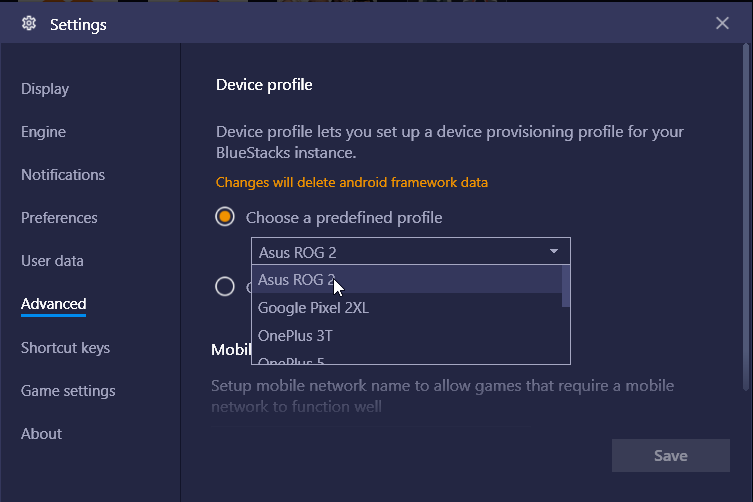
Step 2: Choose Asus ROG 2 Device Profile
- Go to BlueStacks Settings
- Click on ‘Advanced’
- Select ‘Choose a Predefined Profile’
- From the dropdown, simply select ‘Asus ROG 2’
- Click to ‘Save’
Step 3: GPU Settings
For Nvidia GPUs (NVIDIA Control Panel):
Our goal is to remove the FPS cap that Vertical Sync (VSync) brings to the Table. It is recommended to turn off the VSync in your Nvidia GPU Settings for both ‘HD-player.exe’ and ‘BlueStacks.exe’.
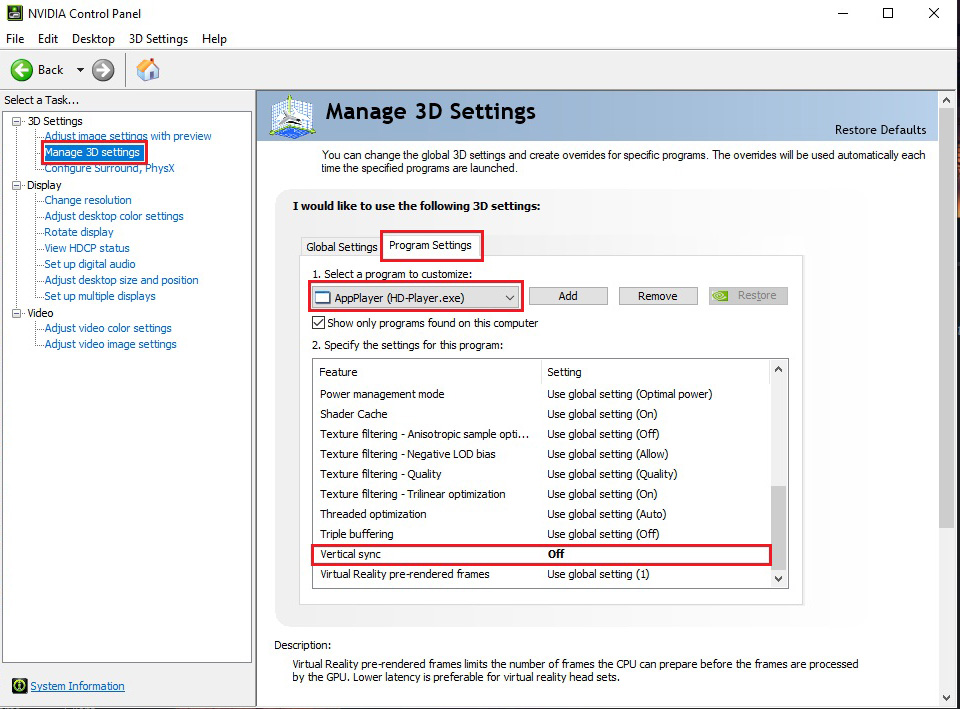
Here’s how to do it.
- Open Nvidia Control Panel(Right-click on Desktop)
- Go to ‘Manage 3D Settings’ under ‘3D Settings’
- Select ‘Program Settings’
- Select HD-Player.exe
- Go to ‘Vertical sync’ under ‘Specify the settings for this program’
- Click on it and turn it off.
- Repeat steps 4 to 6 for BlueStacks.exe and you’re done
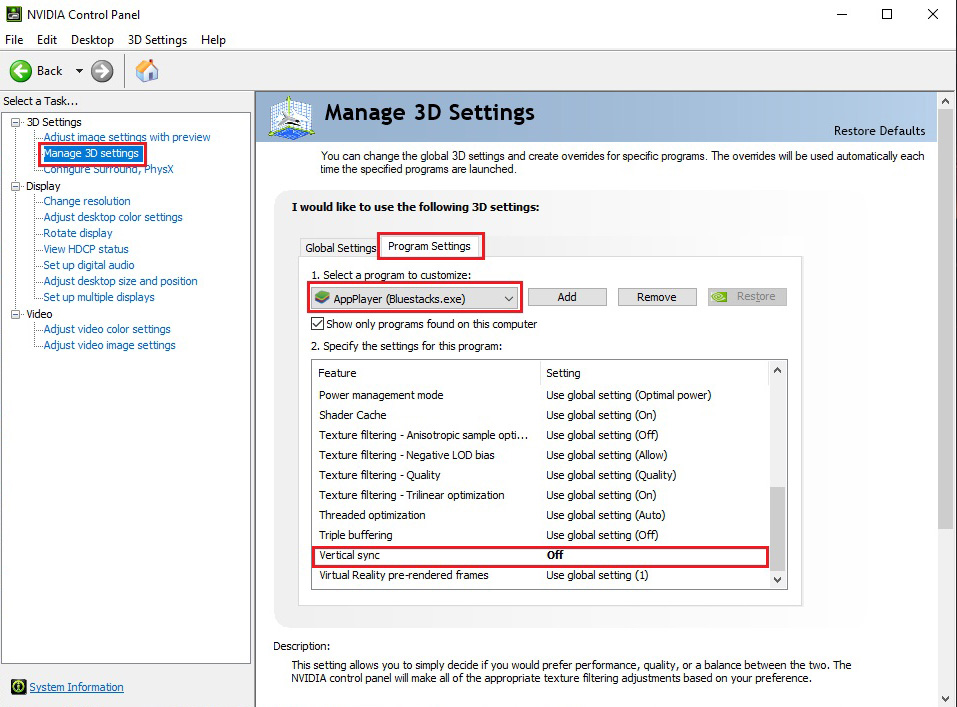
For AMD GPUs (AMD Radeon Software):
Now the Process for AMD GPU Users might be a little more complicated with a few more steps than NVIDIA. You might need to add HD-Player.exe as a game in the AMD Radeon Software Settings.
Here’s how to do it.
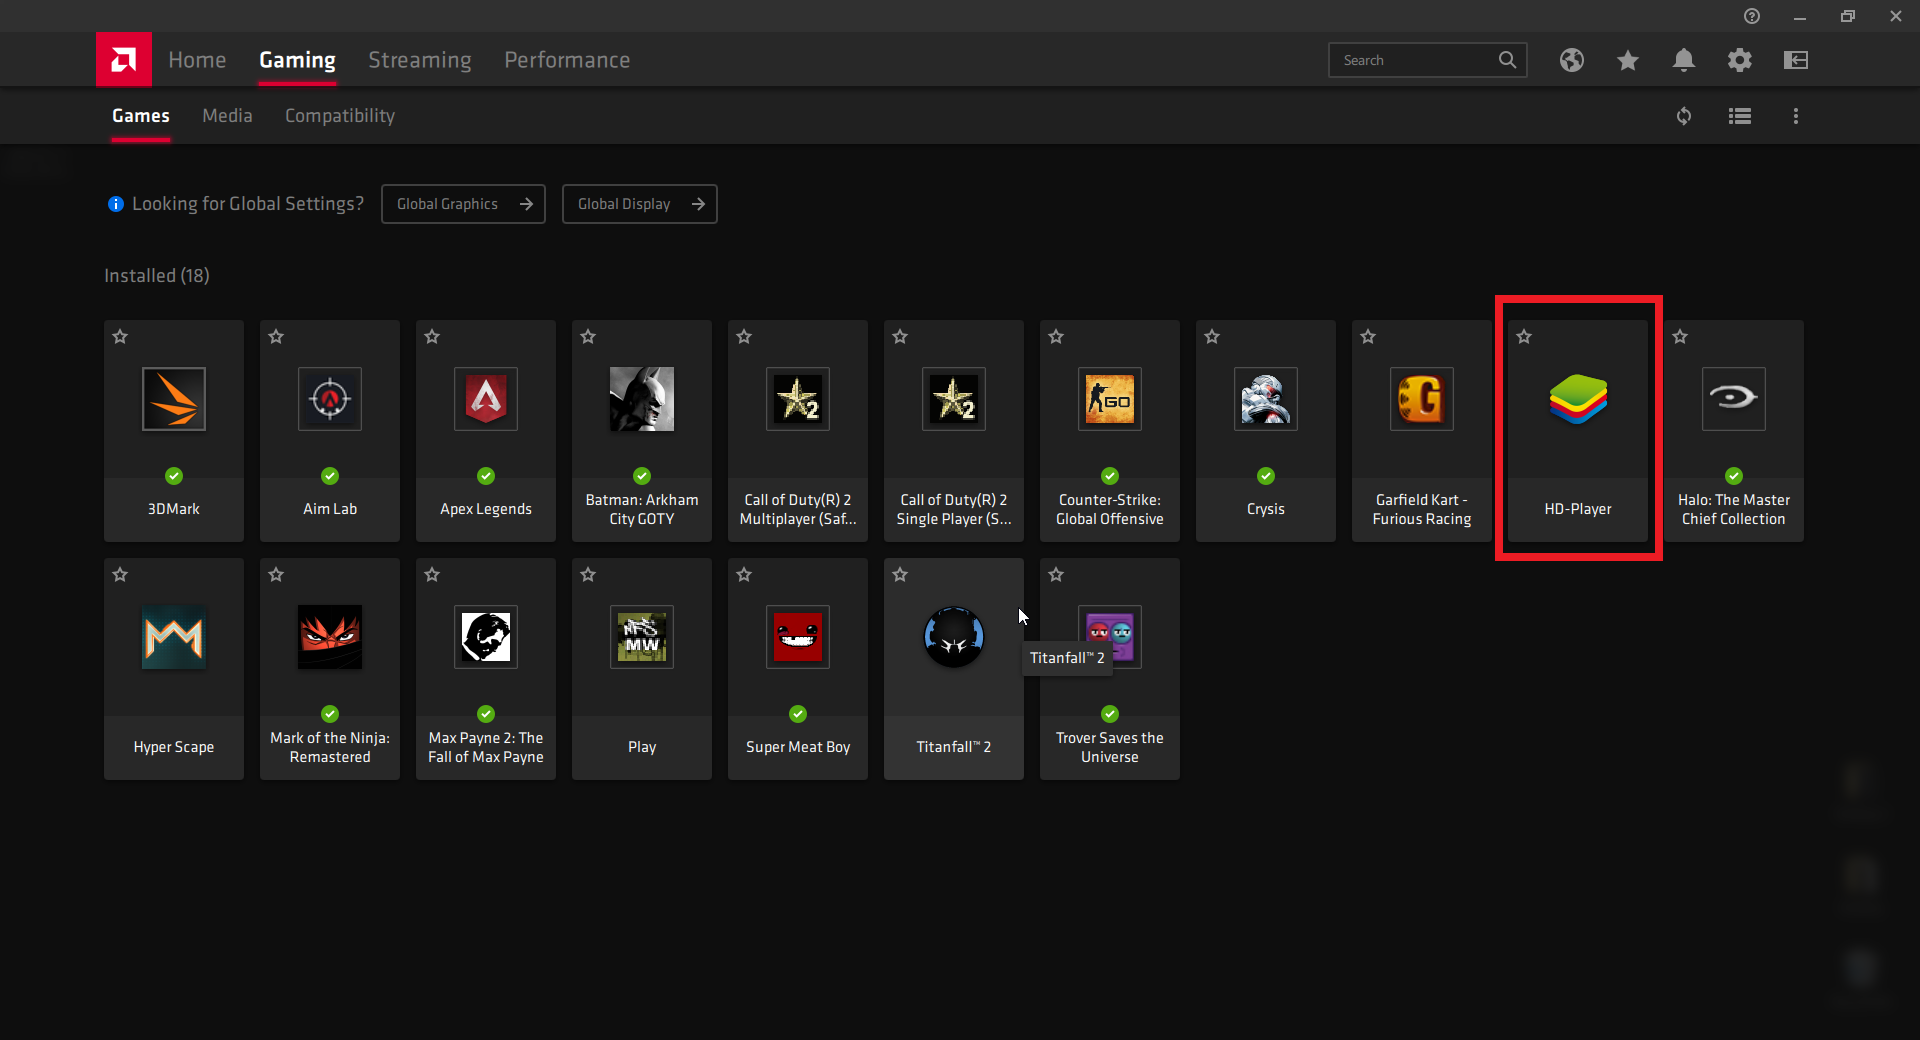
- Open AMD Radeon Software and click on the Gaming Tab. It should look like this.
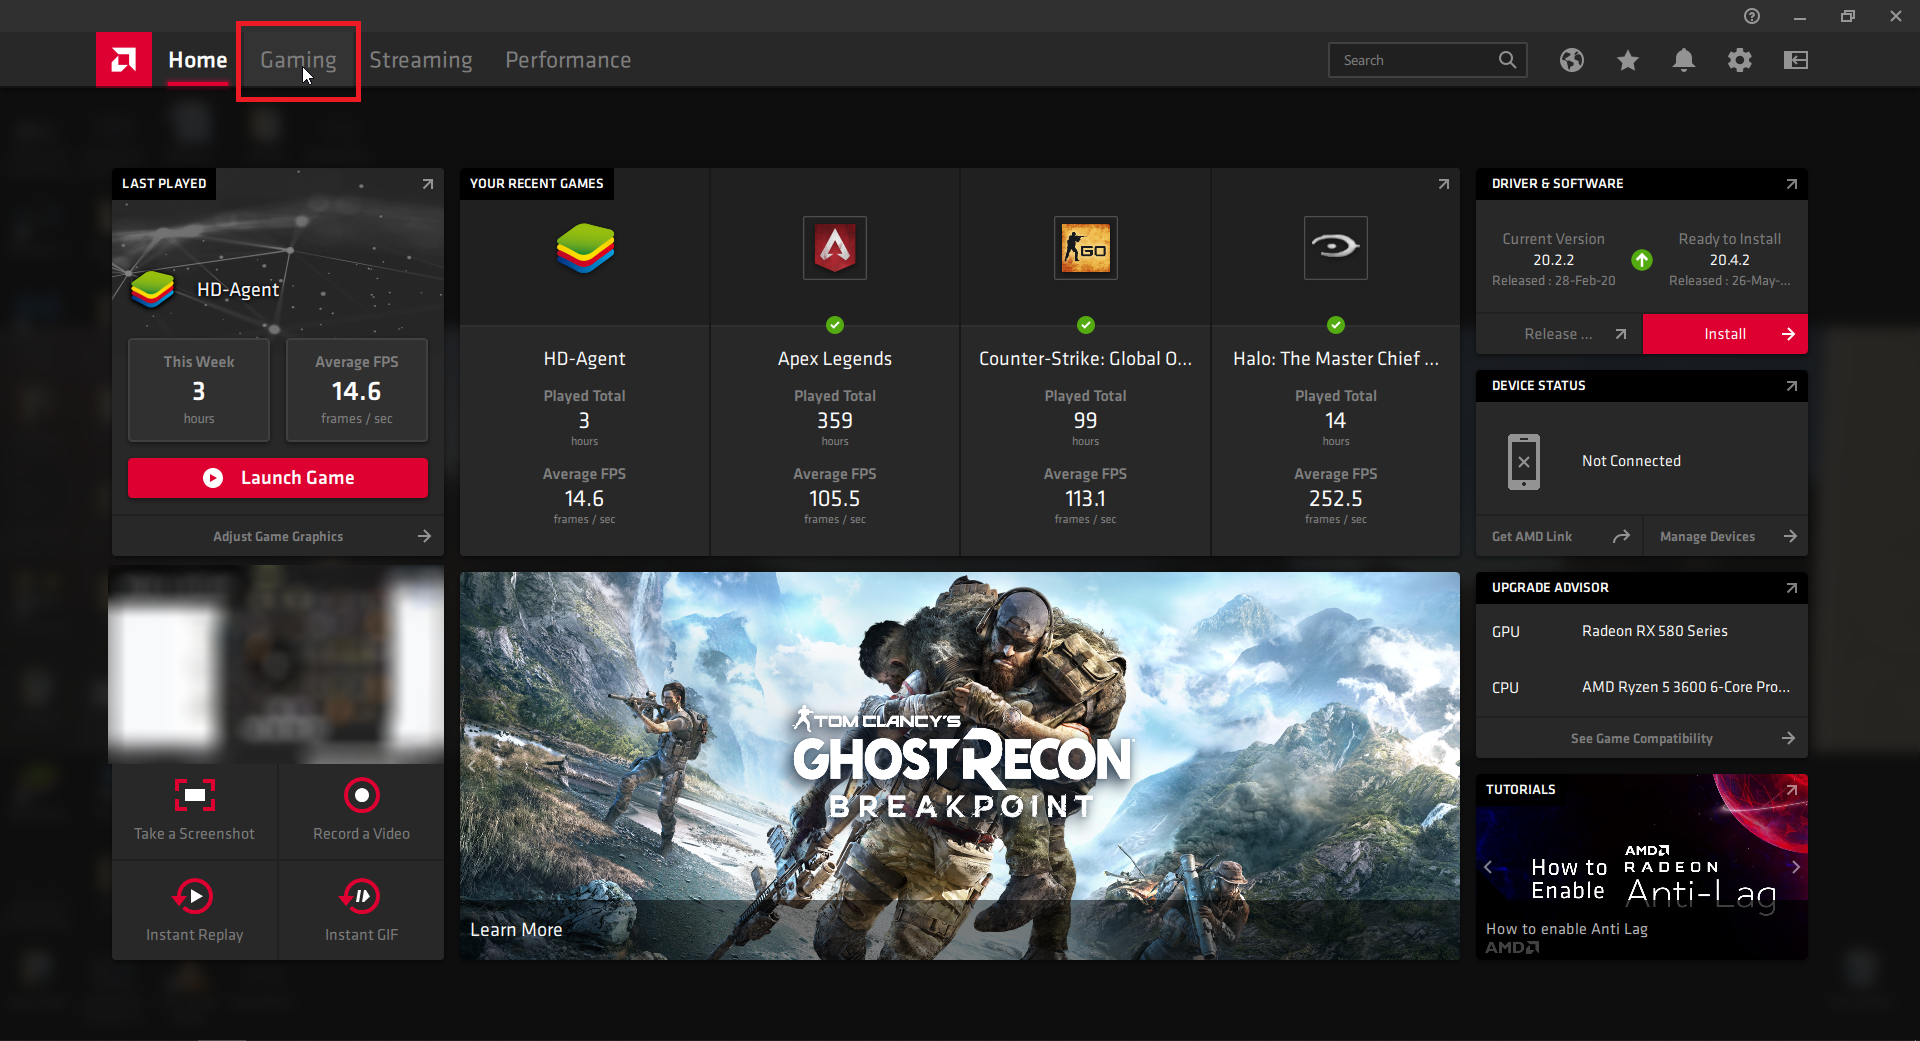
- Go the top-right corner and under ‘More Options’, click on ‘Add a Game’.
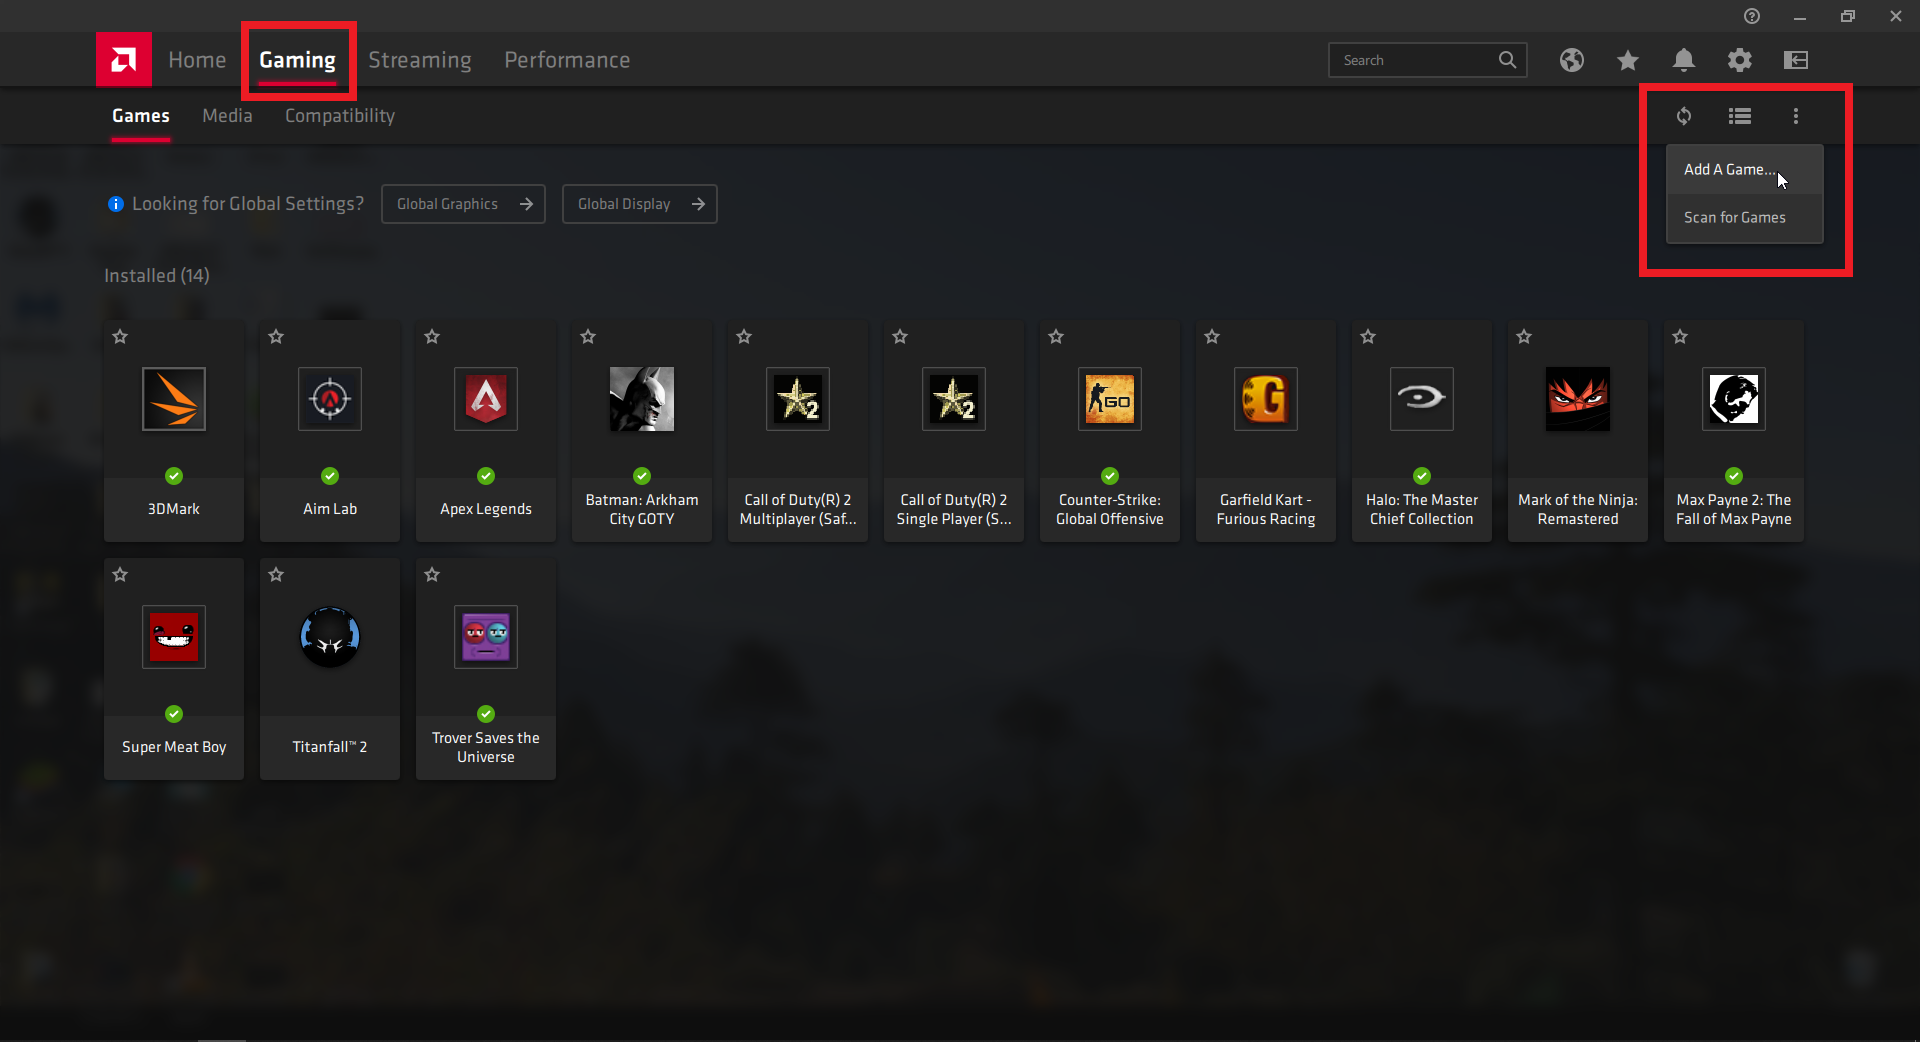
- Add HD-Player.exe from the folder C:\Program Files\BlueStacks
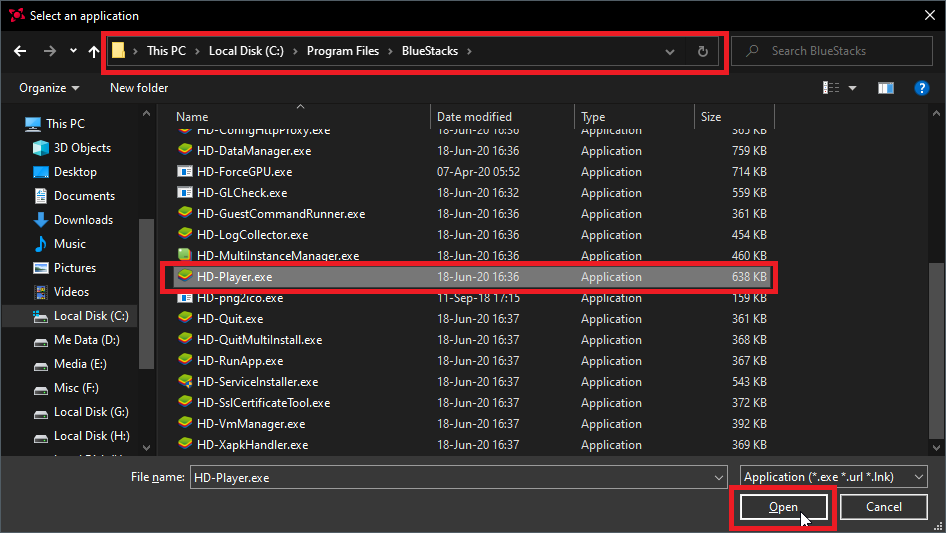
- Click on ‘HD-Player.exe’ in the list.
- Under Graphics, turn the ‘Wait for Vertical Sync’ setting to Off, unless application specifies
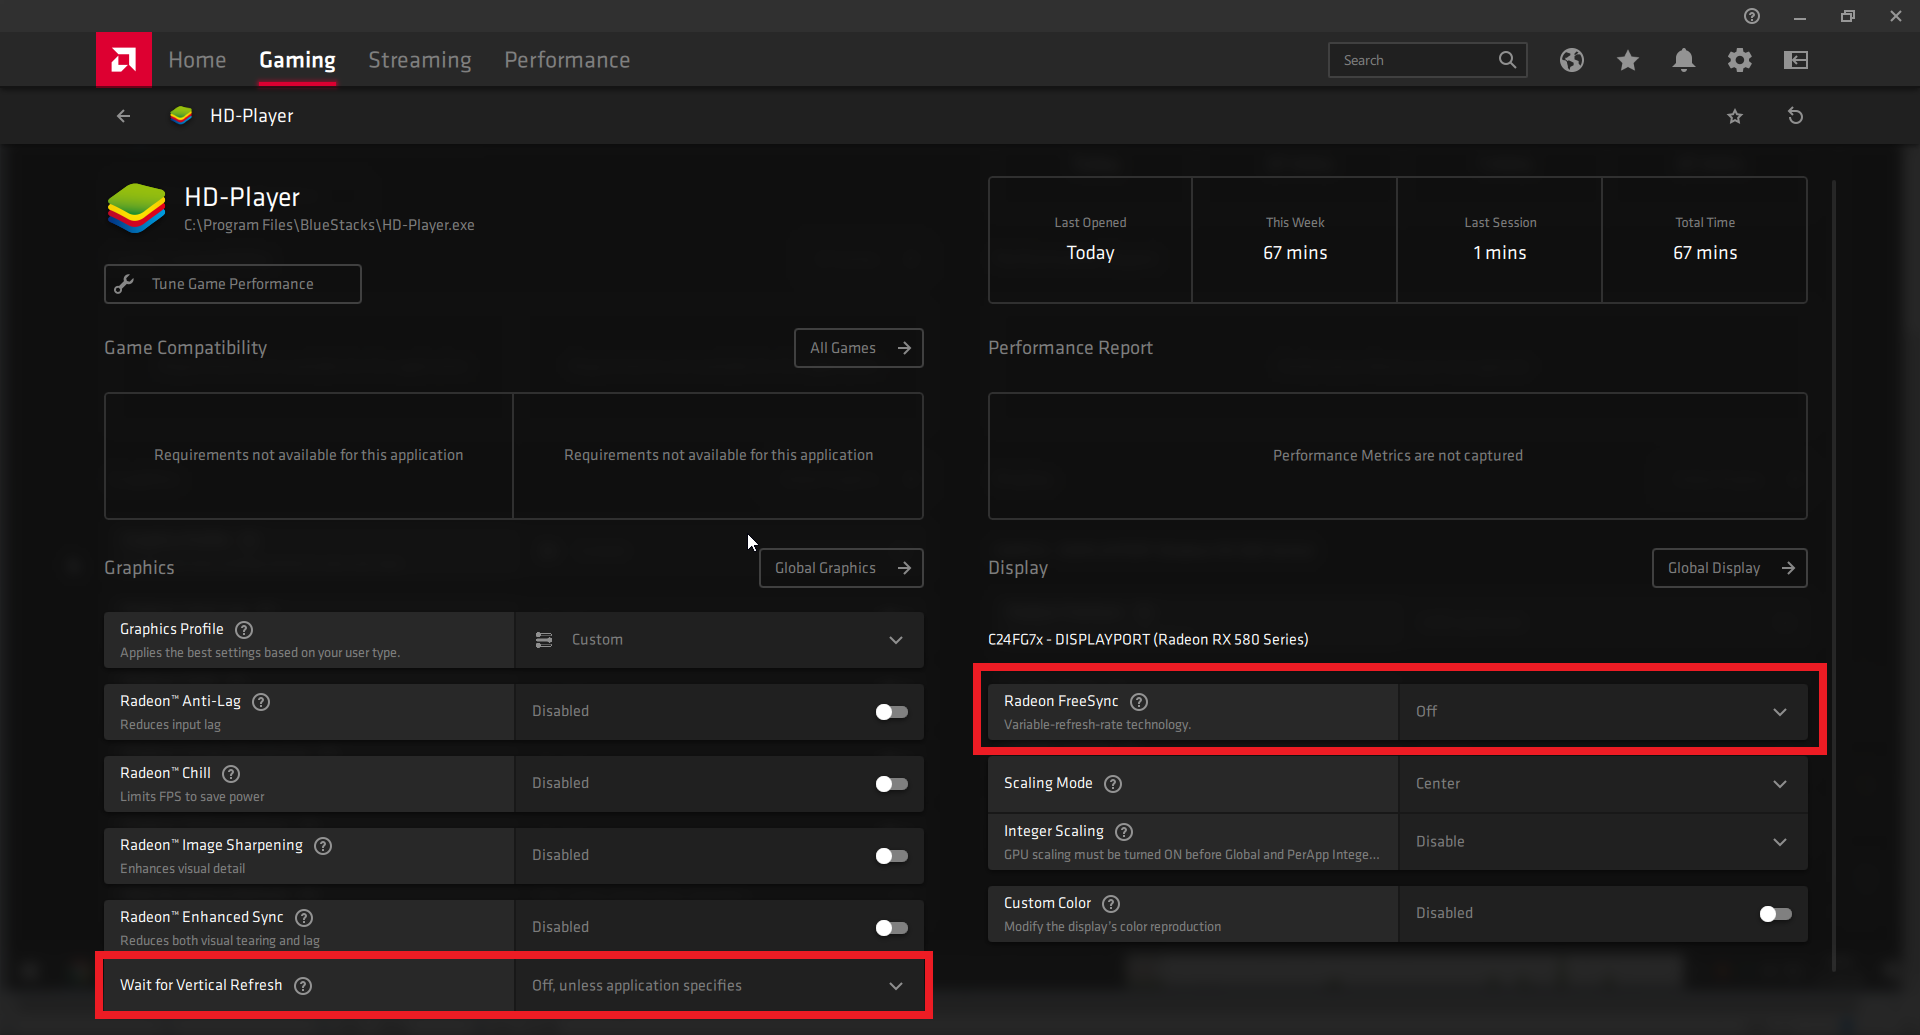
Note: If you have a FreeSync enabled display, please turn off FreeSync Settings in both your monitor and AMD Radeon Software settings. You can do this by going to the
Gaming Tab-> Global Display-> Turn RadeonTM FreeSync Off.
Step 4: Restart BlueStacks
Just restart BlueStacks when you’re done making the changes.
Wreck the Opposition With Superiority
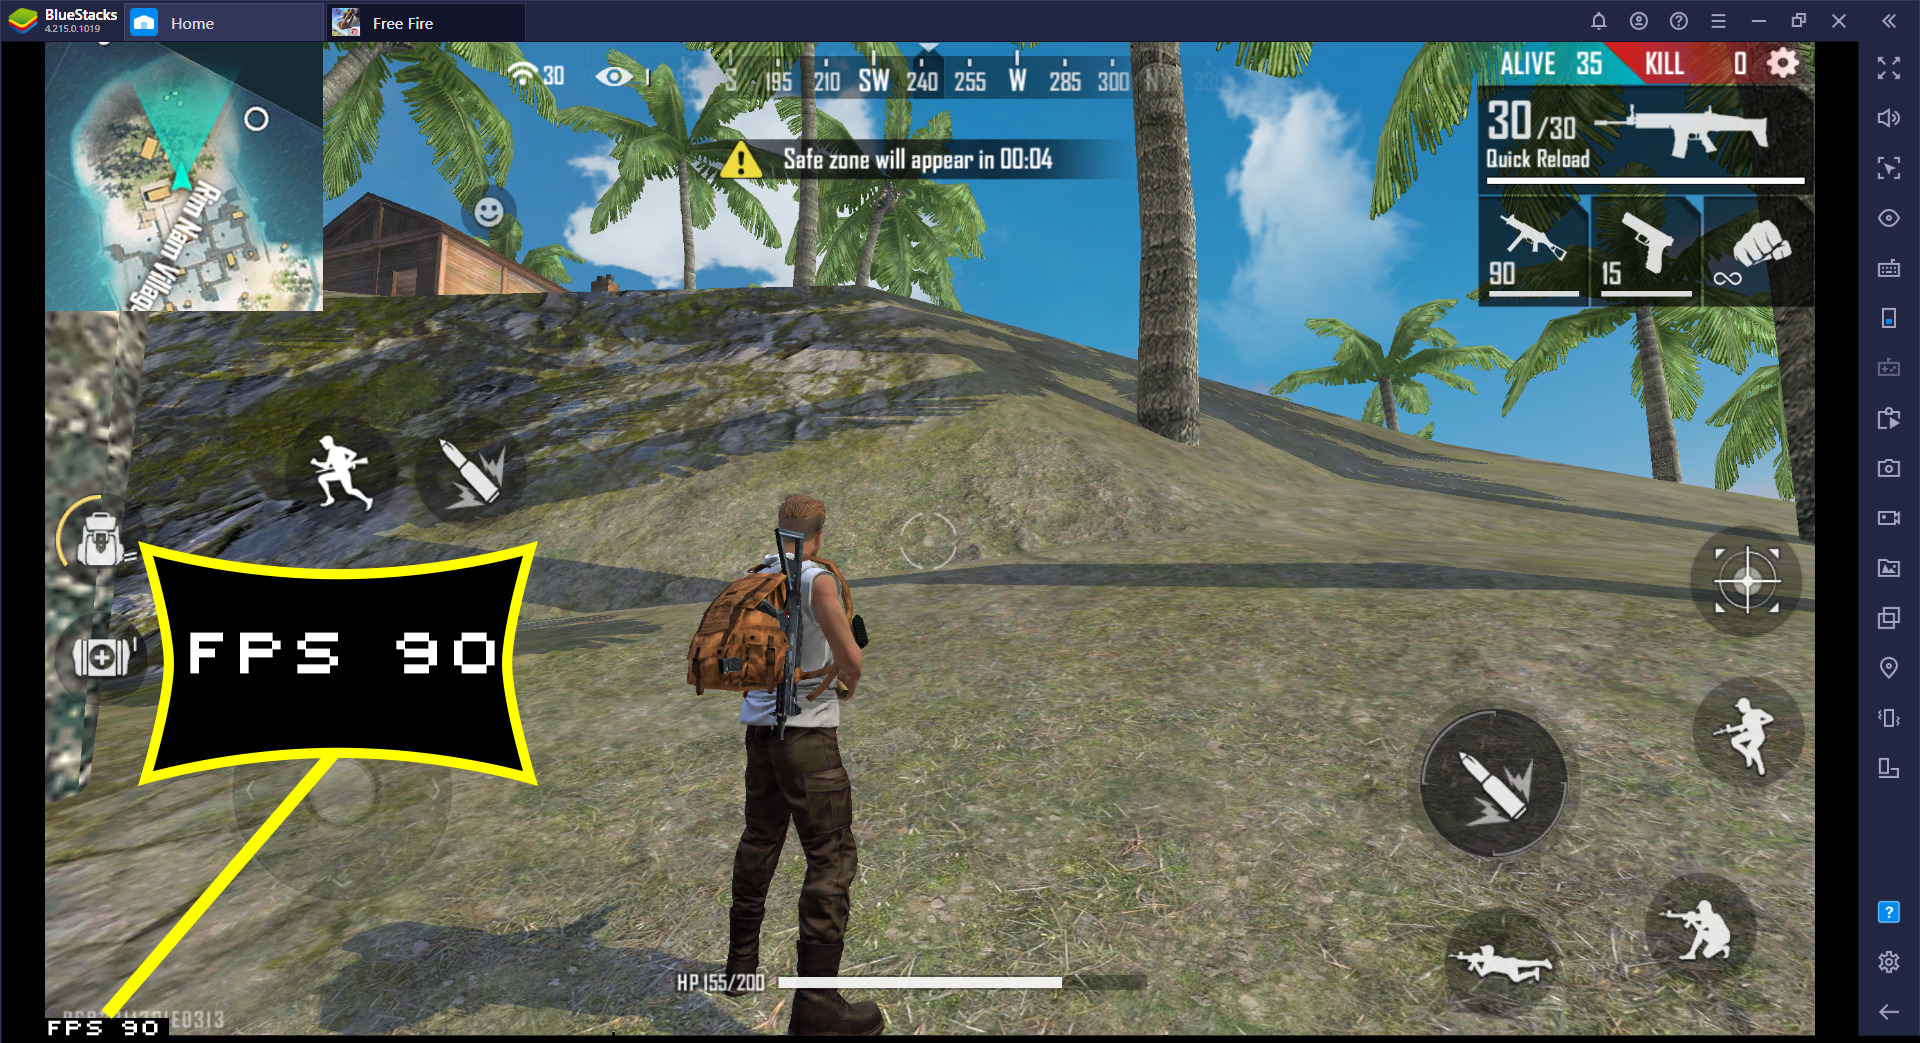
Given the mad skillz you have got and these nifty settings, we are sure it is now going to be raining ‘Booyahs’ in your gaming room. Get ready to see a sharp jump in your K/D ratio and get more ‘respect bruh’. Do tell us how it goes for you. Booyah!
And if you liked this, then you’ll love our upcoming video showcasing this feature. Stay tuned and enjoy this battle royale Free Fire game on your PC.


