BlueStacks Features to Enhance Your Journey of Monarch Experience

Journey of Monarch is a visually stunning game with intricate menu navigation and deep team-building mechanics, making it a perfect fit for BlueStacks. While the RPG’s AFK systems allow for relaxed gameplay, maximizing your progress and enjoyment is easier when you have the right tools at your disposal.
BlueStacks offers several features that elevate your gameplay, especially as a beginner to Journey of Monarch. From the Keymapping Tool that simplifies menu navigation to advanced performance settings that let you enjoy the best visuals, and the Instance Manager for experimenting with strategies on multiple accounts, these tools enhance every aspect of the Journey of Monarch experience.
With that said, let’s explore how you can make the most of these features, in this guide.
Keymapping Tool for Simplifying Menu Navigation
Journey of Monarch is a menu-heavy game, requiring frequent access to hero management, gear upgrades, and other systems. Using touchscreen controls to navigate these menus can feel clunky and slow, especially when managing your progression becomes more complex. The Keymapping Tool on BlueStacks solves this issue by allowing you to assign physical keyboard keys to the game’s controls, ensuring smoother and faster navigation.
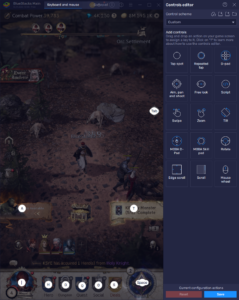
To access the Keymapping Tool, press Ctrl + Shift + A while in-game to open the Advanced Editor. This editor displays your current key bindings, which you can modify by clicking on the existing controls and assigning new keys. You can also drag and drop additional functions from the right-hand panel directly onto the screen, creating shortcuts for anything that requires frequent access. Once you’re satisfied with your setup, click “Save” to apply the changes.
In Journey of Monarch, consider creating hotkeys for essential menus like hero upgrades, inventory management, and the world map. For example, assigning a key to summon bosses or open the Dice system can make these actions feel much more seamless. This customizability ensures you spend less time clicking through menus and more time focusing on strategy and progression.
Achieve Superior Graphics and Performance
Journey of Monarch is powered by Unreal Engine 5, offering breathtaking visuals that deserve to be seen in their full glory. Unfortunately, mobile devices often struggle to deliver consistent performance at high settings, leading to overheating, battery drain, and reduced frame rates. BlueStacks eliminates these issues, allowing you to enjoy smooth gameplay and maximum graphics quality on a bigger screen.
To ensure optimal performance, follow these simple steps:
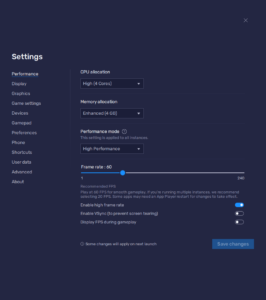
- Open the BlueStacks settings and navigate to the Performance tab.
- Allocate at least 4 GB of RAM and 4 CPU cores, and set the Performance mode to High performance.
- Adjust the FPS slider to 60 FPS or higher, then click Save changes.
- Launch Journey of Monarch and access the in-game settings.
- Set all graphical options to their highest settings.
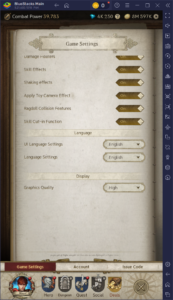
These settings guarantee silky smooth gameplay, free from lags or slowdowns. Not only does BlueStacks take full advantage of your PC hardware, but it also optimizes resources to provide a gaming experience superior to even high-end mobile devices. On top of that, playing on a larger screen allows you to appreciate the intricate details of Journey of Monarch’s visuals, from character models to lush environments.
Moreover, with BlueStacks, you won’t have to worry about draining your phone’s battery or dealing with uncomfortable overheating during long sessions. This means you can focus on immersing yourself in the world of Aden without any distractions.
Experiment with Multiple Strategies Using the Instance Manager
Journey of Monarch’s AFK mechanics make it easy to play on multiple accounts, but managing those accounts on a single device can be cumbersome. BlueStacks’ Instance Manager solves this problem by allowing you to create and run multiple instances of the game simultaneously, letting you test different strategies or formations across accounts.
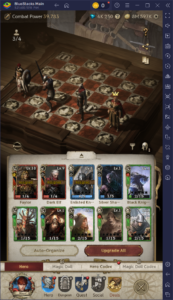
To access the Instance Manager, press Ctrl + Shift + 8 while on BlueStacks. This brings up the instance panel, where you can view all your current instances, launch or close them, and adjust their settings by clicking on the gear icon. To create a new instance, click the “+ Instance” button on the lower left, customize its configuration, and launch it. Keep in mind that running multiple instances requires additional RAM and CPU resources, so adjust the number of instances based on your PC’s capabilities.
Once you have your instances set up, you can install Journey of Monarch on each one and experiment with different approaches. For example, you can try out various hero combinations and formations to see which performs best before committing to a single account. This is particularly useful for rerolling, as you can quickly test multiple heroes across different accounts without waiting for each attempt to finish on a single device.
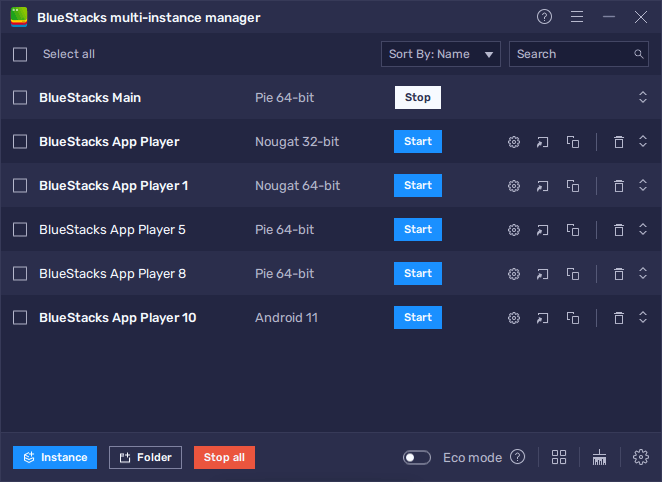
Using the Instance Manager not only speeds up your progression but also lets you explore all the game has to offer without limitations. Whether you decide to stick with one account or progress on multiple accounts simultaneously, this feature opens up new possibilities for your Journey of Monarch experience. For best results, please remember to use our Journey of Monarch promo codes to claim freebies on all your accounts.
BlueStacks is the ultimate platform for playing Journey of Monarch, offering tools that streamline navigation, enhance performance, and enable multitasking like never before. With the Keymapping Tool, you can customize controls for faster menu navigation; with advanced performance settings, you’ll enjoy the game’s stunning graphics and smooth gameplay; and with the Instance Manager, you can explore different strategies and approaches effortlessly.
Take your adventure in Aden to the next level by downloading and playing Journey of Monarch on PC or laptop with BlueStacks today!


