MIR4 on PC - How to Optimize Your Gameplay Experience with BlueStacks
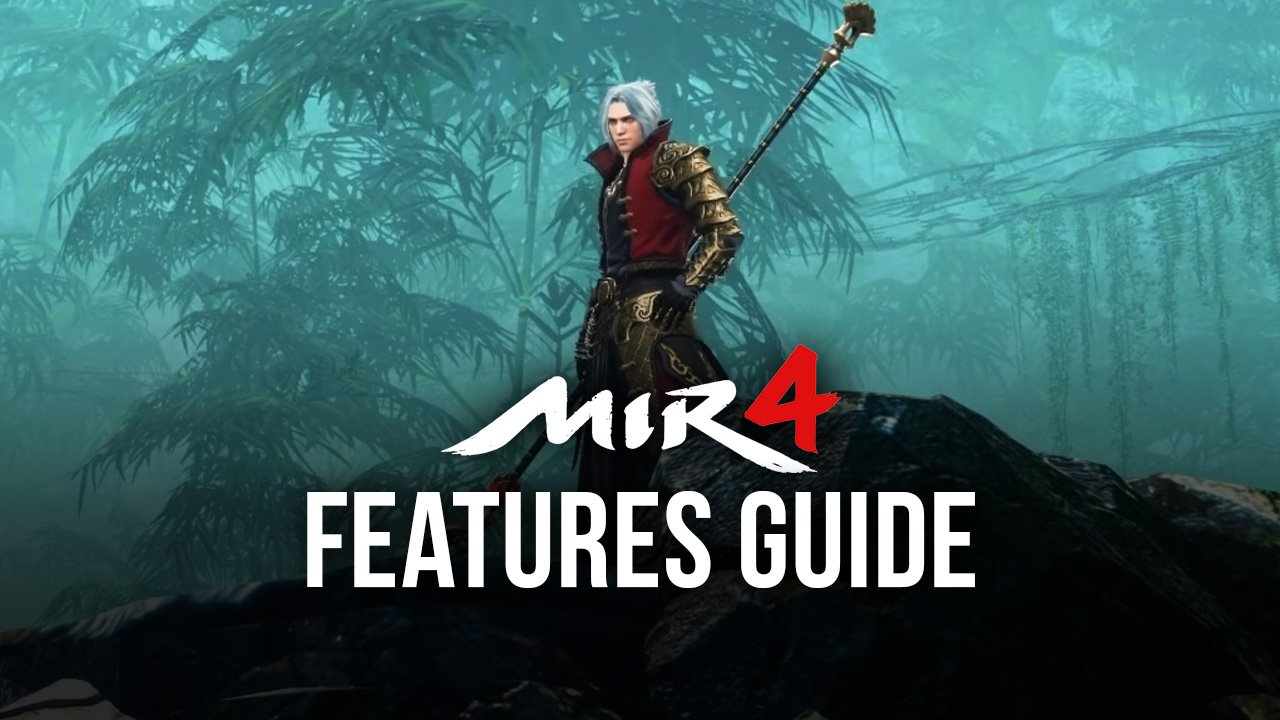
Games like the new MIR4 are constantly pushing the boundaries of what we can achieve with mobile games, featuring groundbreaking graphics and stellar visual presentation not unlike what we’d see in a PC or console game. And while their gameplay varies considerably depending on the game itself, it’s no secret that mobile titles are looking better than ever nowadays, compared to just a few years ago.
Understandably, as games improve in the graphics department, so too do their requirements, which means that you’ll need progressively better phones in order to run them with adequate performance. These high-end phones can cost a pretty penny, however, which puts them out of reach for the majority of gamers around the world. Luckily, you can easily install MIR4 on PC for free with BlueStacks, and enjoy everything that this mobile MMORPG has to offer, but on your larger computer monitor, and with performance comparable to the most expensive phones on the market.
However, a great performance and graphics are not the only things that our emulator has to offer; BlueStacks is equipped with a variety of tools and features that are designed to further boost your gameplay experience, such as by making it much easier and comfortable to control your character, or even to progress much faster with macros or other elements. And in this guide, we’re going to show a few ways that BlueStacks can optimize your enjoyment of MIR4 with its tools, as well as give a few pointers on how to configure them to achieve these results.
How to Get the Best Graphics at 60 FPS
As we mentioned above, MIR4 looks absolutely amazing; it features a blend of high-quality character models with intricate animations and beautifully rendered environments, which combine to create a feast for the eyes. Understandably so, if you’re playing on your phone, there’s a good chance that you’ll need to settle for either graphics, or performance, but not both. However, with BlueStacks, you can have your cake AND also eat it.
To get the best experience with MIR4 on PC, we need to make a few adjustments to BlueStacks, as well as in the game. Here’s a step-by-step explanation on what you need to do:
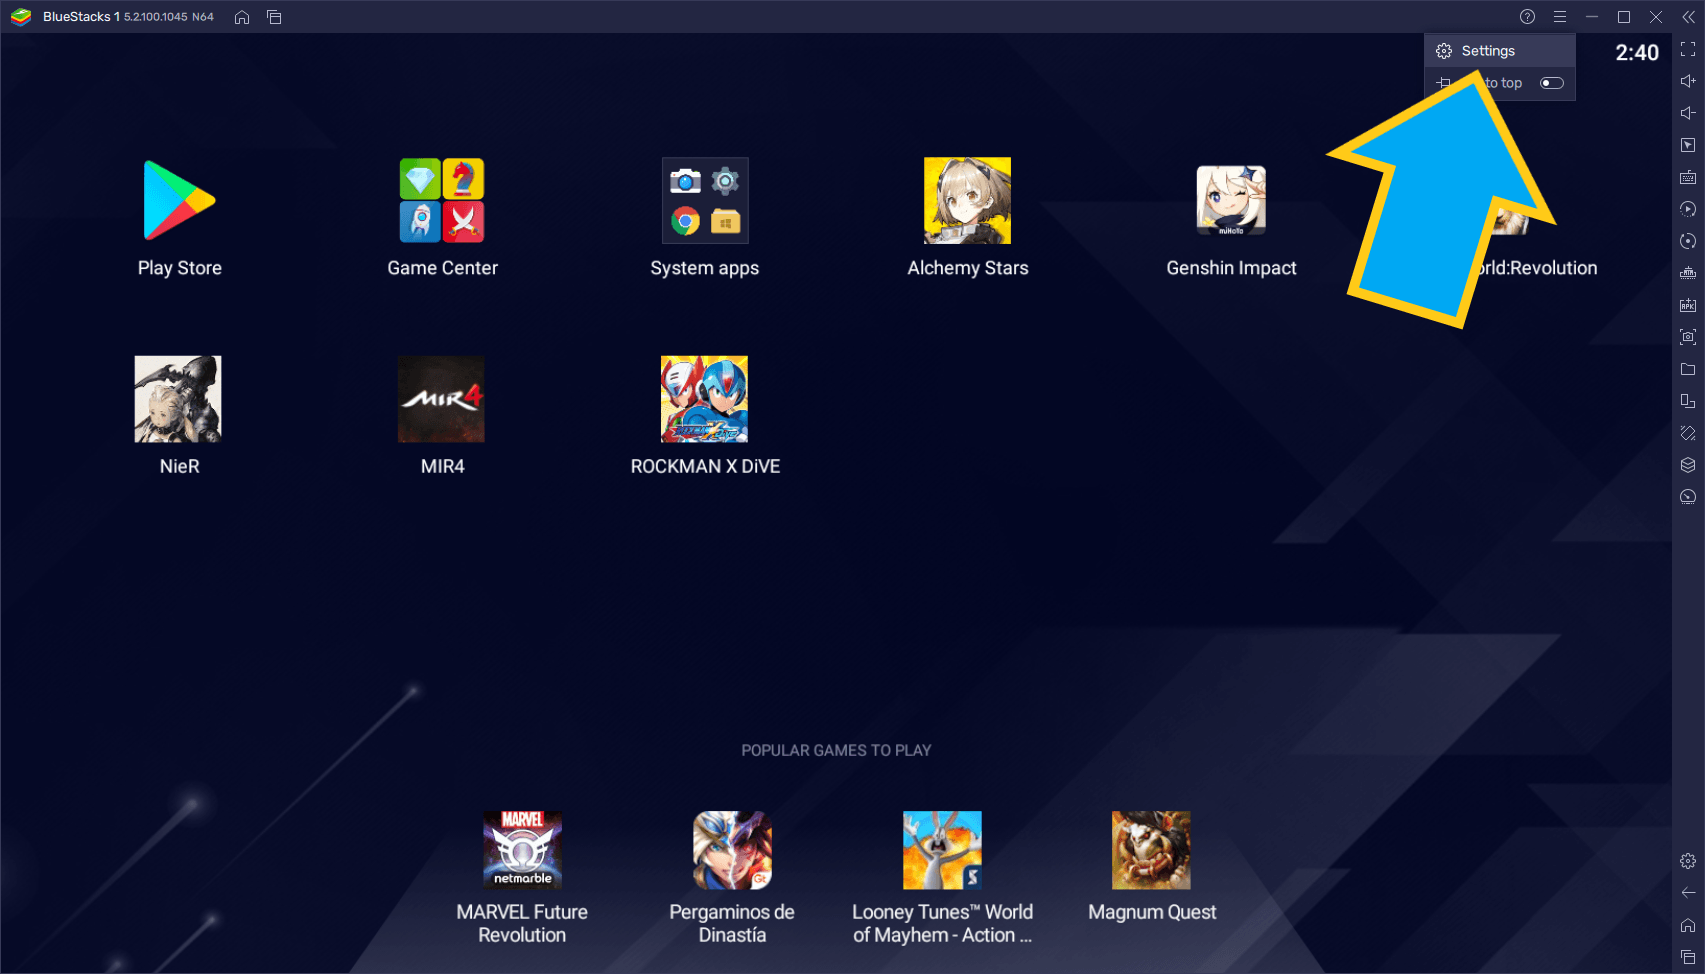
- Open the BlueStacks “Settings” menu by clicking on the hamburger icon on the top right of the screen.
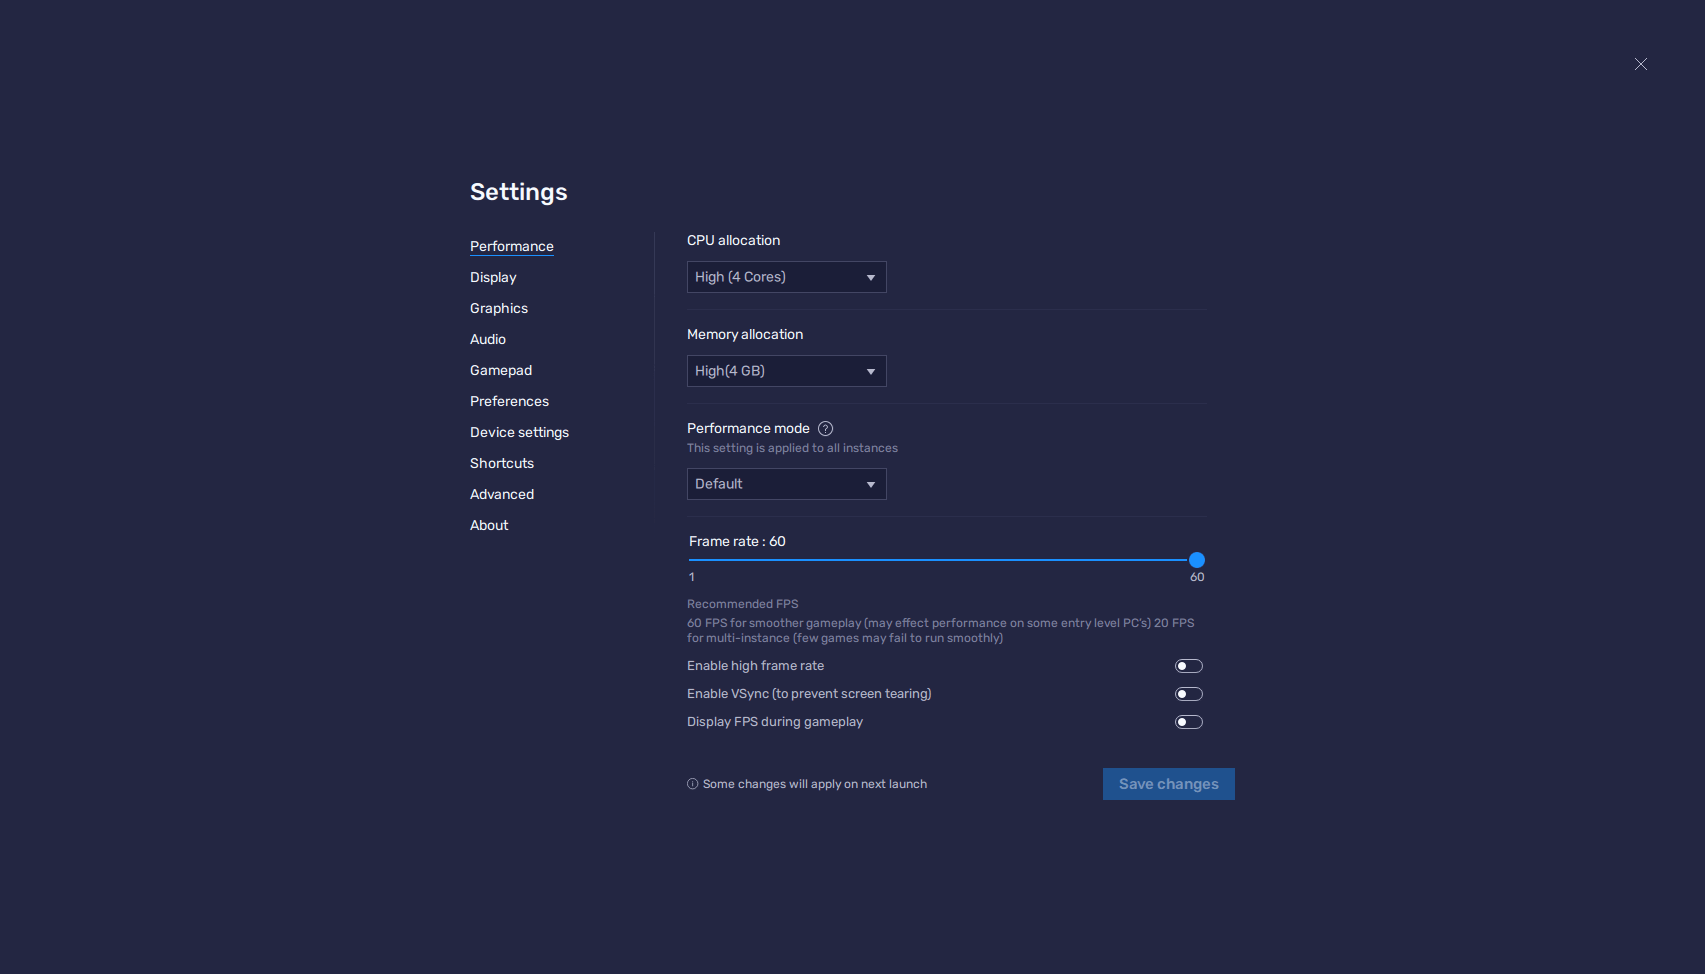
- In the “Performance” tab, set the CPU allocation to 4 Cores, the Memory allocation to 4GB, and set the Performance mode to “High Performance”. Also, set the FPS slider all the way to 60 FPS. Remember to click on “save changes” after you’re done.
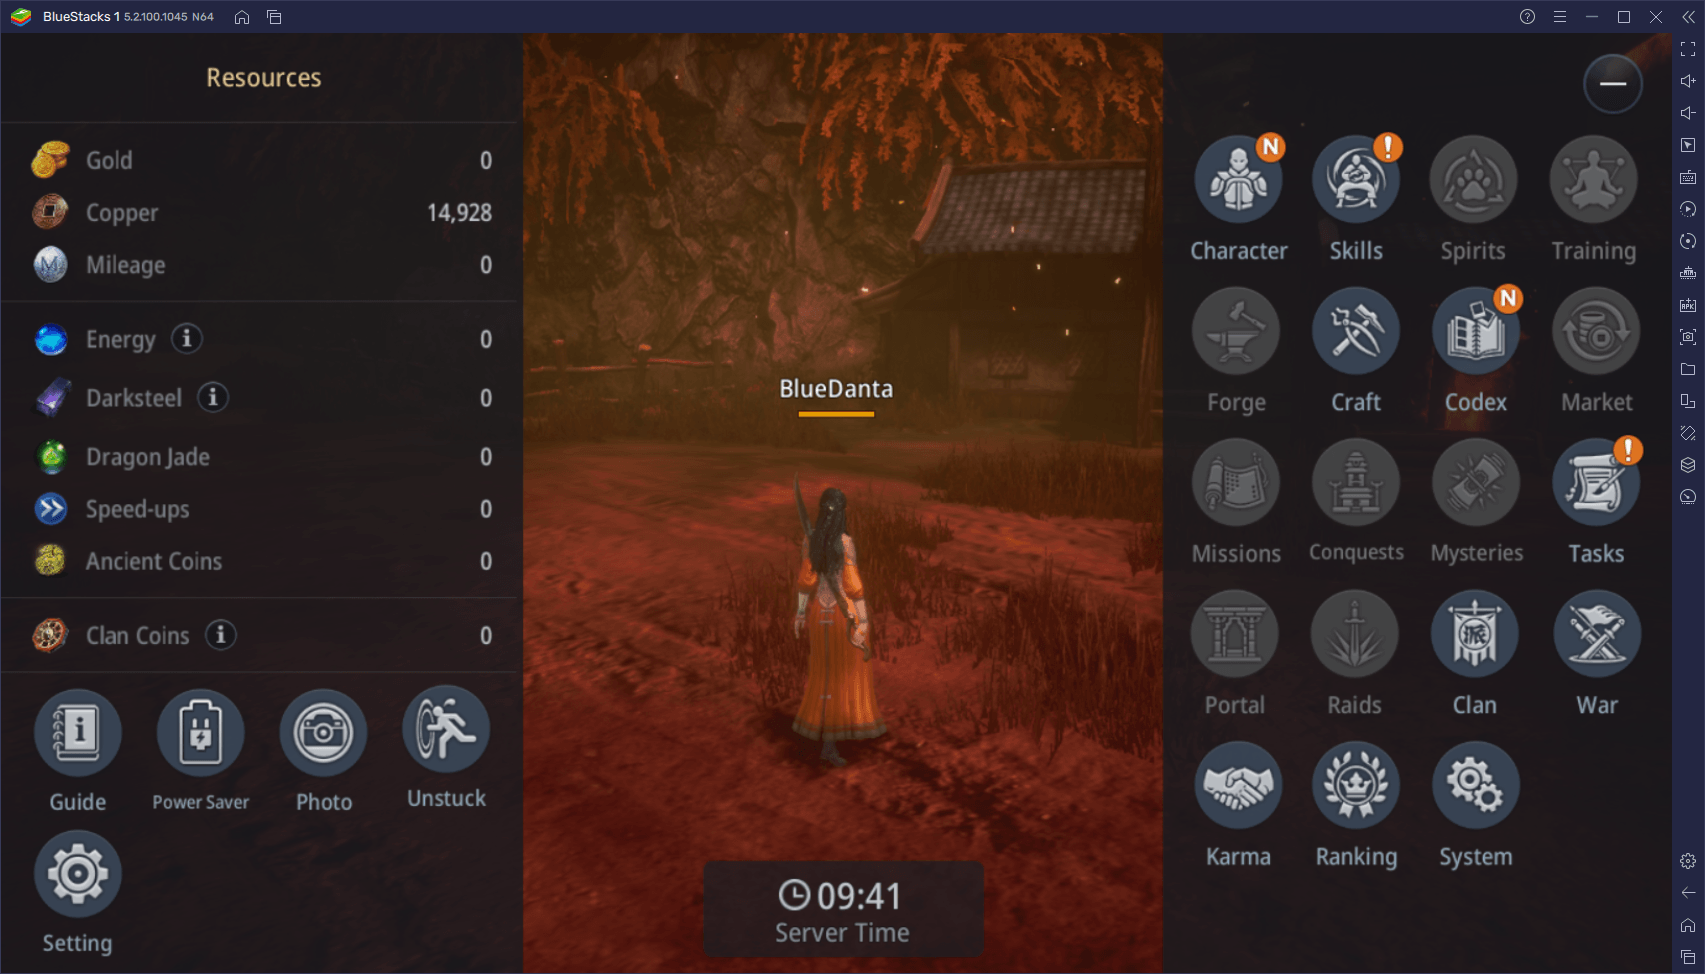
- Launch MIR4 and go to the in-game System menu.
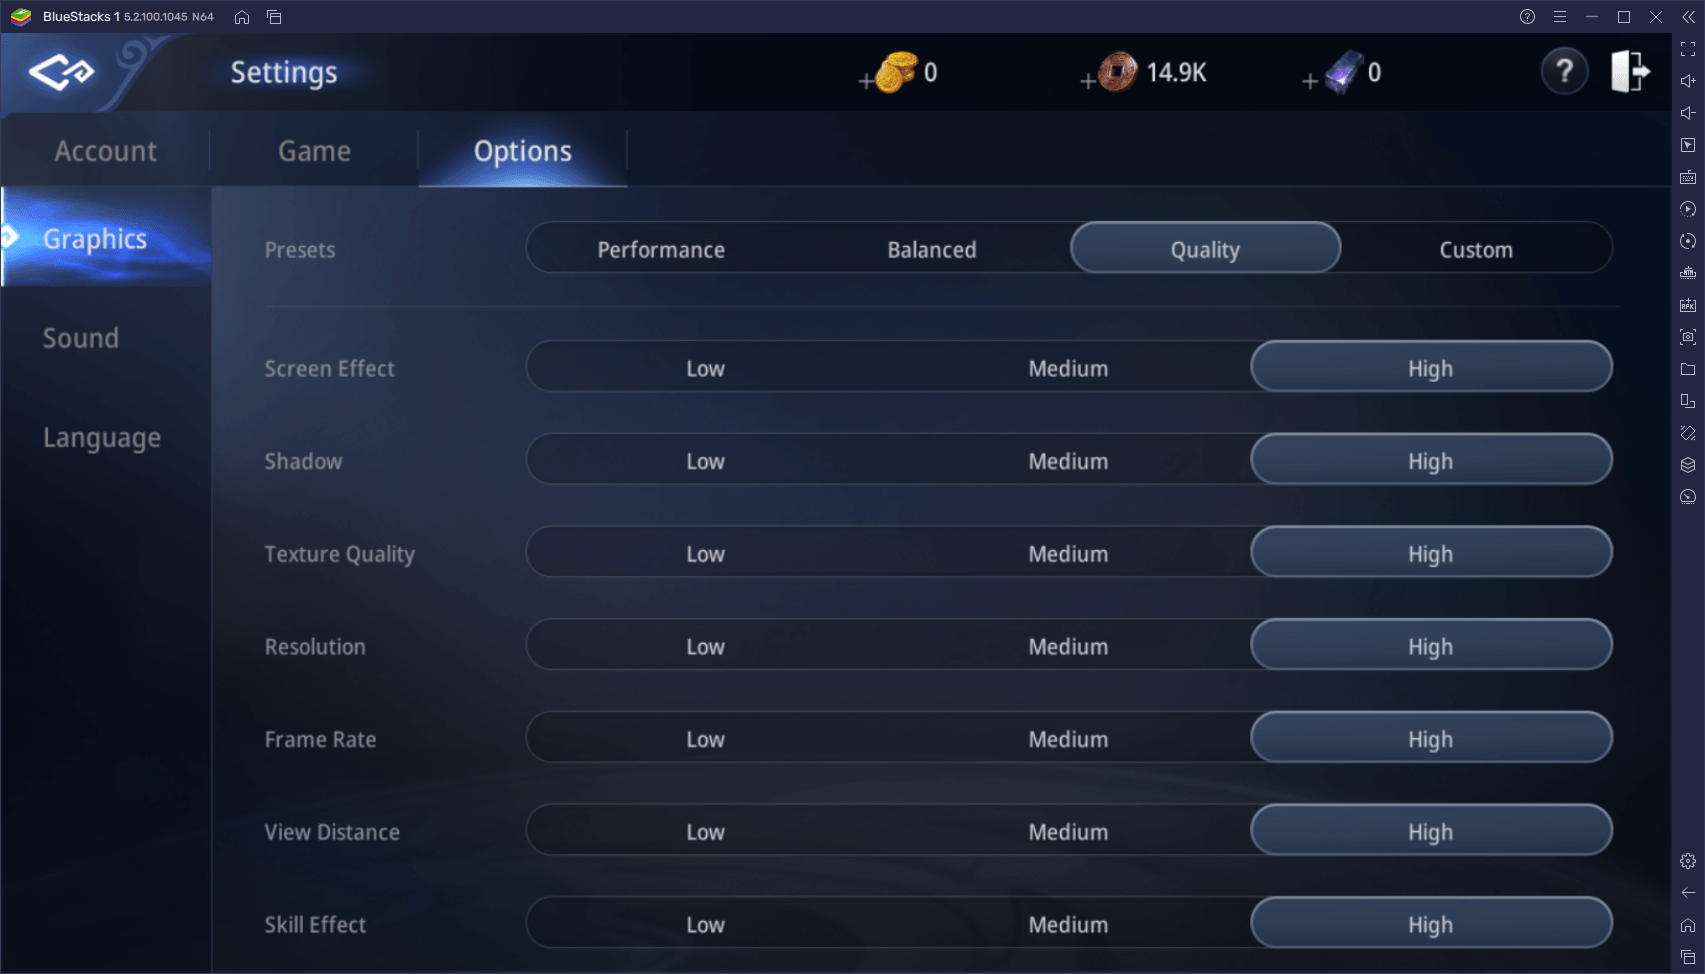
- In the “Options” section, under the “Graphics” tab, set the preset to “Quality”, making sure that the Frame Rate parameter is set to “High”.
With these adjustments, your game should look and run as smoothly as possible. And aside from looking and feeling great, the crisp image and stable frame rate will also make it much easier for you to control your character and defeat your enemies.
How to Configure the Mouse and Keyboard Controls
Another aspect of BlueStacks important for games like MIR4 is the Keymapping Tool, an element through which we can easily and quickly configure the controls of any mobile game. In contrast with playing on our phones, where we’re stuck with awkward touchscreen buttons, you can have full control over your character using your physical mouse and keyboard, which translates to tighter handling, fewer mistakes, and making it much easier for you to destroy your enemies on the battlefield.
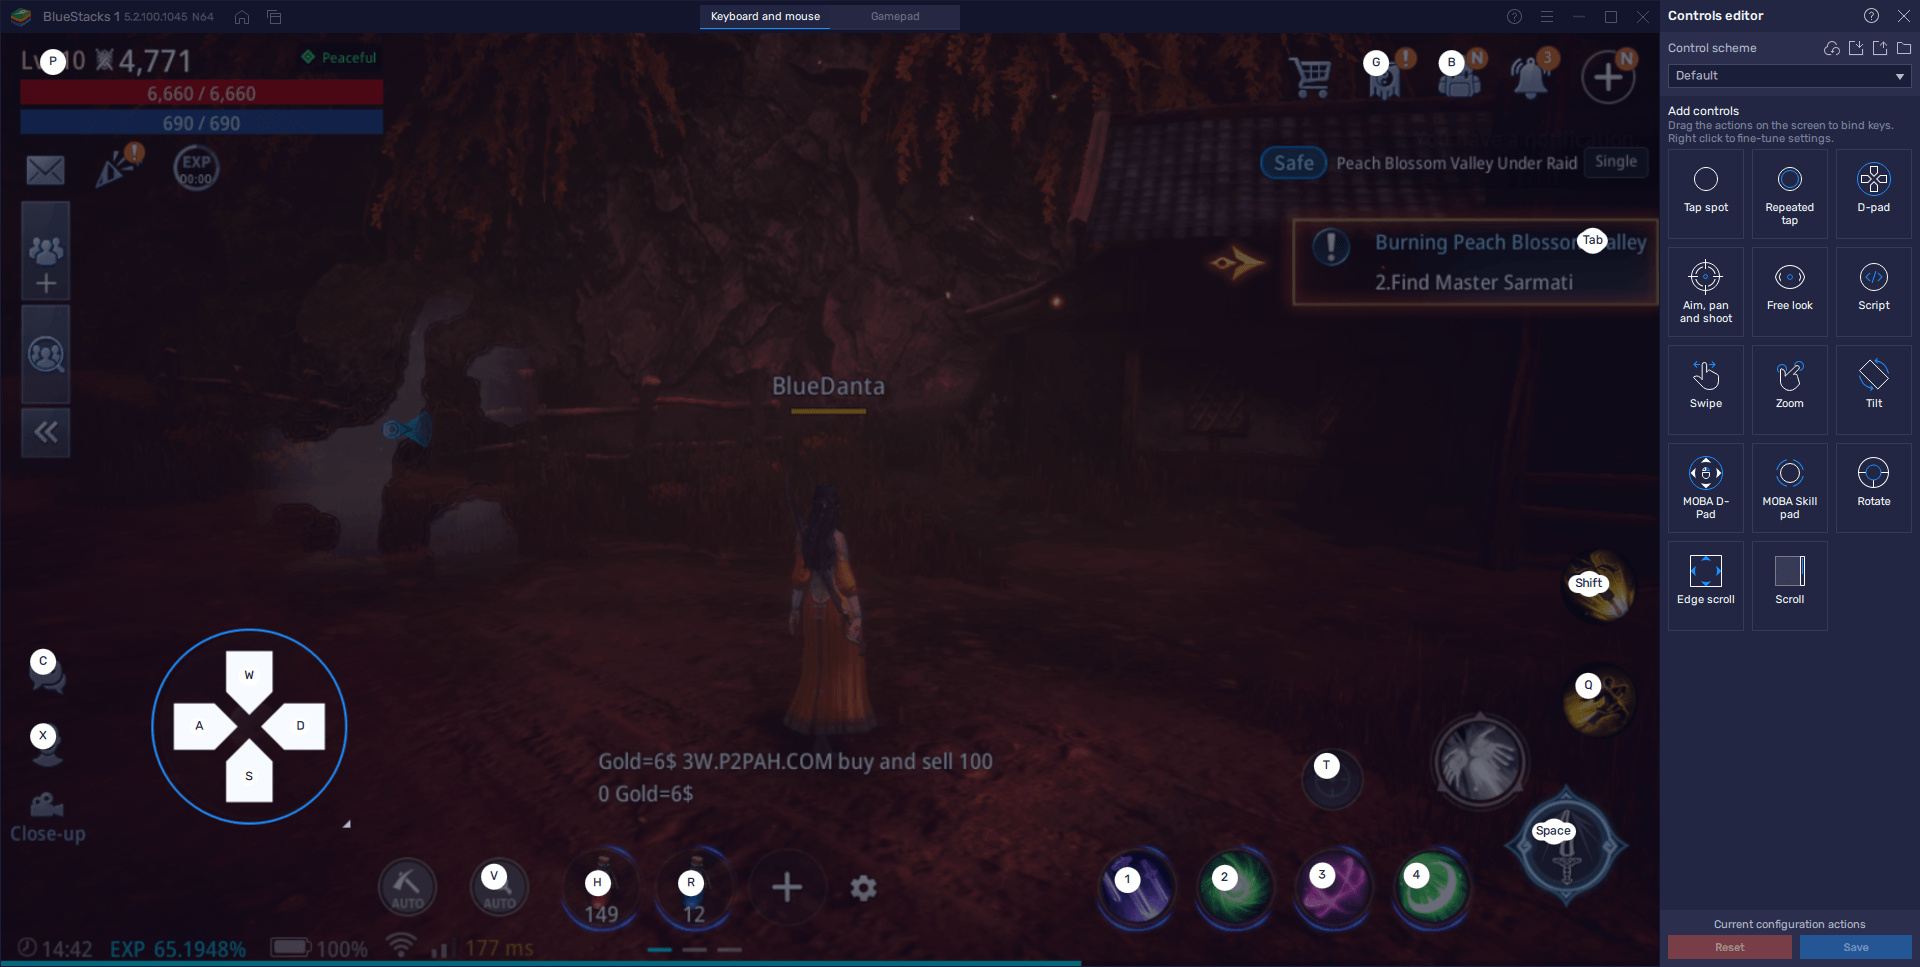
When you launch MIR4 on PC for the first time, you’ll notice that the game already has a control scheme configured by default, which allows you to control most aspects of the combat, at least at the beginning. However, you can easily modify these controls, or even add more functionality to the existing scheme by pressing Ctrl + Shift + A and accessing the Keymapping Tool proper. In this new screen, you can click on any existing binding to change its assigned button, or drag new functions from the panel on the right to add more shortcuts. Just remember to add a keybinding to the new functions, or else they’ll be essentially ineffective.
Level Up Multiple Characters Simultaneously with Ease
As an MMORPG with lots to see and many challenges to complete, you’ll be relying on a group from time to time, especially when it comes to fighting against the toughest bosses. However, finding a steady group of gamers with whom to complete the most difficult challenges can be more complicated than the battle itself. But what if you didn’t need to rely on others for help? What if you could become a one-person army using multiple characters?
With the BlueStacks Instance Manager, it’s possible to create numerous instances of our emulator, and then use them to access the game with all of them at the same time. This means that, if your PC can handle it, you can create a full group using just your own accounts, and tackle the hardest content without ever having to find other players. And since the game has such a strong emphasis on auto-combat, it’s possible to use the Instance Manager to develop multiple characters at the same time with little effort since you can just leave them AFK grinding for the most part.
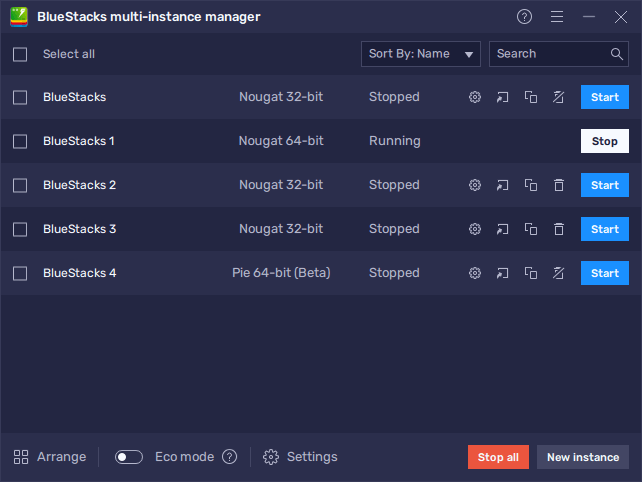
And when it comes to completing daily challenges, you don’t even need to finish them on each account individually; simply use the Multi-Instance Sync feature and play as you normally would on one of your accounts while BlueStacks does the heavy lifting in the background. With this feature, all the actions that you perform on your active instance are replicated across all other active windows, effectively letting you progress on all of them without any extra effort.
BlueStacks can help to significantly enhance your enjoyment of MIR4 on PC by giving the best tools, graphics, and performance. Leave us a message below if you have any questions or comments.

