Installing Sonny On BlueStacks: How To Survive Apocalypse In 25 Minutes
That glorious day has finally come: Zombie invasion has begun and we are ready to become the ultimate survivor. We have been waiting for a long time to hear the outbreak news – finally, all those machetes and ration packs will be of use. But before we start bashing heads and taking out zombie names, we must install and configure Sonny on BlueStacks first: Don’t worry, this will be short and sweet, as we are looking forward to killing some zombies too. Let’s start, there is an apocalypse train we must catch.

Downloading And Installing Sonny: 10 Minutes
It is quite easy to install Sonny: Start by searching the name of the game on BlueStacks App Center. If you don’t see Sonny among the results, don’t worry: Click on “visit Google Play” link and make another search, it will be listed this time. Now, click on “install” and relax: BlueStacks will handle the rest. Sonny is only 230 MB big, so downloading and installing the game takes 10 minutes’ top. Once it is ready to play, BlueStacks will inform you. After that, you can click on the game’s icon and start the apocalypse.
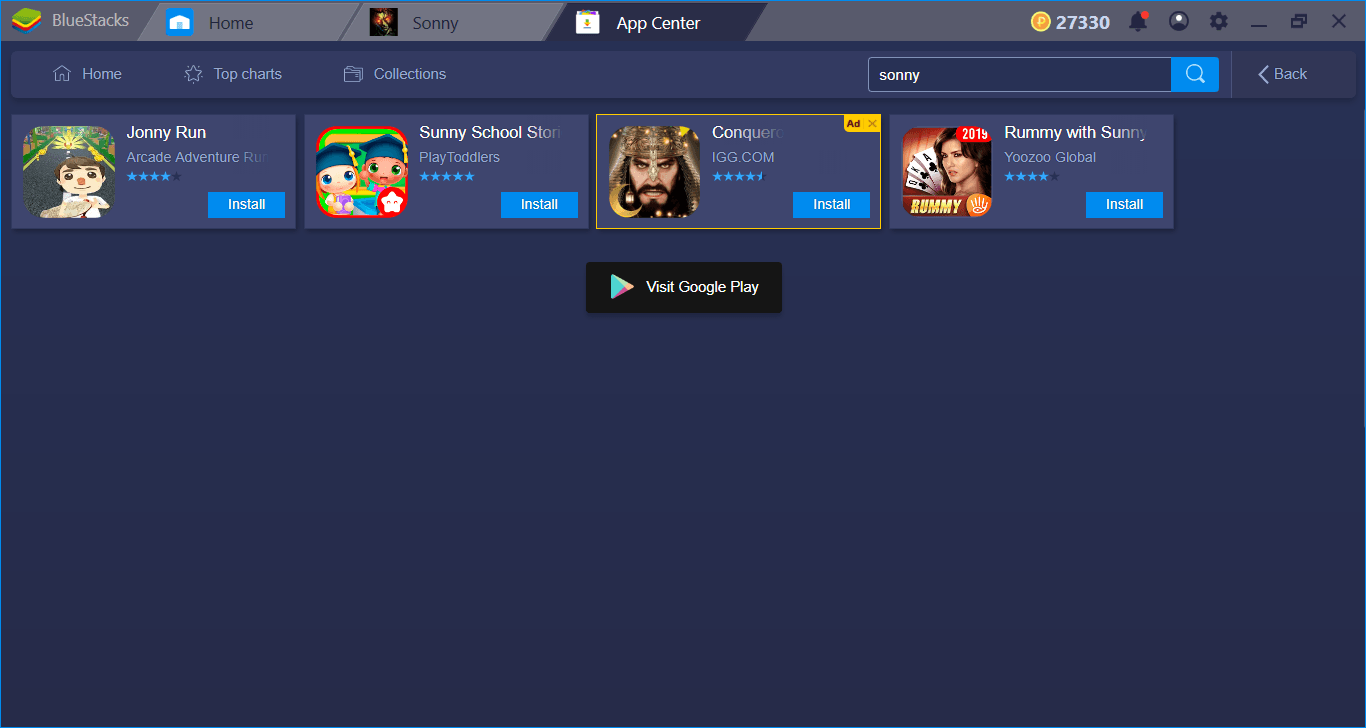
If it is not listed on this page, click the marked section and make another search.
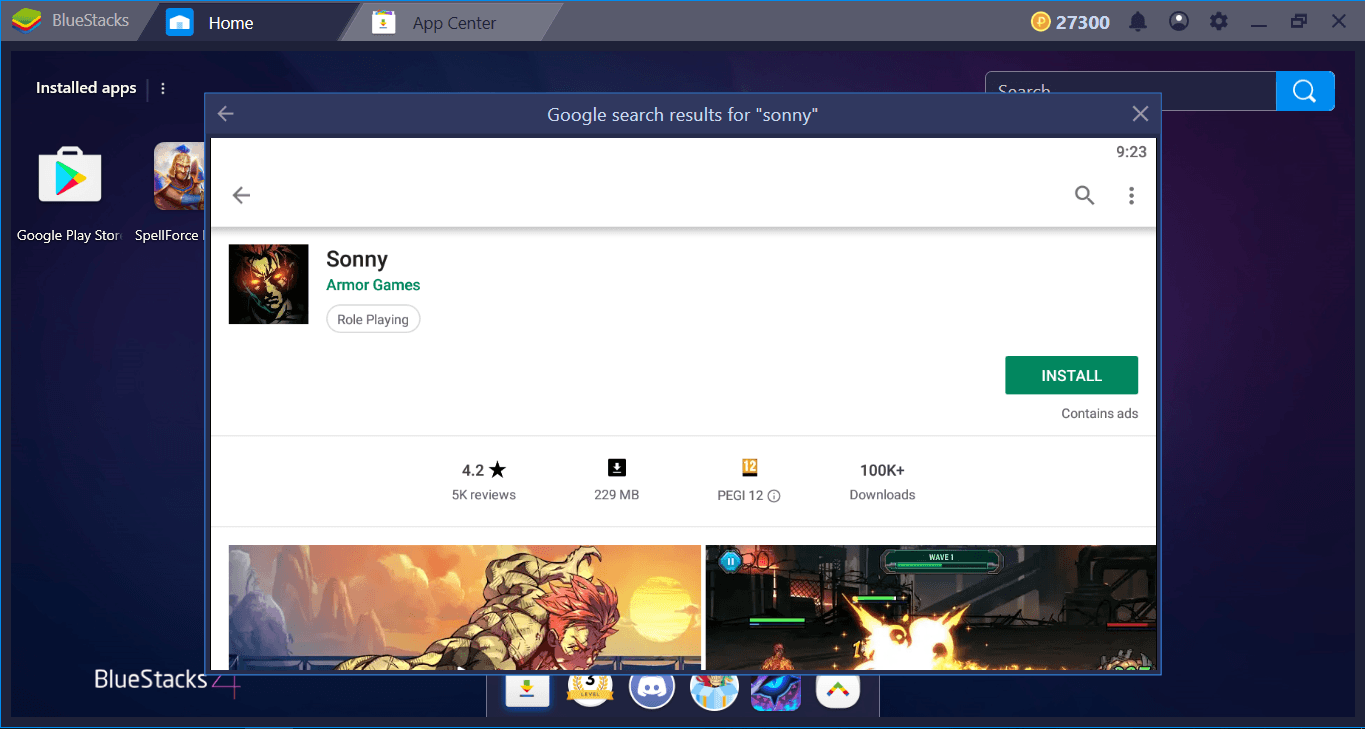
Here it is – only a couple of minutes left to meet with the zombies.
Configuring The Controls: 5 Minutes
Sonny is a “click-to-fight” game, which means the only control tool you need is your mouse. In fact, clicking on buttons is the most effective way of playing Sonny, so you don’t actually need your keyboard. And that’s why the default control scheme of BlueStacks does not include any keyboard keys. However, our friendly neighborhood zombie Sonny has access to lots of skills and after a while, “clicking” becomes kind of boring. Instead, you can create tap spots on top of these skill buttons and assign keyboard keys to each of them. Once you are done, you can use those keys to activate the relevant skills. So the keyboard support is still available, you just need to configure it. Here is how you can do this:
Play Sonny on BlueStacks 4
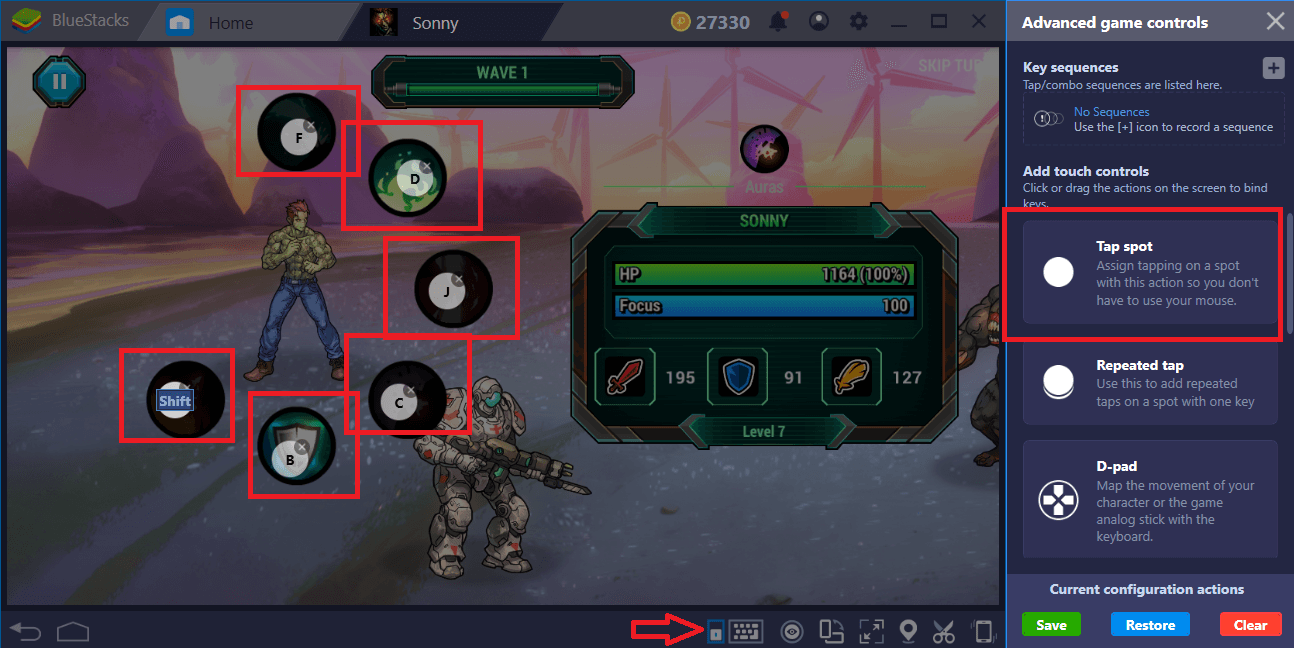
Click the tiny keyboard icon to open Advanced Keymap Tool menu. Now, click on “tap spots”, and drag them on top of the skill buttons. Assign a key to each spot, save, and you are done. In the future, you can use these assigned keys to activate the skills. You can still use your mouse too, of course. The whole process will take 5 minutes’ maximum.
Creating And Recording Combos: 10 Minutes
The battle system of Sonny is turn-based. When it is your turn, you pick which skill to use. Thing is, you have access to only two skills at the beginning, and only one of them is off CD (cooldown), which means you use it over and over. And once the CD of the other one finishes, you click on that. In other words, you get to click only two buttons in a certain order for a long time, and believe us, this becomes boring quite fast. But we can use the Combo Key feature to get rid of this problem: Click those buttons only once, record it, and repeat the same sequence with only one keystroke. You can focus on other things and surf the web, for example, while waiting for Sonny to crush zombies. The Combo Key feature automatizes all of the battles.
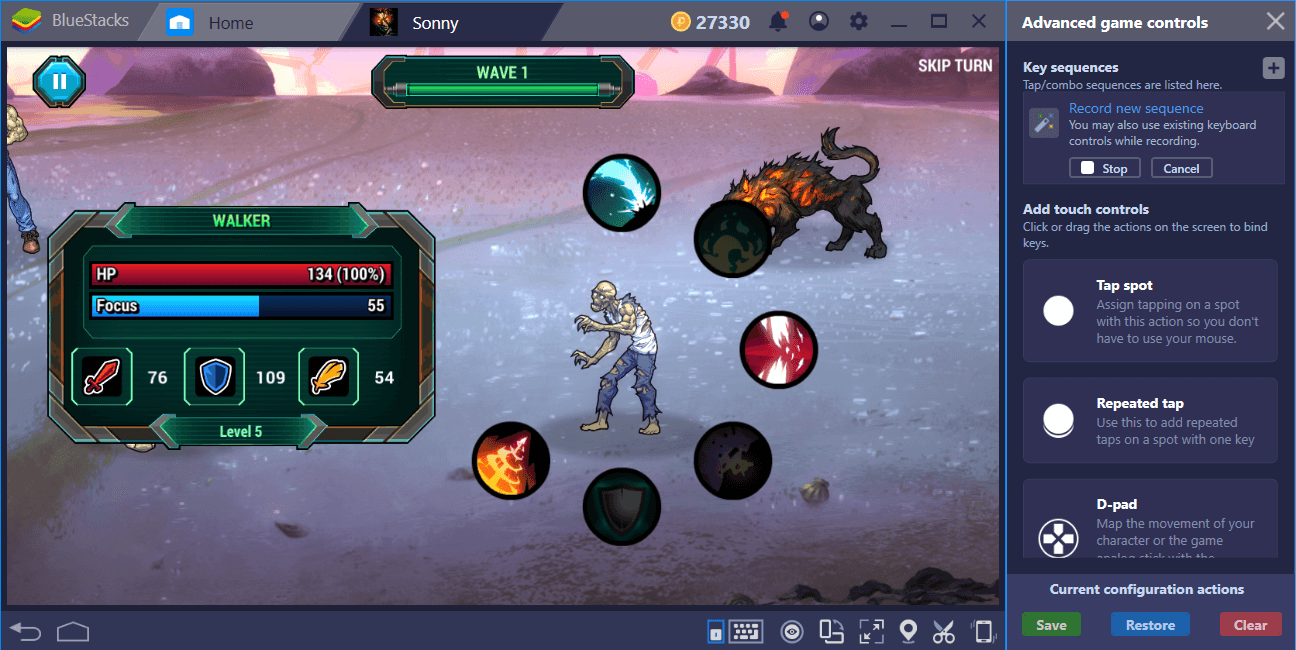
Start a fight, click on your skill buttons, and record this action chain.
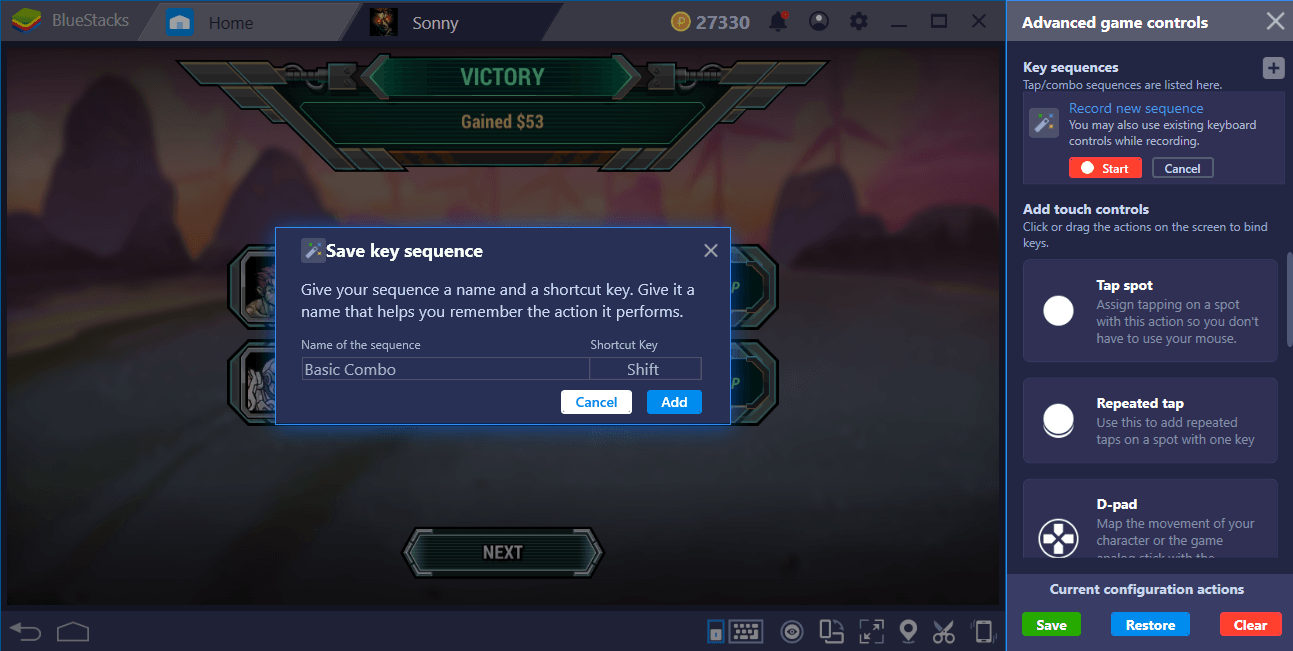
Now we have a recording and we can repeat it as long as we want, by pressing the assigned shortcut. This process won’t take longer than 10 minutes, possibly shorter.
What is the total? 25 minutes? Yes, it will take this long to start bashing zombie’s heads – you waited for years for this day to come, we are sure you can wait 25 minutes more. Read our review too to learn more about Sonny and keep those machetes sharp: You are going to need them. Let’s welcome the apocalypse on BlueStacks together!

