Dunk City Dynasty on PC - How to Enhance Your Gameplay Experience With Our BlueStacks Tools and Features
With the release of the new Dunk City Dynasty in the Philippines, mobile gamers in the region now have yet another option to enjoy some thrilling street basketball gameplay on PC. However, did you know that even if you’re not in the Philippines, you can still download and play Dunk City Dynasty on PC for free? We wrote a separate piece on how to get started, so feel free to check it out to learn more about this.
Table of Contents
- Optimize Your Graphics and Framerate With a Few Clicks
- Set Up the Best Mouse and Keyboard Controls
- Dominate the Court With Gamepad Support
- Try Out Multiple Teams and Strategies Simultaneously
Gamers who play Dunk City Dynasty on PC with BlueStacks will be able to enjoy a whole host of improvements and upgrades, compared to the typical mobile gaming experience. And in this article, we’re going to explain how to use our BlueStacks tools to get the most out of your game.
Optimize Your Graphics and Framerate With a Few Clicks
Dunk City Dynasty has tons of eye candy in the form of great graphics. However, if you’re playing on your phone, you’d need a powerful device in order to run it with stable performance. Luckily, if you’re playing on PC with BlueStacks, you can not only enjoy this game on a large PC monitor, but you can also do so with the highest visual settings and without any of the drawbacks of playing on phones such as overheating issues and battery drainage, to name a couple.
While BlueStacks comes configured from the moment you first install it, your setup might require a few tweaks in order to get the most out of your game. We’ve broken down this easy setup process into a few quick steps:
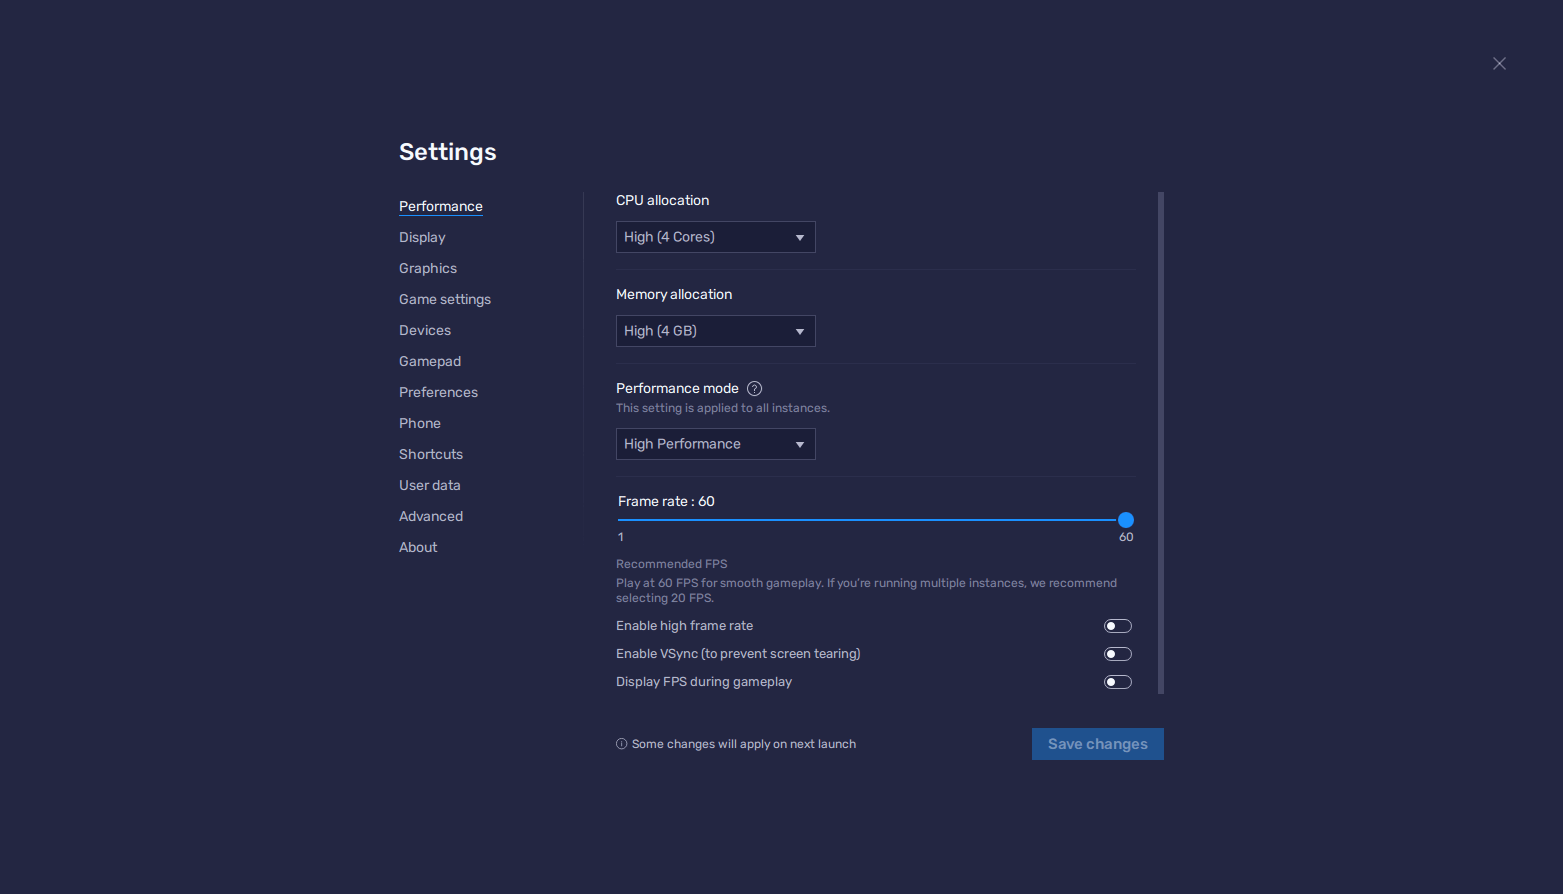
- In the BlueStacks settings, go to the “Performance” tab.
- Check that your emulator is using at least 4 GB of RAM, 4 CPU cores, and that the Performance mode is set to “High performance”.
- Set the FPS slider underneath to at least 60 FPS, and finish by clicking on “Save changes” on the bottom right.
- Launch the game and head to the in-game settings.
- Set your graphical options on the highest settings.
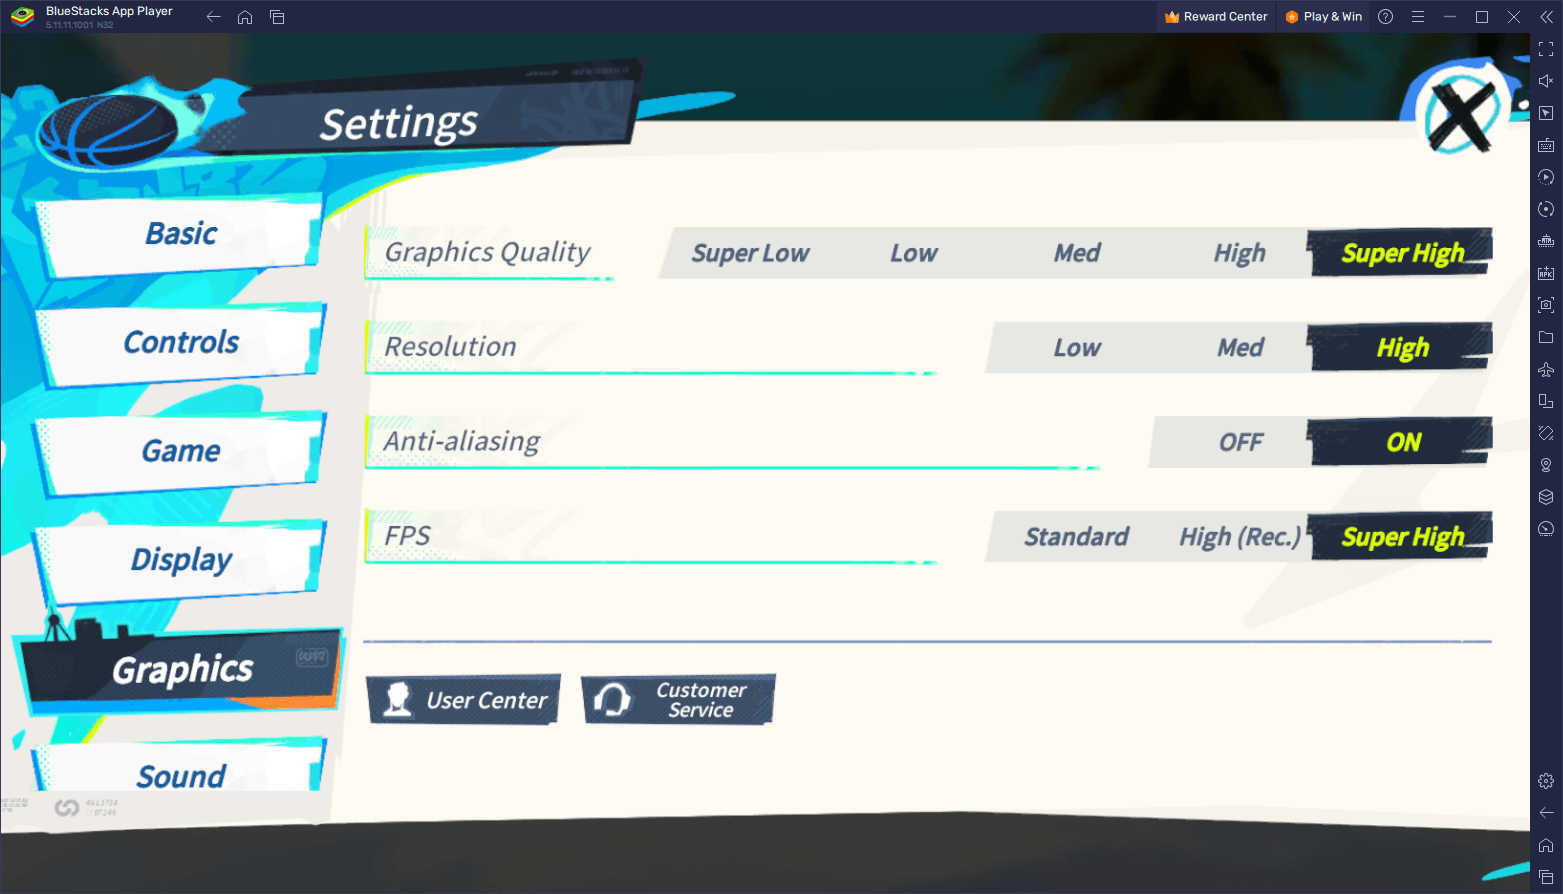
These settings will ensure that you’re getting the smoothest 60 FPS gaming experience in Dunk City Dynasty on PC.
Set Up the Best Mouse and Keyboard Controls
One of the most important elements that you’ll need to optimize in order to win your basketball matches in Dunk City Dynasty are your controls. Simply put, without good controls, you’ll be struggling as much with your game as you will against your opponents. Luckily, by playing on BlueStacks, you can gain access to the Keymapping Tool, a feature through which you can configure the best keyboard and mouse controls that will let you dominate the court with superior precision and comfort.
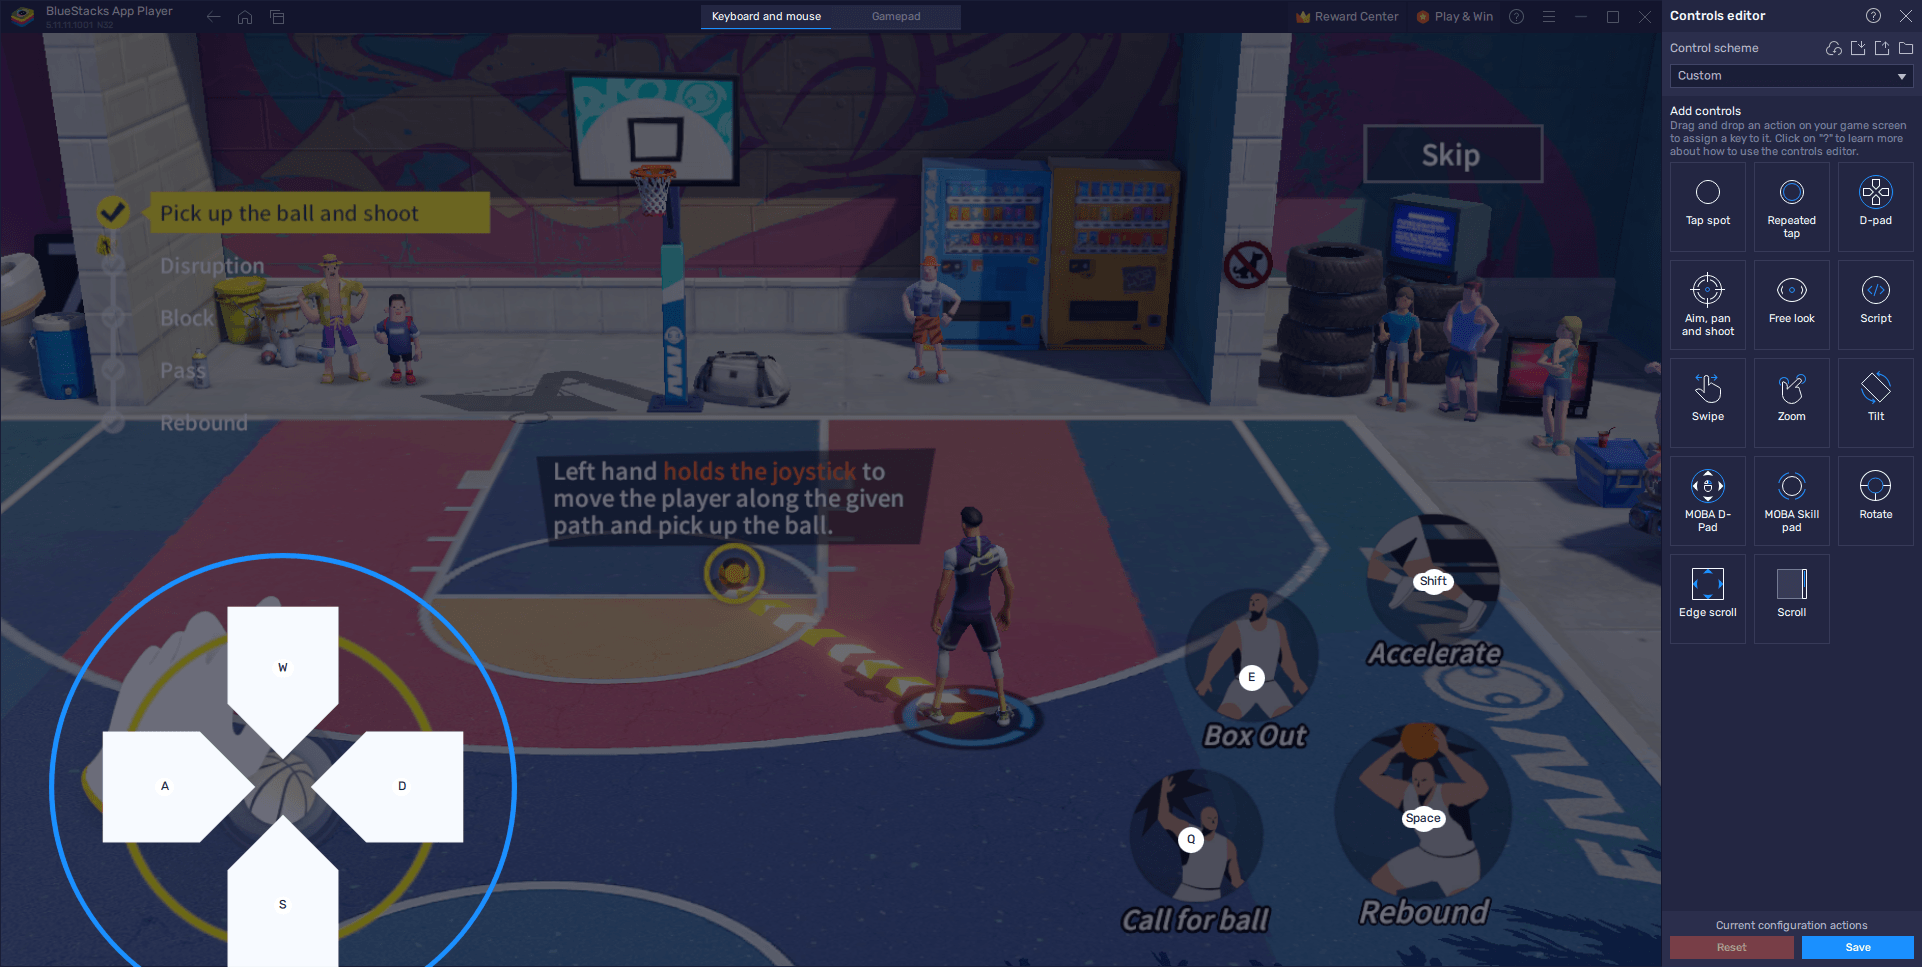
To access the Keymapping Tool, you can simply press Ctrl + Shift + A while in-game, or click on the tool’s button on the BlueStacks side panel. This command will bring up the Advanced Editor screen where you can view your current bindings, modify them by clicking on them, delete them, or even add new ones by dragging and dropping them from the rightmost panel onto anywhere you need them on the screen.
With this valuable tool, you can focus less on struggling with the game’s touchscreen controls, and more on having fun and breaking your opponents’ ankles with your superior controls.
Dominate the Court With Gamepad Support
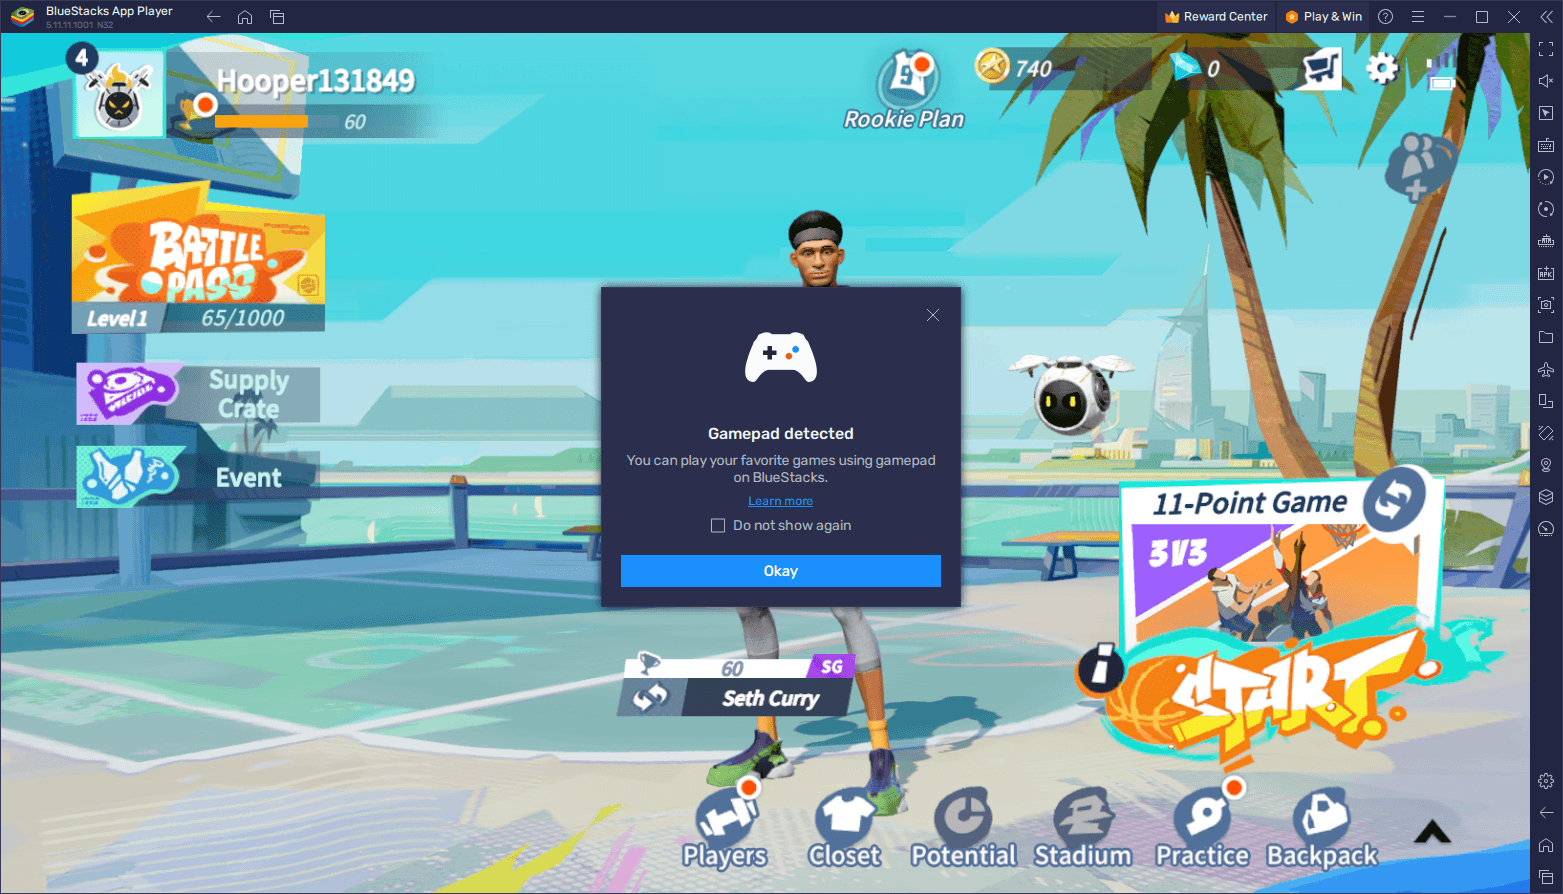
In the same vein as the above suggestion, the BlueStacks Keymapping Tool also has support for gamepad controls, allowing you to control the action and win all your matches using your controller.
To set up these gamepad controls, all you have to do is access the Advanced Editor by once again pressing Ctrl + Shift + A. However, instead of editing the existing keyboard and mouse controls, you must click on the “Gamepad” button on the top center of the screen to switch to your gamepad config. Once switched, all you have to do is configure your gamepad controls by clicking on the existing bindings, and then pressing the corresponding buttons on your gamepad to assign them. The only exception to this process is the movement controls, in which you must click on the gear icon that appears when you hover over them, and then choose whether to bind the movement to the left or right stick, or to the dpad.
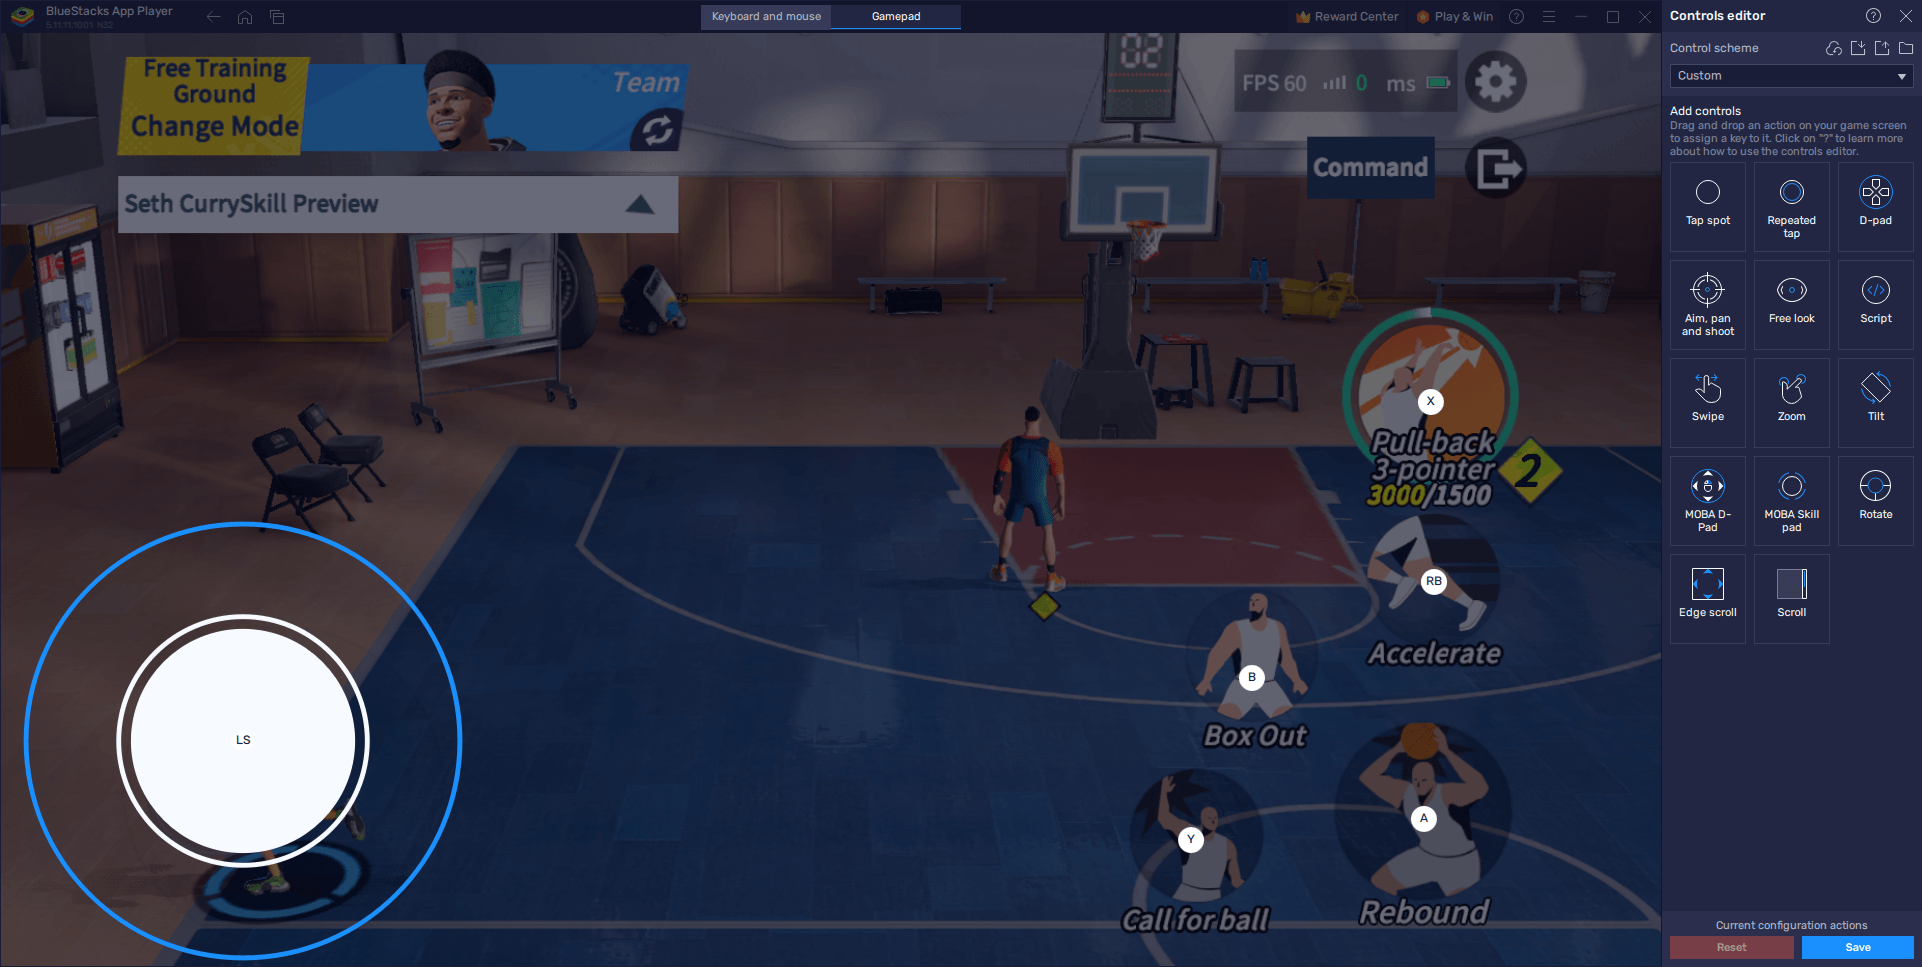
Once all your controls are set up and configured, simply click on the “Save” button like you did in the previous step to implement all your settings and start playing with the comfort and intuitiveness of your gamepad.
Try Out Multiple Teams and Strategies Simultaneously
In some cases, having fun in Dunk City Dynasty goes beyond just winning matches; it’s also about playing to your strengths and being able to adopt a wide variety of strategies and play styles to keep the gameplay fresh and varied. In this sense, while you can adjust your strategies and approaches to the roster of characters you’re playing with, these aspects can vary considerably depending on who you’re able to unlock and recruit to your roster. And while Dunk City Dynasty is a street basketball game first and foremost, it also has a gacha element in which you have little control over the characters you’re able to recruit at any given moment.
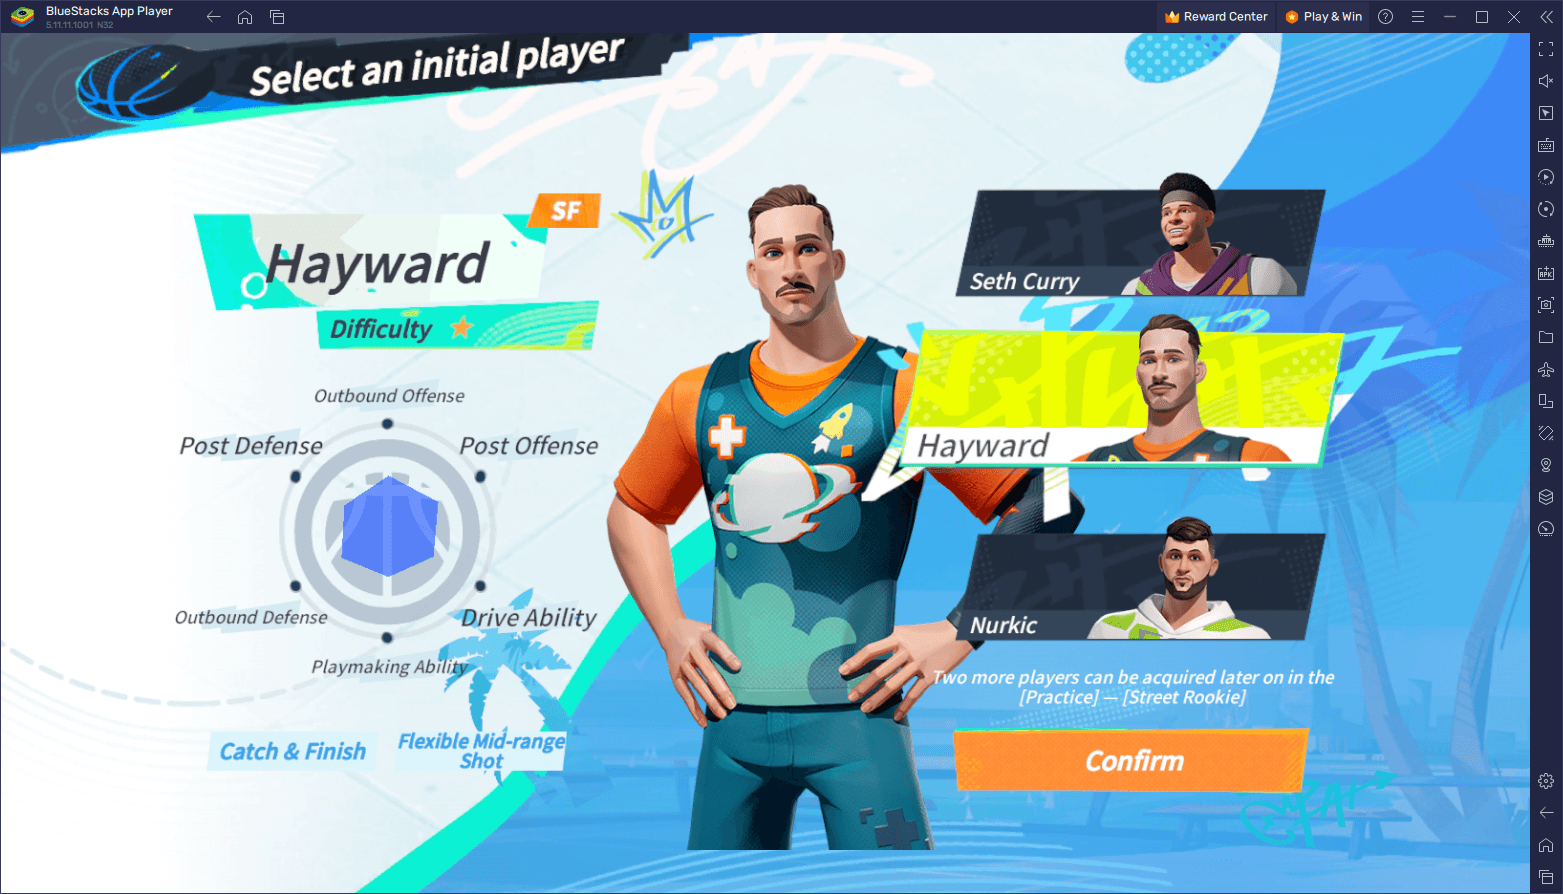
Once you reach level 4, you’ll unlock the Supply Crate feature, which is this game’s gacha aspect. By opening these crates, you have a small chance of obtaining new players for your roster, and an even smaller chance of getting the specific characters that you might be looking for.
Every character has their own strengths and weaknesses, and you’ll be able to enjoy many different play styles and strategies depending on the players you’re able to unlock from the gacha. With the BlueStacks Instance Manager, however, you’ll be able to freely experiment with different formations and strategies, by essentially playing on multiple accounts at the same time. This is because the Instance Manager lets you create as many instances of our app player as you want, and use them to play multiple games at once, or to access the same game on different instances simultaneously.
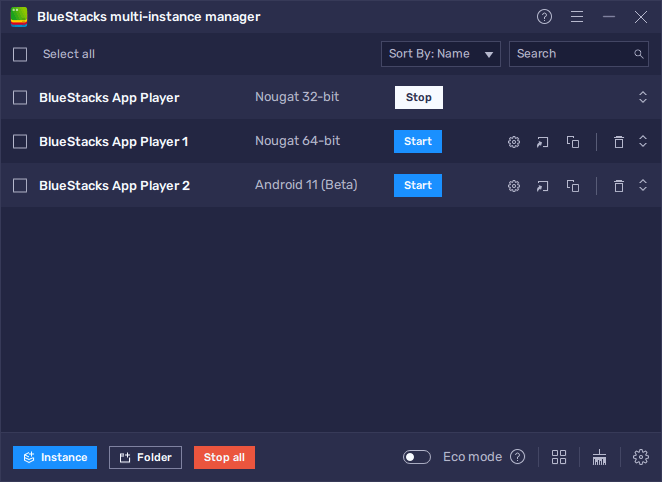
To use the Instance Manager, simply press Ctrl + Shift + 8 or click its corresponding button on the BlueStacks side panel. Afterward, click on the “+ Instance” button on the Instance Manager to create as many instances as you need. And once all your instances are up and running, simply follow the same steps to download and install Dunk City Dynasty on each, and start playing on your multiple accounts simultaneously.
With BlueStacks, you’ll not only enjoy better graphics and controls, but you’ll also be able to freely experiment with different setups and formations, and add tons of variety to your gameplay sessions.


