Mastering Map Positioning in Standoff 2 on PC - Essential Defense Strategies
In Standoff 2, mastering the map is as crucial as having quick reflexes and sharp shooting skills. This fast-paced first-person shooter challenges players not only to outgun their opponents but also to outsmart them through strategic positioning and savvy map movement. For those who want a deeper dive into positioning tactics, this helpful video by the Standoff 2 devs provides a comprehensive guide on setting up effective defenses across various maps. Whether you prefer watching the video or are looking for a text-based explanation, this article complements the video by breaking down the most important tips and tricks for optimal defensive play.
From understanding the fundamentals of crossfire to learning specific positions that can give you the upper hand, we’ll equip you with the knowledge you need to improve your defensive gameplay. Perfect for those who play on PC with BlueStacks, these strategies can be implemented to take full advantage of enhanced controls and graphics, ensuring you’re not just playing the game but dominating it.
Fundamental Defense Concepts: Crossfire and Teamplay
There are two core principles that dictate the success of a defense strategy in the tactical arena of Standoff 2: crossfire and teamplay.
Crossfire is a strategic positioning of players around a bombsite, designed to create intersecting lines of fire over expected enemy paths and critical entry points. By aligning themselves in such a way, players ensure that any advancing threat can be quickly neutralized from multiple angles. This setup not only maximizes the area of coverage but also provides versatility, allowing teammates to adapt to unexpected moves or flanking attempts by the enemy. Effective crossfire requires each player to perform well, as a single weak link can compromise the entire defense, leaving gaps that savvy opponents will exploit. For better results, consider equipping yourself with the best Standoff 2 weapons.
Teamplay, on the other hand, is the glue that holds these strategic positions together. Achieving a cohesive team dynamic is challenging, especially in random matches where communication may be minimal. To overcome this, it is crucial to adapt to the flow of your team’s movements and decisions. Rather than expecting spontaneous coordination from strangers in random matches, it is more effective to pair up with at least one other teammate. This approach not only strengthens your defensive position but also increases the likelihood of successfully executing crossfire setups. In Standoff 2, a well-coordinated team that can effectively manage these two principles is often the deciding factor between a win and a loss.
If possible, try to play with friends so you can significantly increase your odds of mounting better defenses. Barring that, try to add the best players that you meet during your matches, and try to invite them to your team on future occasions. There’s a good chance that they’ll be on the same boat, frustrated at the lack of coordination of random players, and will welcome the opportunity to play with a familiar face. Also, remember that you can always play on PC with BlueStacks, equipped with a plethora of tools and features to enhance your enjoyment and performance, while also playing on a much larger screen and with the precision of your mouse and keyboard.
Map Positioning Tips
When discussing the specifics of each map in Standoff 2, it’s essential to understand that while certain strategies can provide a solid foundation, they are not the ultimate solution to every match. Defensive setups need to be adaptable. Over-relying on a single strategy can lead to predictability, allowing your opponents to quickly adapt and overcome your defenses. To maintain the upper hand, it’s advisable to have two to three varying setups for each bombsite, especially when playing with a coordinated team. This variability ensures that your team can switch tactics on the fly, keeping the opposition guessing and reactionary.
With that said, let’s cover some defensive tips for the more popular Standoff 2 maps.
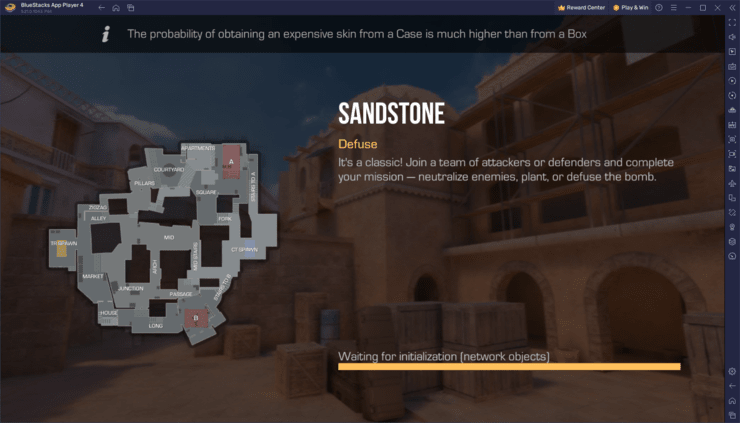
Sandstone Map Defense
On Sandstone, particularly at Bombsite A, effective setups often involve leveraging the apartments and balcony areas. One classic approach is for one player to attract attention on the balcony while their teammate, hidden in the apartment, prepares to ambush the distracted enemies from behind. This pincer movement can effectively neutralize threats entering the site. Another setup involves positioning one player along the long approach while their partner covers from under the apartments, providing mutual support and creating a robust crossfire that’s difficult for enemies to breach.
Transitioning to Bombsite B, the focus shifts to utilizing the container and stairs for strategic advantage. One player might position themselves behind the container or directly on the bombsite, while another controls the staircase area, ready to engage enemies from an elevated or covered position. The inclusion of a third, roving player to cover junctions or rotate as needed helps to compensate for holes in the defense, as well as helps as an early warning sign for approaching enemies.
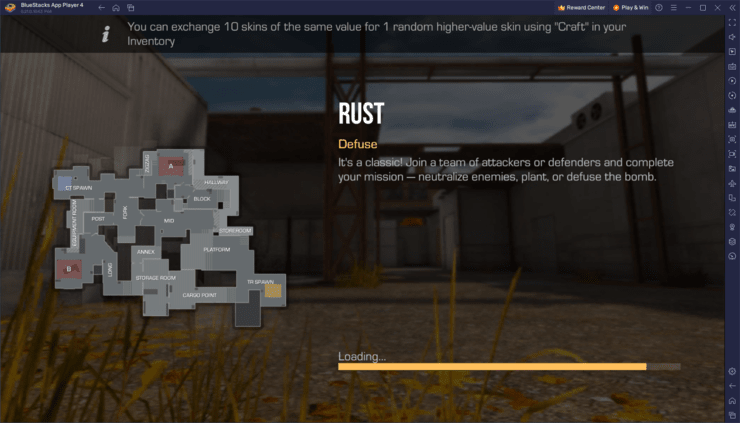
Rust Map Defense
For Rust, at Bombsite A, the setups can vary from tightly controlled to more fluid defenses. A common tactic is for two teammates to fortify a position behind a key container, preparing for a direct confrontation. Alternatively, more dynamic setups might involve one player watching the block exit while another covers the hallway, allowing for both focused fire and quick adjustments to enemy movements.
At Bombsite B, the role of the third player becomes pivotal, often rotating through the hallway to assist against threats that appear on either Bombsite. This flexibility ensures that the team can respond rapidly to shifting attack patterns, which is a crucial element in maintaining control of the site. Other players can position themselves on the Bombsite itself to ensure proper crossfire against points where enemies commonly emerge.
Breeze Map Defense
On Breeze, for Bombsite A, popular strategies include using containers for cover and positioning control. A player might maneuver behind these containers to disrupt incoming attackers, while their teammate supports by watching the long approach or guarding the fountain exit. The ability to interchange these positions based on enemy movement and tactical needs makes the defense unpredictable.
Bombsite B strategies often revolve around brick piles points and ramps, with options to boost teammates into advantageous positions for unexpected angles of defense. The brick pile in the middle—the one closest to the pillar—is the most important as it gives ample defenses and visibility against approaching enemies. These setups are designed to create layers of resistance, complicating the attackers’ approach, and forcing them into disadvantageous engagements.
Province Map Defense
In Province, especially around Bombsite A, an effective strategy involves the careful placement of three players to maximize area coverage while minimizing vulnerability to Molotovs and other explosives. One suggested setup sees the third player positioned behind the well or on CT, allowing them to respond quickly to threats and provide backup as needed. For controlling access points like tunnels and zigzag paths, defensive positioning can be flexible; one player might hold against the wall, while another covers from the cellar or directly on the bombsite, providing a crossfire that can effectively neutralize incoming attackers.
At Bombsite B, teamwork and positioning flexibility are crucial. Players might position themselves in tunnel setups to directly confront opponents, or choose more distanced positions in zigzag for a broader view and range of fire. These choices depend heavily on the enemy’s movement patterns and require constant communication and adaptation from the defensive team.
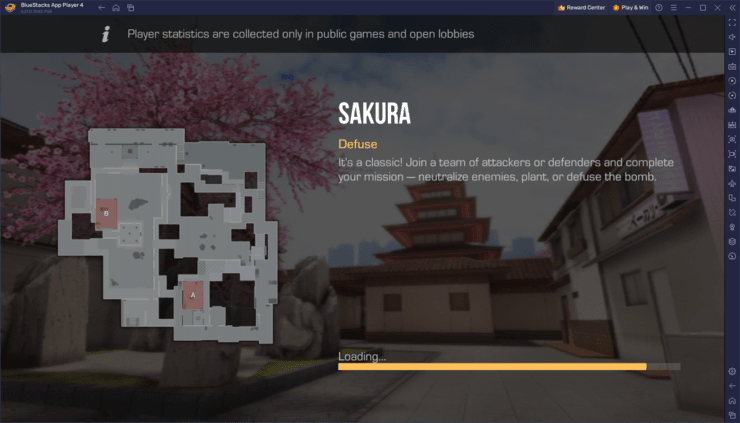
Sakura Map Defense
On the Sakura map, in Bombsite A, the focus is on controlling the dojo and adjacent areas. Effective setups may involve boosting players over the ledge behind the bombsite to create unexpected angles and crossfires. The apartments near Bombsite A offer risky but potentially rewarding control points; however, holding these requires careful coordination and awareness of all other map points to prevent being flanked or overrun.
At Bombsite B, setups often hinge on the strategic use of cover and elevation. One player might consistently hold the bombsite, utilizing standard cover points, while another positions themselves behind stones for a broader range of movement and ambush potential. This setup allows for surprise attacks and effective control of ramp access, with a third player typically assigned to watch the doors, ensuring no enemy slips through unchallenged.
Dune Map Defense
The Dune map, known for its compact bombsites and limited setup options, demands precise and calculated defensive strategies. At Bombsite A, where space is restricted, players often need to employ close-quarter defenses, such as by using shotguns or other powerful weapons. A common tactic involves positioning oneself directly where the bomb is planted, ready to confront enemies head-on. This position requires vigilance as opponents are likely to use grenades to flush out defenders. Therefore, adopting more enclosed setups or utilizing nearby cover can provide crucial protection while maintaining control of the area.
For Bombsite B, team coordination becomes even more essential due to the limited space and potential entry points for attackers. A strategy might involve two players positioning themselves close together to create a strong, unified front. This allows for mutual support and rapid response to breaches. However, caution is advised as this close positioning can make defenders vulnerable to explosives or coordinated attacks. To mitigate this, one player may hold a slightly more withdrawn position to offer a secondary layer of fire, should the front line be compromised.
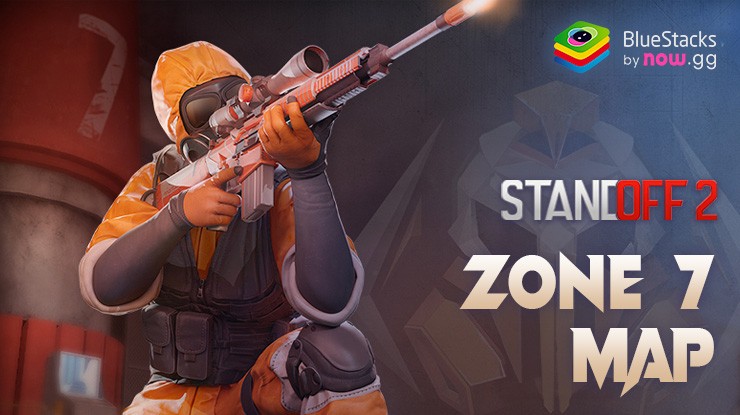
By integrating these strategies with the principles of crossfire and adaptive team play, players can effectively secure their positions while maintaining the flexibility to respond to any in-game situation. While we covered most of the maps in Standoff 2, we realize we left out Zone 7, but this is because the map is still quite new, and players are still figuring out the optimal setups for defensive positions. Feel free to check out our Zone 7 article to learn more about this map. Remember, the key to a successful defense in Standoff 2 is not just knowing the map, but also being able to read the game and adjust your strategies accordingly.