Combat Strats and More: Tips and Tricks to Wasteland Punk
When you play Wasteland Punk, surviving out in the wasteland is not just about having the strongest mercenaries but it is also about knowing a few tricks up your sleeve to always have the advantage. In this guide, we’ll tackle some neat features that you can use to help in winning more battles against enemy groups as well as some useful things to keep in mind when playing the game.
Custom Mercenary Tactics
Your mercenaries can be controlled automatically by the game during battle. This grants you the convenience of not having to constantly stress over which action to take. During automatic mode, it may seem like the game is just randomly choosing one of three of the mercenary’s abilities but, it is actually following a preset queue of actions.
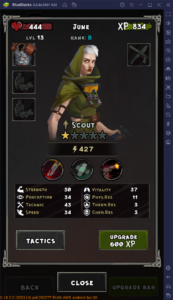
Interestingly, you can customize this queue so that you can tailor a specific strategy for your mercenary. To do this:
- Go to the Bar in Tombstone.
- Select the mercenary whose action queue you want to edit.
- Click on the “Tactics” button.
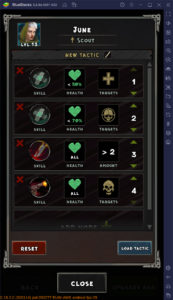
In the Tactics menu, you will be greeted with rows consisting of mercenary abilities accompanied by other variables. These rows are called nodes and they are the building blocks of your mercenary’s tactics. A node consists of four columns.
| First Column | Second Column | Third Column | Fourth Column |
| This column contains the actual mercenary skill that will be activated. You can choose one of three of your mercenary’s skills to fill up this column. Whatever skill you pick determines the options that you can choose for the third column. | This column tells you how much health should the target have in order for the node to be activated in the first place. “ALL” means that the node will be activated regardless of the health of the target. You can edit this column such the node will be activated when the target’s health is lesser than or greater than a certain percent of their current health (i.e., 90%). | This column determines who the targets will be. The values you can select for this column depends on whether or not the skill you picked for the first column is a single-target attack or AoE (area of effect) attack.
Single-target:
AoE attack:
|
This columns contains the queue number of the node and determines which will be activated first. You can click on the arrows to move the node up or down the queue. |
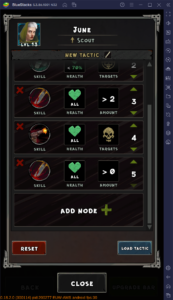
You can add a new node by simply clicking on the huge “Add Node +” button. It is best to have plenty of nodes to account for plenty of possibilities that can happen during battle. For instance, you may want to prepare nodes to account for the possibility of an enemy having very little health left. In this case, you can edit a mercenary’s node such that they will finish off that enemy instead of doing non-offensive actions like healing or buffing.
The game moves on to the next node if the conditions set on the second and third columns are not met. After all, nodes are activated, the queue resets back to the top.
After creating your own mercenary tactic, you can give it a name by clicking on the tactic name located on top of the first node.
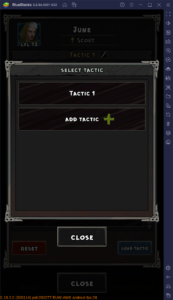
You can create new tactics by clicking on “Load Tactic” and then clicking on “Add Tactic”. This is also the same menu where you can access and load all of the tactics that you have created for this mercenary.
Vehicle Parameters
Venturing the wasteland in expeditions is already a rough ride given the amount of enemies you can encounter and how far you can go from Tombstone. With that, it is important to give some upgrades to your vehicle to make expeditions easier.
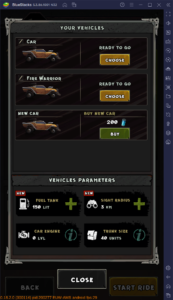
Before going on expeditions, take a look at the “Vehicles Parameters” tab as this is where you can give upgrades to your vehicles. You can upgrade four things on your vehicle:
- Fuel Tank – upgrade to increase the amount of fuel your vehicle can carry and subsequently allow you to explore further
- Sight Radius – upgrade to increase how far your vehicle can see which then allows you to see enemy gangs from further away
- Trunk Size – upgrade to increase the max amount of loot garnered from expeditions
- Car Engine – this parameter is already fully upgraded
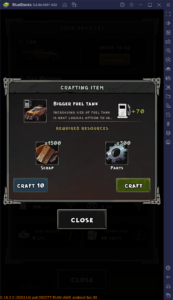
Upgrades to these parameters require Scrap and Parts. These are resources that can easily be generated for free in Tombstone’s Manor. To know more about how the Manor works and how to acquire more resources in general, you can check out this separate guide here.
Combat Tips
Fighting enemies in Wasteland Punk can be tough especially when there are plenty of them so here are some useful tips that you can apply to increase your chances of winning battles.
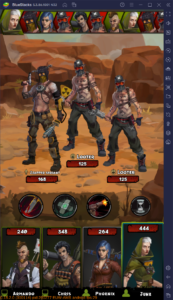
The first thing that you can do is not always rely on automatic controls. While it is true that you can edit the actions that your mercenaries can do during the auto mode, we still must consider that anything can happen in the battlefield and there may be instances where relying on automatic controls may just make you lose. It is ideal to constantly switch between automatic and manual controls especially when the situation starts to become drastic (i.e., all your mercenaries are low health).
Switching from automatic to manual controls and vice-versa can be done by simply clicking on your mercenary’s name during battle. What is interesting is that clicking on a mercenary’s name only affects the controls scheme of that specific mercenary. This means that, for example, you can have two of your mercenaries manually controlled while the other two are automatically controlled.
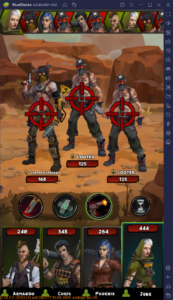
Another tip is to eliminate enemies one-by-one rather than all at once. Eliminating one enemy makes a huge difference as it recalibrates the queue and gives your team more turns than the enemies. You can hit enemies with two AoE attacks to try and take out four enemies at once. However, when at least one enemy does not get eliminated, then that means those four enemies are still in the queue and can still harm your mercenaries. In contrast, you can hit two single-target attacks on one enemy and that removes them from the queue, giving your team more chances to win. This does not mean that you should not use AoE attacks at all. There are situations where you can still use them (i.e., all remaining enemies are low health).
Salvaging Warehouse Items
Some of the loot that you acquire from expeditions are not actually immediately usable. In fact, you need to “salvage” them first in Tombstone’s Warehouse to convert them into usable ingredients for crafting items in the Workshop.
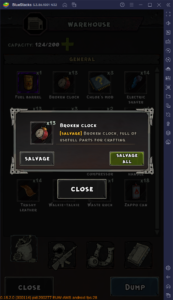
To salvage these materials, go to the Warehouse, select the material that you want to salvage, and then either click on “Salvage” to just convert one material or “Salvage All” to convert all stocks of that material. Note that not all items stored in the warehouse are salvageable as they are already considered as final materials (i.e., trashy leather, rusty metal plate).

