Maximize Your Zombie.io - Potato Shooting Experience with our BlueStacks Tools and Features
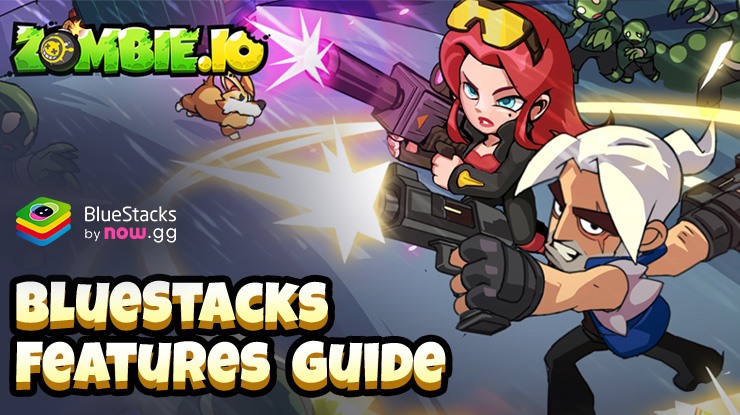
Zombie.io – Potato Shooting brings a fun twist to the roguelike genre with its charming potato characters and thrilling top-down shooter gameplay. In this game, players team up with heroic spuds to tackle waves of zombies through clever tactics and powerful gear upgrades. With each session uniquely shaped by rogue-lite mechanics, you’ll find endless excitement and challenges, especially when you play on PC with BlueStacks, as you aim to save the world from a zombie apocalypse.
Now, let’s explore why playing Zombie.io—Potato Shooting on BlueStacks gives you an edge over mobile gameplay. This guide will explore the top features that enhance your game experience on PC, from smoother controls to better graphics, and show you how to get the most out of BlueStacks.
Enjoy the Best Customizable Controls
Playing Zombie.io on PC with BlueStacks elevates your gaming experience. Thanks to the powerful Keymapping Tool, you can customize controls precisely to your liking. This feature frees you from the constraints of touchscreen inputs, allowing you to use physical buttons that provide better feedback and greater precision—crucial for mastering games like this one.
To get started with customizing your controls, press Ctrl + Shift + A while in-game. This command opens the Advanced Editor, where you can see all your current key bindings. From here, the customization possibilities are extensive:
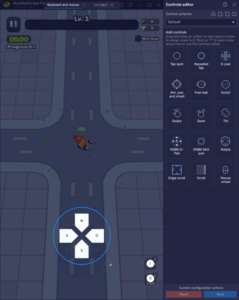
- Modify Existing Bindings: Click on any existing binding to change it. Press the new key you want to assign to that function, and it’s.
- Remove Bindings: If a binding is no longer needed, hover your cursor over it and click the ‘X’ ‘to delete it.
- Add New Functions: To enhance your control scheme, drag and drop additional functions from the right-hand panel onto your game screen. Once placed, click on these new functions to assign them a specific key binding.
- Saving Your Setup: After tweaking your controls to perfection, remember to hit the “Save” and bu” buttons located in the lower right corner to apply your changes.
With these steps, you transform your gameplay into a more tactile and responsive experience. Zombie.io becomes more enjoyable and more accessible to control, making it more straightforward to tackle those hordes of zombies with efficiency and flair on BlueStacks. This keymapping capability ensures that every session is optimized for success and fun.
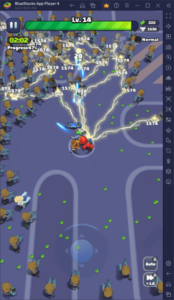
Dominate the Stages with Gamepad Support
Beyond the keyboard and mouse, BlueStacks enhances your gameplay in Zombie.io with robust gamepad support through its versatile Keymapping Tool. Setting up your gamepad is straightforward and mirrors the simplicity of configuring your keyboard and mouse controls.
Here’s where you can seamlessly integrate gamepad controls into your Zombie.io gameplay:
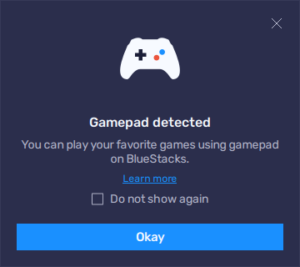
- Connect Your Gamepad: First, connect your gamepad to your PC via USB or Bluetooth. Once connected, BlueStacks will recognize your controller and display a prompt to confirm this.
- Open the Advanced Editor: Press Ctrl + Shift + A to reopen the Advanced Editor. In this view, click on the “Gamepad” button at the top of the window to switch your focus from keyboard and mouse to gamepad configuration.
- Configure Your Controls: Just like with the keyboard setup, click on any game function you wish to assign to your gamepad, then press the corresponding button on your controller to link it. For directional controls, click on the gear icon that appears when you hover over the main d-pad function. This opens a small menu where you can choose to bind movement to your right or left thumbstick or directly to the d-pad.
- Save Your Settings: After setting up your controls as needed, click on the “Save” button located in the lower right corner of the screen to implement your changes.
By enabling gamepad support, BlueStacks ensures that you can tackle the zombie waves in Zombie.io with the best possible control setup. This feature not only makes the game more accessible but also more enjoyable, allowing you to play with the precision and comfort of a game console. Whether you’you’reving through zombies or lining up the perfect shots, BlueStacks gamepad support puts you in full control of the action.
Share Your Best Runs with Moments Mode
BlueStacks takes your gaming moments seriously, and with Moments Mode, capturing your thrilling gameplay in Zombie.io has never been easier. This feature lets you record the last 30 seconds of your game with just the tap of a shortcut, preserving your best gaming highlights without the need for external recording software or a complex setup.
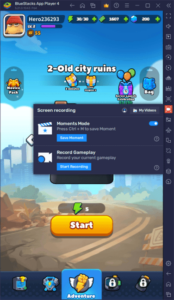
To activate Moments Mode, click on the video camera icon located on the BlueStacks side panel and toggle “Moments Mode” to”On. Once activated, a banner will appear at the top of your BlueStacks screen indicating that Moments Mode is ready and that you can save your last 30 seconds of gameplay anytime by pressing Ctrl + M. If the banner is in the way, you can easily dismiss it by clicking on the X icon in the rightmost corner.
Once Moments Mode is active, press the shortcut whenever you pull off an impressive maneuver or survive a tricky wave, and the clip will automatically be saved locally. For added convenience and security, link your BlueStacks to the now.gg cloud. This is done through the Moments Mode gallery by clicking on “Open” Cloud Folder” and” following the provided instructions. By saving your clips to the cloud, you can access them from anywhere via a web browser, ensuring you never lose those epic gaming moments.
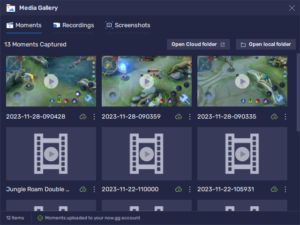
With BlueStacks, every zombie slaying session in Zombie.io – Potato Shooting becomes a chance to show off your skills. Capture and share your best moments effortlessly while enjoying enhanced controls and visuals. Start playing on BlueStacks today and turn every game into a highlight reel ready to impress.

